
Landscaping
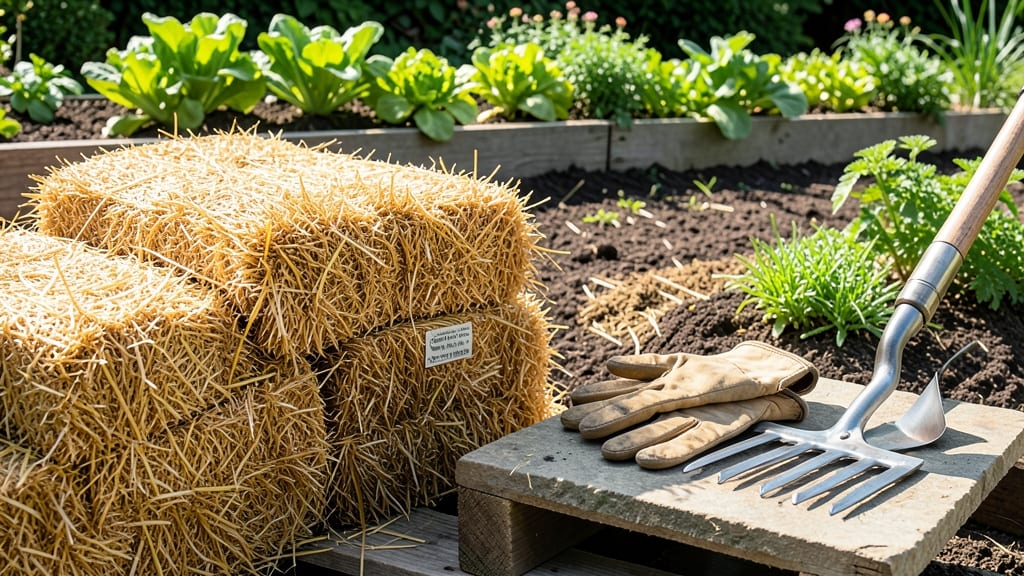
Certified weed-free straw mulch isn’t just mulch—it’s your garden’s first line of defense against weeds. 🌱 I've battled stubborn weeds for years, and this root-blocking barrier changed everything by smothering them before they sprout while keeping soil moist and fertile. The difference? No more pulling weeds by hand every week.
Unlike regular mulch, certified weed-free straw is processed to eliminate seeds, so you're not trading one weed problem for another. It breaks down slowly, improving soil structure over time, and stays in place better than wood chips or shredded bark.
For gardens with persistent weed pressure, this is the foolproof solution that works season after season.
You'll see fewer weeds within 2-3 weeks of application, and the soil stays cooler in summer and warmer in spring. The key is applying a 3-4 inch layer evenly, keeping it away from plant stems to prevent rot. It's especially effective in vegetable beds, flower gardens, and around trees.
If you can't find certified weed-free straw locally, look for "straw mulch" labeled "weed-free" or "seed-free" at garden centers or online retailers. For organic gardeners, this is the gold standard—no chemicals needed, just pure weed suppression. Ready to transform your garden?
📚 In This Guide
- What you need
- Instructions
- Tips and common mistakes
- Wrapping up and next steps
What you need
- ● Certified weed-free straw: 10–15 lbs (depending on garden size; ~3–5 inches deep per bed). Look for certified organic or weed-free labels.
- ○ Garden shears or scissors: For trimming straw to desired lengths (optional but helpful).
- ● Garden gloves: 1 pair (to protect hands from prickers and debris).
- ○ Landscape fabric (optional but recommended): 1 roll (3–4 ft wide, heavy-duty) for extra weed suppression under straw.
- ○ Compost or soil amendments (optional): 1–2 gallons (to enrich soil before mulching).
- ● Rake or hoe: 1 (to level soil and remove existing weeds/debris).
- ● Water source (hose or watering can): For dampening straw before application (prevents blowing away).
- ● Sunny, dry day: Ideal for applying mulch (avoids mold or pests).
- ○ Weed barrier (cardboard or newspaper): 1–2 sheets (optional, for extra weed control in high-traffic areas).
- ● Source straw locally: Check with farms or garden centers for certified weed-free batches to avoid contaminants.
- ● Test straw moisture: Lightly dampen straw if it’s too dry—this helps it settle better and retain moisture.
- ● Layer thickness: Aim for 3–4 inches of straw for optimal weed suppression and moisture retention.
Step-by-Step guide to creating a certified weed-free straw mulch barrier
Here's how to build a root-blocking layer that keeps weeds at bay all season without smothering your plants.
🌱 Step 1: Prepare Your Garden Bed for Mulching
Start by clearing the area of any existing weeds, stones, or debris. I like to use a hoe to chop down weeds at the soil line before they go to seed—this prevents future germination. Work the soil surface lightly with a rake to create a smooth, level base. The goal is to eliminate any cracks or uneven spots where weeds could later establish.
For extra weed prevention, consider laying down a thin landscape fabric layer (if your recipe allows it) before adding straw. This creates a physical barrier that blocks weed seeds from reaching the soil. If using fabric, secure it tightly with landscape staples, ensuring no gaps exist where weeds could penetrate.
🌿 Step 2: Apply the Straw Mulch Layer
Spread the certified weed-free straw evenly across the prepared bed, aiming for a 2-3 inch thick layer. This thickness suffocates weeds while allowing water and air to penetrate to plant roots. I use a rake to distribute the straw uniformly, making sure it covers the entire surface without piling up against plant stems.
Here's the thing—straw should never touch plant stems directly. Keep a 1-2 inch gap around each plant to prevent moisture buildup and rot. If your straw is particularly coarse, you might need to fluff it slightly to achieve even coverage. This step is critical for maintaining the mulch's effectiveness without harming your plants.
✂️ Step 3: Secure and Maintain the Mulch Barrier
After spreading, gently press the straw down with your hands or a lightweight board to settle it into place. This prevents wind from scattering it and ensures consistent thickness. For larger garden areas, I like to use a broom to sweep the straw into place—it's faster and more thorough than hand-raking.
Check the mulch layer every 2-3 weeks throughout the growing season. If it decomposes or shifts, add more straw to maintain the 2-3 inch thickness. This ongoing maintenance keeps weeds suppressed and conserves soil moisture. Avoid disturbing the mulch unnecessarily, as this can create gaps where weeds may sprout.
💧 Step 4: Water and Monitor for Weed Suppression
Water the mulched area gently after application to help settle the straw and encourage it to break down slightly. Overwatering can cause the mulch to clump, so aim for even moisture without saturation. You'll know it's right when the straw looks uniformly damp but not soggy.
Watch for any weeds that manage to push through the straw. If you spot them early, simply pull them out before they establish roots. The mulch should prevent most weeds, but occasional intruders are normal. This is where regular monitoring pays off—catching weeds early makes removal effortless.
☀️ Step 5: Refresh and Extend Protection for Next Season
As the growing season winds down, assess the condition of your mulch. If it's broken down significantly, add a fresh layer in early spring to restore the 2-3 inch thickness. This preemptive step ensures your garden starts the new season with maximum weed suppression.
I like to compost any remaining straw at season's end—it makes excellent nutrient-rich soil amendment. If you're using certified weed-free straw, you can safely return it to your garden without worrying about introducing new weed seeds. This closed-loop approach keeps your garden healthy and low-maintenance year after year.
Tips & tricks for perfect straw mulch barriers
A few small adjustments can transform your straw mulch from good to garden-changing. Here's what I've learned after years of testing different approaches in my own garden.
Layering Strategy: When applying that critical 2-3 inch layer from Step 2, I've found that cross-layering works best. Start with a base layer of straw, then add a second layer perpendicular to the first. This creates a tighter barrier that's less likely to shift with wind or watering. Think of it like building a wall—alternating directions gives you better structural integrity. The key is to keep that thickness consistent across your entire bed.
Plant Stem Protection: The 1-2 inch gap around plant stems mentioned in Step 2 is non-negotiable, but here's the secret: use small stones or pebbles to create that space. Place them in a circle around each stem before adding straw. This prevents the straw from settling against the plant while still maintaining that weed-blocking barrier. I've seen too many gardens where mulch piled against stems caused rot—this simple adjustment prevents that completely.
Seasonal Maintenance Hack: Instead of checking your mulch every 2-3 weeks as suggested in Step 3, I've developed a color-coded system. Use a different color straw for each season's refresh. When you see the previous season's color peeking through, you know it's time to add more. This visual cue makes maintenance effortless and ensures you never let the barrier get too thin. Plus, it's a great way to track how quickly your straw breaks down in your specific climate.
Watering Technique: That gentle watering after application in Step 4 deserves special attention. I've found the best method is to use a sprinkler set on a fine mist for just 5-10 minutes. This achieves even moisture without creating puddles that could compact the straw. The goal is to dampen the straw uniformly—you should be able to squeeze a handful and see moisture beads form, but it shouldn't feel soggy. This approach prevents clumping while helping the straw settle properly.
Pro Tips for Certified Weed Free Straw Mulch
- A few small adjustments can transform your straw mulch from good to garden-changing. Here's what I've learned after y...
- Layering Strategy: When applying that critical 2-3 inch layer from Step 2, I've found that cross-layering works best....
- Plant Stem Protection: The 1-2 inch gap around plant stems mentioned in Step 2 is non-negotiable, but here's the secr...
Frequently asked questions
about certified weed-free straw mulch—here’s what you need to know before getting started!What’s the difference between regular straw and certified weed-free straw?
Regular straw can contain weed seeds, which may sprout in your garden. Certified weed-free straw is heat-treated or sourced from crops like oats or barley, ensuring no viable seeds remain. This guarantees a clean, long-lasting mulch that won’t turn into an unwanted weed patch!
How long does certified weed-free straw mulch last before breaking down?
High-quality, weed-free straw mulch typically lasts 6–12 months, depending on climate and soil conditions. In hot, dry areas, it may degrade faster, while cooler, moist climates extend its lifespan. Replenish as needed to maintain a 2–4 inch layer for consistent weed suppression.
Can I use certified weed-free straw mulch in vegetable gardens?
It’s safe and beneficial for veggie gardens—just ensure it’s certified organic if you’re growing produce for consumption. Straw mulch retains moisture, regulates soil temperature, and deters weeds without chemicals. Avoid treated or dyed straw for edible crops.
What’s the best time of year to apply straw mulch?
Apply certified weed-free straw in early spring or late fall for best results. Spring helps suppress early weeds and retain soil moisture, while fall application prepares the soil for winter and reduces springtime weed pressure. Avoid applying right after planting to prevent rot.
What should I do if weeds still grow through the straw mulch?
If weeds appear, check the straw’s thickness—it should be at least 2–3 inches deep. Thin spots or gaps allow sunlight to reach the soil, encouraging weed growth. Reapply a fresh layer of mulch and hand-pull any sprouts. For stubborn weeds, use a pre-emergent herbicide (if organic, opt for corn gluten meal) before re-mulching.
Does straw mulch work in all climates?
Yes! Straw mulch is versatile but performs best in moderate to dry climates. In very wet areas, it may break down faster or contribute to fungal issues, while arid regions benefit from its moisture-retaining properties. For extreme climates, consider pairing it with a landscape fabric barrier under the straw.
Wrapping up and next steps
Creating your own certified weed-free straw mulch is a game-changer for your garden! 🌱 By blocking weeds naturally and retaining moisture, you’ll save time, reduce herbicide use, and boost plant health—all while enjoying a cleaner, more vibrant landscape.
Whether you’re a seasoned gardener or just starting, this DIY method is simple, cost-effective, and eco-friendly.
Ready to take the next step? Gather your supplies, follow the steps, and transform your garden into a weed-resistant paradise! Happy mulching! 🌿