
Planting
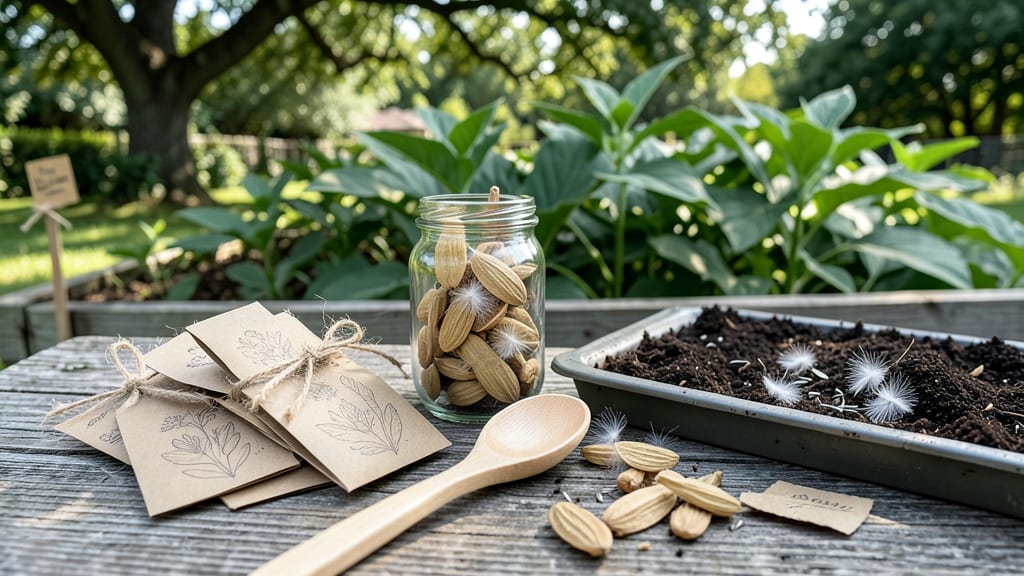
Finding free milkweed seeds is easier than you think—especially when you know where to look. 🌱 These tiny seeds are the lifeline for monarch butterflies, and planting them transforms your garden into a pollinator paradise without spending a dime.
Local native plant programs, seed swaps, and even roadside cleanup efforts often distribute them for free if you ask.
The secret to growing milkweed successfully starts with the right conditions: full sun, well-draining soil, and patience. Most varieties sprout within 10-14 days when planted in early spring or fall, and they thrive in poor soil—making them perfect for neglected corners of the yard.
Just avoid overwatering; milkweed hates soggy roots.
By summer, you’ll see tall, fuzzy stems dotted with milkweed pods—each one a future meal for hungry caterpillars. The plants grow 3-5 feet tall, their bright green leaves providing shelter for monarchs while adding texture to your garden. Even a small patch makes a difference for declining butterfly populations.
Ready to get started? The best part? These seeds multiply easily—so you’ll have extras to share next season. Whether you’re a beginner or a seasoned gardener, milkweed is one of the most rewarding plants to grow for both your garden and local wildlife.
📚 In This Guide
- What you need
- Instructions
- Tips and common mistakes
- Wrapping up and next steps
What you need
- ● Free milkweed seeds: 1–2 packets (or enough for your desired planting area). Common varieties include Asclepias tuberosa (butterfly weed) or Asclepias syriaca (common milkweed).
- ● Garden soil or potting mix: 1–2 bags (well-draining, slightly sandy loam is ideal).
- ● Planting container or garden bed: For containers: 5–10-inch pots (with drainage holes) or a seed-starting tray.
- ● For in-ground planting: A sunny spot (6+ hours of sunlight daily) with loose, well-draining soil.
- ● Watering can or hose with a gentle spray nozzle.
- ○ Gloves (optional but recommended) to protect your hands from prickly milkweed stems.
- ● Seed-starting kit: Includes heating mats or grow lights to speed up germination (especially useful in cooler climates).
- ● Compost or organic fertilizer: A small bag to boost soil nutrients once seedlings sprout.
- ● Mulch (straw or shredded leaves): Helps retain moisture and suppress weeds.
- ● Plant markers: Label seeds or seedlings to track varieties (e.g., "Butterfly Weed").
- ● Butterfly-friendly companion plants: Like native grasses or nectar-rich flowers (e.g., coneflowers) to attract monarchs.
Step-by-step guide to planting milkweed for monarch butterflies
Here’s how to turn free milkweed seeds into a thriving monarch butterfly magnet.
🌱 Step 1: Collect and Prepare Your Free Milkweed Seeds
Milkweed seeds are often free from local conservation groups, native plant nurseries, or even mature milkweed pods in your area. Collect seeds when the pods turn brown and begin splitting open—this usually happens in late summer or early fall. Gently twist open the pods and scoop out the fluffy, parachute-like seeds inside. Store them in a paper envelope in a cool, dry place until ready to plant.
If you're using seeds from a trusted source like a seed swap or conservation program, check the packet for planting instructions. Some varieties need cold stratification (a period of cold treatment) to germinate. Place seeds in a sealed bag with slightly damp sand and refrigerate for 4-6 weeks to mimic winter conditions. This step mimics nature’s way of breaking seed dormancy.
🌱 Step 2: Choose the Right Planting Location
Milkweed thrives in full sun, so pick a spot in your garden that receives at least 6-8 hours of direct sunlight daily. Monarchs are drawn to milkweed in open, sunny areas where they can easily spot and land on the plants. Avoid planting in low-lying areas where water pools, as milkweed dislikes soggy soil.
If you're planting in a container, use a 5-gallon pot or larger with drainage holes. Milkweed grows tall—some varieties reach 4-5 feet—so ensure the pot is sturdy and deep enough to support the plant’s height. Fill the pot with a well-draining soil mix, like a blend of native soil, compost, and perlite.
💧 Step 3: Plant the Seeds at the Right Depth and Time
Sow milkweed seeds in early spring, right after the last frost date in your area. Scatter the seeds lightly on the soil surface—don’t bury them, as they need light to germinate. Press them gently into the soil so they make contact but remain exposed. Water the area lightly to keep the soil moist but not waterlogged.
Keep the soil consistently moist for the first 4-6 weeks while the seeds germinate. You’ll see tiny seedlings emerge within 2-3 weeks, but some seeds may take longer. Once the seedlings reach 2-3 inches tall, thin them out to 12-18 inches apart to give each plant room to grow. This spacing ensures strong, healthy plants that attract more monarchs.
☀️ Step 4: Care for Your Milkweed Plants Through the Season
Milkweed is drought-tolerant once established, but young plants need regular watering—about 1 inch of water per week—to encourage deep root growth. Mulch around the base of the plants with 2-3 inches of organic mulch (like shredded leaves or straw) to retain moisture and suppress weeds. Avoid over-fertilizing, as milkweed prefers lean soil.
Watch for monarch caterpillars in late spring and summer. You’ll spot them as bright green, striped larvae munching on the leaves—this is a sure sign your plants are doing their job! If you notice aphids or other pests, hose them off gently with water or use neem oil for organic control. Avoid chemical pesticides, as they’ll harm monarchs and other beneficial insects.
✂️ Step 5: Encourage Regrowth and Spread for Next Year
In late fall, after the monarchs have migrated and the plants have finished flowering, cut back the stems to 6-12 inches tall. This encourages new growth in the spring and keeps the plant tidy. Leave the seed pods on the plant if you want to collect more seeds for next year—just let them dry out completely before harvesting.
Milkweed spreads easily through seeds and underground runners, so you may find new plants popping up in unexpected places. If your garden has enough space, let nature take its course. If not, dig up and transplant any volunteers to new locations. Over time, your garden will become a monarch butterfly hotspot, supporting not just monarchs but other pollinators like bees and hummingbirds too.
Tips & tricks for perfect milkweed planting
Transforming free milkweed seeds into a thriving monarch haven requires a few strategic moves that make all the difference between struggling seedlings and a flourishing butterfly magnet.
Seed Collection Timing: The key to successful seed collection is patience—wait until pods turn completely brown and begin splitting open naturally. I've learned this the hard way: harvesting too early means immature seeds that won't germinate, while waiting too long risks losing seeds to wind or rain. Collect on dry days when pods are fully mature but haven't yet released their seeds. Store them in paper envelopes to allow airflow while preventing moisture buildup.
Cold Stratification Hack: For seeds that require cold treatment (check your seed packet), I recommend using a simple DIY method: place damp sand in a sealed plastic bag, add your seeds, and refrigerate for the full 4-6 weeks. This mimics winter conditions perfectly. Pro tip: Label your bag with the date to track the stratification period accurately. The cold treatment breaks seed dormancy, ensuring higher germination rates when you're ready to plant.
Sunlight Optimization: While milkweed thrives in full sun, not all gardens receive uniform sunlight. If your planting area gets partial shade, position your milkweed in the sunniest part of the space. I've seen plants in 5-6 hours of sunlight still produce flowers, though they'll be less vigorous. For container gardening, place pots where they'll receive the most direct sunlight possible—south-facing windowsills or balcony spaces work beautifully during summer months.
Pest Prevention Strategy: Monarchs aren't the only creatures interested in milkweed! Aphids and other pests can become problematic. My go-to solution is a gentle spray of water mixed with a few drops of dish soap (1 tablespoon per gallon) applied in the early morning. This disrupts aphids without harming monarch caterpillars. For more serious infestations, neem oil is an excellent organic alternative that's safe for pollinators when used according to package instructions.
Pro Tips for Free Milkweed Seeds
- Transforming free milkweed seeds into a thriving monarch haven requires a few strategic moves that make all the difference between struggling seedlings and a flourishing butterfly magnet.
- Seed Collection Timing: The key to successful seed collection is patience—wait until pods turn completely brown and begin splitting open naturally.
- This mimics winter conditions perfectly.
Frequently asked questions
Got questions about growing milkweed from free seeds? You're not alone!
Here are some of the most common concerns—and straightforward answers—to help you get started with confidence.
When is the best time to plant free milkweed seeds?
The ideal time to plant milkweed seeds outdoors is in early spring (after the last frost) or late summer (for fall blooms). If you’re starting indoors, sow seeds 6–8 weeks before your last frost date. Milkweed thrives in warm soil, so avoid planting in cold, wet conditions—it can rot!
How long does it take for milkweed to grow from seed?
Germination can take 10–30 days, depending on temperature and moisture. Once sprouted, milkweed grows quickly—expect 6–12 inches in its first season. With proper care, it can reach 3–5 feet tall by summer, providing plenty of nectar and habitat for monarchs.
What if my milkweed seeds don’t sprout? Troubleshooting tips.
If seeds aren’t germinating, try these fixes:
- Cold stratification: Milkweed seeds often need a 2–4 week cold period (place seeds in a damp paper towel in the fridge).
- Light exposure: Some varieties need light to germinate—don’t bury seeds deeper than ¼ inch.
- Fresh seeds: Older seeds may lose viability. Check the seed packet date or source fresh seeds.
Patience is key—milkweed can be finicky but rewarding!
Can I grow milkweed in containers or small spaces?
Dwarf varieties like Asclepias tuberosa ‘Gay Butterflies’ thrive in pots (12+ inches deep). Ensure containers have drainage holes and use well-draining soil. Just be mindful that milkweed spreads—prune aggressively if you want to keep it contained. Bonus: Container milkweed attracts butterflies right to your balcony!
Are there alternatives if milkweed doesn’t grow in my area?
If your climate is too harsh for milkweed, consider these native butterfly-friendly plants:
- Swamp milkweed (Asclepias incarnata) – Loves wet soils.
- Joe-Pye weed (Eutrochium) – Tall, late-season nectar source.
- Goldenrod (Solidago) – Supports butterflies and bees.
Check local native plant nurseries for region-specific options!
Wrapping up and next steps
Transforming your garden into a thriving monarch butterfly haven is easier—and more rewarding—than you think! With free milkweed seeds, you’re not just planting a flower; you’re nurturing a lifeline for these magnificent pollinators.
Start small, stay consistent, and watch your garden bloom into a vibrant ecosystem that benefits both you and nature.
Ready to take the next step? Grab your seeds, pick a sunny spot, and get planting! Share your progress with fellow butterfly enthusiasts—your efforts might just inspire others to join the movement. 🌱🦋