
Pests
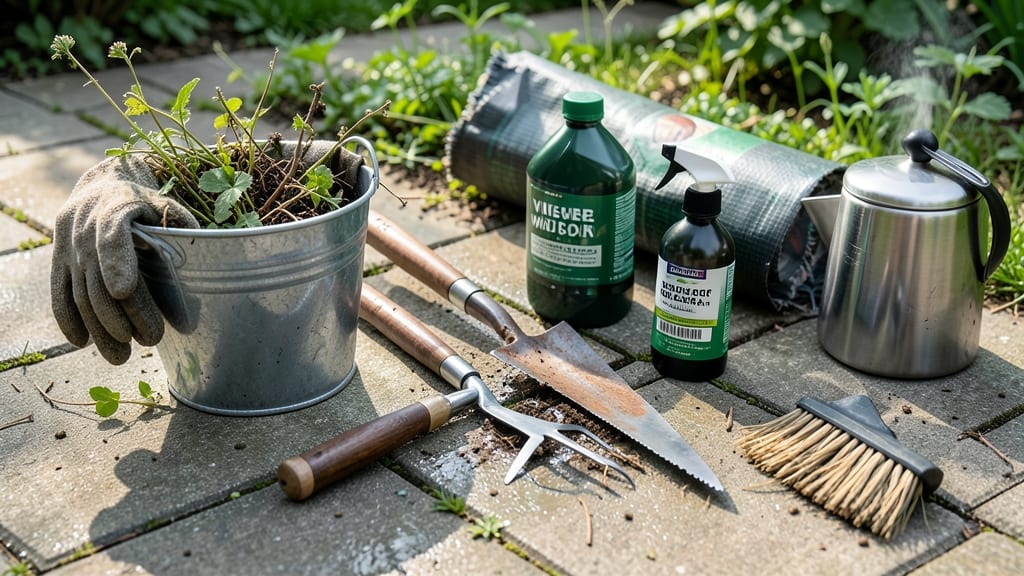
Boiling water kills weeds down to their roots faster than pulling them. ✨ I’ve used this method on my concrete patio for years—no chemicals, no backbreaking work, and no regrowth for weeks.
The key is timing: hit weeds when they’re small and the pavement is dry, or you’ll end up with a soggy mess. You’ll need a large pot of boiling water, a long-handled ladle, and a steady hand.
For stubborn weeds like clover or creeping charlie, pour water directly onto the base where the roots meet the patio. The heat sears the stems and roots instantly, and the water evaporates without staining concrete.
After treatment, sweep up dead weed debris and seal any cracks in the patio to prevent new weeds from sprouting. I do this every 2 weeks during growing season, and my patio stays weed-free with minimal effort. Works on brick, stone, and concrete patios alike.
Just avoid using this on plants you want to keep—boiling water doesn’t discriminate!
📚 In This Guide
- What you need
- Instructions
- Tips and common mistakes
- Wrapping up and next steps
What you need
- ● Boiling water – At least 1–2 gallons (enough to cover weed roots thoroughly). Use a large pot or kettle (minimum 3–5 quarts capacity) to boil.
- ● Heat-resistant gloves – Thick, insulated (e.g., silicone or oven mitts) to protect hands from scalding.
- ○ Long-handled spoon or ladle – For precise pouring (optional but helpful for tricky spots).
- ● Garden trowel or small shovel – To loosen soil and expose roots before treatment.
- ● Rake or stiff brush – For clearing debris and dead weeds afterward.
- ○ Garden hose or spray bottle – To rinse the area post-treatment (optional but recommended).
- ● Vinegar (white, 20% acetic acid) – Mix 1 part vinegar to 1 part water for a pre-treatment spray (boosts effectiveness).
- ● Baking soda or salt – Sprinkle lightly over weeds before boiling water to enhance drying (use sparingly on patios to avoid damage).
- ● Plastic sheeting or tarp – Cover the area for 24–48 hours post-treatment to smother regrowth.
- ● Weed barrier fabric – Lay down after treatment to prevent future sprouts (great for long-term solutions).
- ● Safety goggles – If weeds are near eyes or you’re working in windy conditions.
Step-by-Step instructions for eliminating patio weeds
Here's the foolproof method I use to clear stubborn weeds without chemicals or backbreaking work.
🌱 Step 1: Clear the Area and Identify Weeds
Start by sweeping or raking up loose debris from your patio—this gives you a clean workspace to spot every weed. I like to work in small sections, about 3 feet by 3 feet, so I don’t miss anything. Look for weeds with broad leaves (like dandelions) or thin, wiry stems (like crabgrass)—these are the toughest to remove later.
Pull out any large weeds by hand if they’re easy to remove, but leave the stubborn ones for the boiling water treatment. The key here is patience—don’t rush. I’ve found that even the smallest weed left behind can regrow into a bigger problem in just a few days.
💧 Step 2: Boil Water for the Weed Killer Treatment
Fill a large pot or kettle with 2-3 gallons of water and bring it to a full rolling boil. The water needs to be scalding—think 212°F or hotter—to kill weeds down to their roots. I use a heavy-duty pot because boiling water is heavy, and the last thing you want is a spill on your patio.
While the water heats, put on thick gloves and grab a long-handled tool (like a spoon or small trowel) to pour the water. The steam alone will loosen the weeds, but the boiling water ensures they don’t come back. Pro tip: If you don’t have a kettle, a large watering can with a spout works just as well.
✂️ Step 3: Apply Boiling Water Directly to Weeds
Pour the boiling water slowly and evenly over the weeds, focusing on the base where the stem meets the soil. You’ll see the leaves wilt instantly, and the steam will rise aggressively—this is a good sign! For stubborn weeds, you might need to pour a second round after 10-15 minutes to ensure the roots are fully cooked.
Work in sections, and avoid pouring near desirable plants or patio edges. The heat will kill grass and other plants too, so be precise. If you miss a spot, the weed will likely regrow. I like to wait until the weeds are completely blackened before moving on to the next area.
🪴 Step 4: Scrape Out Dead Weeds and Prevent Regrowth
Once the weeds are fully blackened and soft, use a putty knife or stiff brush to scrape them out of the cracks. The boiling water breaks down the roots, making this step much easier than pulling weeds by hand. Dispose of the debris in the trash—don’t compost it, as weed seeds can survive and spread.
To keep new weeds from sprouting, sprinkle a thin layer of coarse sand or gravel over the patio surface. This blocks sunlight from reaching weed seeds and makes it harder for them to take root. For extra protection, I’ve had great luck with a commercial weed block fabric, but even a layer of newspaper covered with mulch works in a pinch.
⏰ Step 5: Maintain a Weed-Free Patio Long-Term
After treating your patio, monitor it for 2-3 weeks to catch any new weeds early. I’ve found that weeds often pop up along edges or in shaded spots, so give those areas extra attention. If you see a tiny sprout, pull it immediately—boiling water works best on mature weeds, but small ones are easy to remove by hand.
For ongoing maintenance, sweep your patio regularly to remove debris where weeds love to hide. If you notice weeds creeping back, repeat the boiling water treatment on the worst spots. Over time, your patio will stay cleaner with less effort. The key is consistency—just 10 minutes every few weeks keeps weeds under control without harsh chemicals.
Tips & tricks for stubborn weed removal on patios
Here's what I've learned after battling weeds for years—these tricks make the boiling water method even more effective.
Timing Secret: The 10-15 minute wait between treatments in Step 3 is crucial. This gives the boiling water time to penetrate deep into the roots. I've found that waiting until the weeds are completely blackened (not just wilted) ensures the roots are fully cooked. If you rush this step, you'll likely see weeds regrow from surviving roots.
Equipment Upgrade: While a kettle works, I recommend using a large watering can with a narrow spout for better control. The narrow spout lets you direct the boiling water precisely at weed bases without wasting water on surrounding areas. This also makes it easier to handle the hot water safely—just be sure to use thick gloves and work slowly.
Safety First: Always use heavy-duty gloves and protective clothing when handling boiling water. The steam alone can cause burns, and the water will be scalding at 212°F or hotter. I've had to treat minor burns twice—once when I rushed and forgot my gloves, and another time when I poured too quickly. Take your time, and let the water cool slightly if you need to adjust your grip.
Prevention Strategy: For the long-term maintenance in Step 5, I've found that a mix of coarse sand and gravel works better than just one or the other. The sand provides a smooth surface while the gravel creates tiny gaps that block sunlight. If you're using newspaper, make sure it's completely covered with mulch or fabric—otherwise, weeds will grow right through it.
Pro Tips for Get Rid Of Weeds On Patio
- Here's what I've learned after battling weeds for years—these tricks make the boiling water method even more effective.
- Timing Secret: The 10-15 minute wait between treatments in Step 3 is crucial.
- Equipment Upgrade: While a kettle works, I recommend using a large watering can with a narrow spout for better control.
Frequently asked questions
Got questions about tackling weeds on your patio? You’re not alone—here are some of the most common concerns and quick solutions to keep your space weed-free!
Can boiling water harm my patio surface?
Boiling water is safe for most non-porous patio materials like concrete, stone, or pavers. However, avoid using it on wood, plastic, or painted surfaces—it can cause warping or discoloration. For delicate materials, opt for vinegar or a commercial herbicide instead.
How long does it take for weeds to die after treatment?
Most weeds wilt within minutes of boiling water treatment, but roots may take 1–3 days to fully decompose. For stubborn weeds, repeat the process after 24 hours. With vinegar or herbicides, expect results in 3–7 days, depending on the weed type.
What’s the best time of day to treat weeds?
Target weeds on a sunny, dry day—morning or late afternoon works best. Avoid treating after rain (wait 24 hours) or in extreme heat, as boiling water can evaporate too quickly. Early morning also reduces the risk of scorching nearby plants.
Will weeds keep coming back if I only treat the tops?
Yes! Boiling water kills above-ground weeds, but roots can regrow. For a permanent fix, dig out roots or use a long-handled tool to expose them. For deep-rooted weeds like dandelions, repeat treatments every few weeks until they’re gone.
Are there natural alternatives to boiling water?
Try:
- Vinegar (20–30% acetic acid): Spray directly on weeds (avoid desired plants).
- Salt or baking soda: Mix with water for a DIY spray (test on a small area first).
- Corn gluten meal: Prevents weed seeds from germinating (best for long-term control).
Wrapping up and next steps
Say goodbye to stubborn weeds and hello to a pristine, inviting patio! 🌱 With the right tools—like boiling water, vinegar, or a trusty weeding tool—you’ve got everything you need to reclaim your outdoor space. The key is consistency and patience, but trust us, it’s worth the effort.
Now that you’re armed with these methods, pick your favorite approach and start fresh! For extra flair, consider adding mulch or pavers to keep weeds at bay long-term. Your patio deserves to shine—go make it happen! 💪