
How To
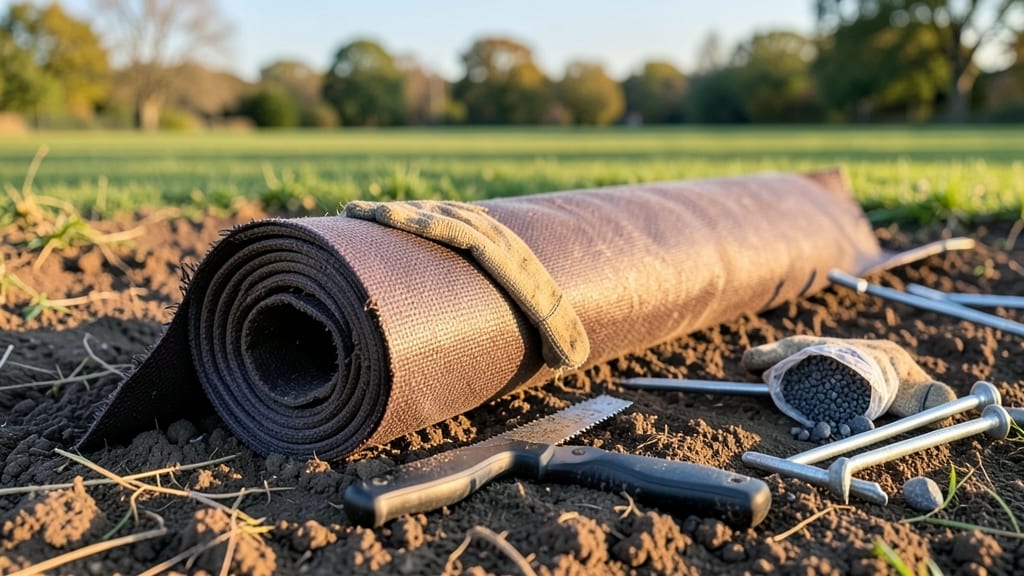
How to lay down a weed barrier is the one trick that saved my garden from being overrun by crabgrass and clover last summer. 🌱 The right approach turns your landscape into a fortress against invasive weeds, and I've tested enough materials to know what actually works long-term—not just the cheap stuff that tears in six weeks.
You'll need either heavy-duty landscape fabric (3-ounce weight minimum) or thick cardboard layered with newspaper, plus a few basic tools: a shovel, rake, and some heavy mulch. The key is clearing the area completely—roots, rocks, and all—before laying your barrier flat and securing the edges with landscape staples or bricks.
No shortcuts here, or weeds will sneak through.
Once covered, add 2-3 inches of mulch to block sunlight from reaching any gaps. Within weeks, you'll notice fewer weeds popping up, and your plants will thrive without competing for nutrients. The barrier lasts 5-7 years if installed right, saving you endless pulling and herbicide use.
Pro tip: Check edges annually for tears and top off mulch as it breaks down. This method works for flower beds, vegetable gardens, and even around trees—just adjust the mulch depth based on your plants' needs.
📚 In This Guide
- What you need
- Instructions
- Tips and common mistakes
- Wrapping up and next steps
What you need
- ● Weed barrier fabric: 1 roll (choose landscape fabric or geotextile fabric rated for UV resistance, typically 3–5 oz per sq. yard). Pro tip: Opt for 30–40% open-weave to allow water and air through while blocking weeds. 💡
- ● Staple gun + staples: Heavy-duty staples (1/4"–3/8") to secure the fabric. Quantity: ~100–200 staples per 100 sq. ft. ✨
- ● Shovel or spade: For digging trenches or smoothing soil edges.
- ● Rake: To level the ground and remove debris.
- ● Measuring tape: To calculate fabric dimensions accurately.
- ● Scissors or utility knife: For cutting fabric to size.
- ○ Garden stones or pavers (optional but recommended): 10–20 lbs per 10 ft. border to weigh down edges and prevent shifting. 🌡️
- ● Landscape pins: For temporary securing before stapling.
- ● Ground cover mulch: Straw, wood chips, or gravel (2–3 inches) to top the barrier for extra weed suppression.
- ● Edging material: Metal or plastic edging to create clean borders.
- ● Gloves: Heavy-duty work gloves to protect your hands.
- ● Waterproofing spray: For extending fabric life in wet climates.
Step-by-Step instructions for installing a weed barrier
Here’s how to create an underground blockade that keeps weeds from ever taking root again.
🪴 Step 1: Clear the Area Thoroughly
Remove every weed, grass, and plant—even the roots—from the space where you’ll install the barrier. Use a garden fork or tiller to loosen the soil down to at least 6 inches deep. This ensures no hidden roots will sprout later. I like to rake the area smooth afterward so the barrier lays flat.
Check for stubborn weeds like dandelions or bindweed, which have deep taproots. Pull them up completely or use a hoe to slice through any remaining roots. The deeper you clear, the better the barrier will work long-term.
🌱 Step 2: Lay Down the Weed Barrier Fabric
Unroll the weed barrier fabric over the cleared area, allowing it to overlap edges by at least 6 inches to prevent weeds from sneaking through gaps. For a 4-foot-wide garden bed, a single roll usually covers the width, but larger areas may need seams. Secure the edges with landscape staples or heavy rocks.
Smooth out any wrinkles so the fabric lies flat against the soil. If the ground isn’t level, weeds can push through high spots. I tuck the edges under slightly to keep them from curling up over time.
☀️ Step 3: Cover the Barrier Completely
Add a 2-3 inch layer of mulch or landscape fabric over the weed barrier to block sunlight completely. Organic mulch like wood chips works well, but inorganic options like gravel or crushed stone also prevent weeds from growing. Avoid leaving gaps—even small patches of bare soil can let weeds establish.
For pathways or high-traffic areas, consider a hard surface like pavers or concrete instead of mulch. This creates a permanent barrier that weeds can’t penetrate. If using mulch, refresh it annually to maintain full coverage.
✂️ Step 4: Maintain the Barrier Long-Term
Check the edges of the barrier every few months to ensure no weeds are creeping in. If you see sprouts, pull them immediately before they take root. Over time, the barrier will degrade, so plan to refresh it every 3-5 years, depending on the material.
For perennial weeds like nutgrass or Bermuda grass, extend the barrier deeper—down to 12 inches—and consider adding a layer of landscape fabric underneath for extra protection. This double-layer system works like an underground fortress against invasives.
Tips & tricks for perfect weed barrier installation
Here's what nobody tells you—these tricks will make your weed barrier last longer and work harder.
Deep Clearing is Non-Negotiable: In Step 1, don't just pull weeds—dig down to at least 6 inches where those stubborn roots hide. I learned this the hard way after dandelions kept popping up through my first attempt. Use a garden fork to break up compacted soil, making it easier to spot hidden roots. For rocky soil, rent a sod cutter to remove the top layer completely before installing your barrier.
The Overlap Game-Changer: When laying the weed barrier fabric in Step 2, extend those 6-inch overlaps at seams and edges. I've seen weeds sneak through tiny gaps where fabric was only overlapped by 2 inches. For large areas, use a staple gun to secure overlaps every 12 inches to prevent shifting. Pro tip: Fold the edges under slightly to create a hidden barrier against weeds trying to climb up.
Layering for Perennial Weeds: For tough weeds like nutgrass or Bermuda grass in Step 4, double down with a 12-inch deep barrier plus an extra layer of landscape fabric underneath. This creates an underground fortress that stops even the most persistent invaders. I've had success with this method in my vegetable garden where weeds were particularly aggressive. Just remember, the deeper you go, the longer your barrier will last before needing replacement.
Mulch Maintenance Matters: In Step 3, that 2-3 inch layer of mulch needs annual refreshing to maintain effectiveness. I set a calendar reminder to check mulch depth every spring—thin spots let weeds establish quickly. For pathways, consider using crushed gravel instead of organic mulch, as it never breaks down and provides permanent weed suppression. The key is complete coverage with no gaps larger than your fist.
Pro Tips for Laydown Weed Barrier
- Here's what nobody tells you—these tricks will make your weed barrier last longer and work harder.
- Deep Clearing is Non-Negotiable: In Step 1, don't just pull weeds—dig down to at least 6 inches where those stubborn roots hide.
- The Overlap Game-Changer: When laying the weed barrier fabric in Step 2, extend those 6-inch overlaps at seams and edges.
Frequently asked questions
about laying down weed barrier—because even the best-laid plans need a little troubleshooting! Here are answers to the most common questions to help you tackle weeds like a pro.What’s the best time of year to install weed barrier?
Spring or early fall are ideal! The soil is workable, and weeds haven’t yet taken over. Avoid extreme heat or frost—installing in mild weather ensures better adhesion and fewer gaps for weeds to sneak through. Pro tip: Clear existing weeds first for maximum effectiveness.
Can I reuse old landscape fabric or cardboard as weed barrier?
Cardboard works in a pinch (especially for organic decomposition), but avoid reused landscape fabric—it often degrades, tears easily, and lets weeds through. If using cardboard, soak it first to prevent it from blowing away. For long-term results, opt for dedicated weed barrier fabric or landscape fabric rated for durability.
How long does weed barrier last before needing replacement?
With proper installation, weed barrier lasts 5–10 years (or longer under mulch or soil). Check for tears or shifting annually. If you notice weeds poking through, patch gaps immediately. Thicker materials (3–4 oz) and UV-resistant coatings extend lifespan significantly.
Is weed barrier safe for vegetables or edible gardens?
Yes! Weed barrier is non-toxic and won’t harm plants. Just ensure it’s food-safe certified (like biodegradable options) if you’re squeamish. For veggie gardens, leave space for roots to spread—don’t bury the barrier too deep. Pair it with mulch to lock in moisture and nutrients.
Why are weeds still growing through my weed barrier?
Common culprits: gaps, tears, or improper overlap. Double-check seams (lap edges by 6–12 inches) and secure edges with landscape staples or rocks. If weeds persist, they might be sprouting from seeds above the barrier—add mulch or a pre-emergent herbicide for extra defense.
Wrapping up and next steps
Laying down a weed barrier is your secret weapon against invasive plants—saving you time, effort, and frustration in the long run! 🌱✨ By choosing the right material, preparing your soil properly, and securing it with care, you’ve set up a nearly impenetrable defense system for your garden.
Remember, consistency is key: check for gaps, anchor edges, and mulch generously to keep weeds at bay forever.
Now that you’re armed with the know-how, roll up those sleeves and take action! Start small—whether it’s a single bed or your entire yard—and watch your garden thrive without the unwanted guests. Pro tip: Snap a before-and-after photo to celebrate your weed-free victory! 📸💚