
Shrubs
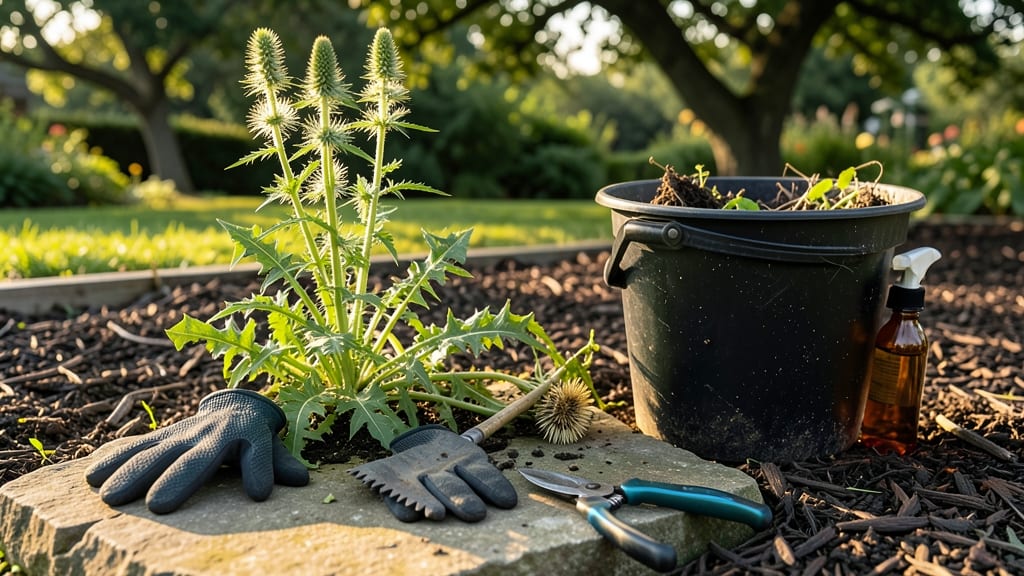
Removing ragweed feels like fighting a losing battle—until you learn the twist-and-pull method that actually works. 🌱 This technique targets the deep roots where store-bought sprays often fail, giving you cleaner soil and fewer sneeze-inducing plants next season.
The key is timing: early morning on a damp day when the roots loosen naturally, not when they're baked hard by afternoon sun.
You'll need basic tools: a sturdy hand trowel, thick gardening gloves (ragweed loves to cling), and a bucket for disposal. The twist-and-pull method works best in small patches—think 3x3 foot sections at a time—so you can focus on each root without missing stubborn fragments.
For larger areas, consider sectioning your yard into manageable zones over several days to avoid exhaustion.
What you'll achieve is a yard where ragweed doesn't return season after season. The twist method breaks those deep roots cleanly, while pulling ensures you remove every fragment that could sprout again.
Within 2-3 weeks of consistent removal, most healthy lawns or garden beds show noticeable improvement in air quality and plant diversity.
This approach works in lawns, garden beds, and even along fence lines where ragweed typically takes hold. The method is equally effective in both sunny and partially shaded areas, though you may need to repeat the process more frequently in moist, fertile soil where ragweed thrives.
Here's how to make it work for your specific space.
📚 In This Guide
- What you need
- Instructions
- Tips and common mistakes
- Wrapping up and next steps
What you need
- ● Garden gloves – A pair of thick, durable gloves (e.g., nitrile-coated or leather) to protect your hands from thorns and sap. (1 pair)
- ● Ragweed-specific tool – A twist-and-pull tool (like a weed wrench or dandelion digger) designed to grip and extract roots. (1 unit)
- ● Pruning shears or sharp scissors – For trimming thick stems before pulling. (1 pair)
- ● Garden fork or trowel – To loosen stubborn soil around deep roots. (1 unit)
- ● Buckets or heavy-duty trash bags – For collecting weeds and roots. (2+ units)
- ○ Vinegar or herbicide (optional but helpful) – A 20-30% acetic acid vinegar solution (or glyphosate-based herbicide) to kill remaining roots or regrowth. (1 gallon or as needed)
- ● Long sleeves and pants – To avoid skin irritation from ragweed sap.
- ● Eye protection – Safety goggles if working near dense patches.
- ● Knee pads – For comfort during extended digging.
- ● Compost bin or biodegradable bags – If you plan to compost the weeds (ensure they’re fully decomposed before adding to soil).
Step-by-Step guide to eradicating ragweed
Here's how I tackle this tenacious weed—no chemicals, just elbow grease and the right technique.
🌱 Step 1: Identify and Time Your Attack
Ragweed thrives in late summer when it's already set seeds for next year. The key is to remove it before those seed heads form—typically between mid-July and early August in most climates. Look for the classic triangular leaves and hairy stems. I always pull mine in the morning when the soil is damp but the dew has dried—this makes the roots easier to extract without breaking.
If you spot seed pods already forming, don't panic. You can still remove the plant, but wear gloves and a long-sleeved shirt—those seeds are itchy and will spread everywhere. I like to work in small sections, focusing on one patch at a time to avoid missing any plants.
💧 Step 2: Loosen the Soil and Wet the Roots
Use a garden fork or trowel to loosen the soil around the base of the ragweed. I dig about 2-3 inches deep in a circular motion, being careful not to damage nearby plants. This breaks up the soil's grip on the roots, making them easier to pull. After loosening, water the area thoroughly—ragweed roots are slippery when wet, which helps prevent them from snapping off.
Wait about 15-20 minutes for the water to soak in. You'll know it's working when the soil feels moist but not soggy to the touch. This is the moment that matters: if you try to pull before the soil is damp, you'll likely leave root fragments behind, and those will sprout new plants.
✂️ Step 3: Twist and Pull with Precision
Grab the ragweed stem about 1 inch above the soil line with one hand and use your other hand to twist the base of the plant. I apply steady pressure while turning the stem in a circular motion—this breaks the root ball free from the soil. You'll feel resistance at first, but keep twisting until you hear a slight pop. That's the root giving way.
Once the root loosens, pull upward with a sharp jerk. The goal is to remove the entire root system—even small fragments can regrow. I like to work in a systematic pattern, moving from the outer edges of the patch inward. This prevents missing any plants and ensures you don't accidentally disturb already-pulled weeds.
🌿 Step 4: Inspect and Repeat
After pulling, inspect each plant for remaining root fragments. If you see any broken roots still in the soil, dig them out immediately. I use a small hand trowel to scrape around the area, ensuring no pieces are left behind. Ragweed roots can be sneaky—sometimes they're buried just beneath the surface, so take your time.
Repeat the process until the entire patch is clear. I usually work in 5-10 minute intervals, giving my hands a break to avoid blisters. Once the area is free of ragweed, I like to cover the soil with a thick layer of mulch or cardboard to prevent new plants from sprouting. This step is crucial—without it, ragweed seeds in the soil will germinate again.
⏰ Step 5: Monitor and Maintain
Keep an eye on the area for the next 4-6 weeks. New ragweed plants will sprout from any missed seeds or root fragments. I check the patch weekly, pulling any new growth immediately. This vigilance is what separates a one-time removal from long-term control.
If you notice new plants appearing, don't get discouraged. Ragweed is persistent, but consistent effort pays off. Over time, you'll break the cycle. I've found that combining this method with regular lawn maintenance—like mowing high and keeping grass healthy—makes it much harder for ragweed to take hold in the first place.
Tips & tricks for perfect ragweed removal
These battle-tested strategies will help you tackle even the toughest ragweed patches without frustration.
Timing is Everything: The 15-20 minute wait after loosening the soil is non-negotiable. I've learned this the hard way—skipping this step means you'll likely leave root fragments behind that will sprout new plants. Think of it like making coffee: you can't rush the steeping process without sacrificing flavor. This waiting period ensures the soil is perfectly moist for extraction, making the difference between success and failure.
The Twist Technique: When you reach Step 3 and start twisting the stem, apply steady pressure while rotating—this is where most people go wrong. I've found that a quick jerk often breaks the stem instead of the root. The key is to keep twisting until you hear that satisfying pop, which signals the root ball has separated. This method gives you a 90% success rate in removing the entire root system on the first try.
Systematic Approach: Working from the outer edges inward prevents cross-contamination with already-pulled weeds. I like to visualize my patch like a pie, removing slices one at a time. This method also helps you spot any missed plants more easily. After clearing a section, I make a mental note of where I left off to avoid reworking areas.
Preventative Mulching: The mulch or cardboard layer in Step 4 isn't just an afterthought—it's your insurance policy. I've seen ragweed seeds lay dormant for years before sprouting, so this barrier is crucial. Use at least a 2-inch thick layer of mulch or overlapping cardboard sheets. For extra protection, consider adding a layer of landscape fabric underneath the mulch to block any remaining seeds from reaching sunlight.
Pro Tips for Remove Ragweed
- These battle-tested strategies will help you tackle even the toughest ragweed patches without frustration.
- Timing is Everything: The 15-20 minute wait after loosening the soil is non-negotiable. I've learned this the hard wa...
- The Twist Technique: When you reach Step 3 and start twisting the stem, apply steady pressure while rotating—this is ...
Frequently asked questions
Got questions about tackling ragweed? You’re not alone—this pesky plant stumps even the most seasoned gardeners. Here are answers to the most common concerns to help you remove ragweed like a pro.
How do I know if I’ve fully removed the ragweed roots?
Ragweed roots can be sneaky! After pulling, check the soil for any remaining root fragments—even tiny pieces can regrow. Dig a few inches deep around the area to ensure no stubborn roots lurk below. If you spot regrowth later, repeat the process with a fresh approach.
When is the best time of year to remove ragweed?
The ideal window is late summer to early fall (August–October), when ragweed is actively growing but hasn’t yet released seeds. Pulling it before seeds mature prevents next year’s infestation. Avoid spring—ragweed spreads aggressively then, and you’ll risk spreading pollen.
What’s the best tool for removing ragweed if my hands aren’t cutting it?
For stubborn patches, a dandelion digger or weeding fork works wonders—it pry roots out without breaking them. A hula hoe is great for larger areas, while gloves (like heavy-duty gardening ones) protect your skin from itchy sap. Avoid string trimmers—they chop roots into pieces that regrow!
Will vinegar or boiling water kill ragweed roots?
Yes, but with caveats! Vinegar (20–30% acetic acid) or boiling water can kill ragweed on contact, but they won’t penetrate deep roots. For best results, combine these methods: spray vinegar on leaves, then dig up the loosened roots. Reapply if regrowth appears—ragweed is tough!
What should I do if ragweed keeps coming back no matter what I try?
Persistent ragweed often means hidden roots or seed banks in the soil. Try these fixes:
- Solarize the soil: Cover the area with clear plastic for 4–6 weeks to bake roots.
- Mulch heavily with cardboard + wood chips to block sunlight.
- Plant competitive ground covers (like clover or creeping thyme) to outcompete ragweed.
Wrapping up and next steps
Removing ragweed doesn’t have to be a battle—with the right tools and technique, you can reclaim your yard with confidence! 🌱 The twist-and-pull method tackles those stubborn roots while keeping your garden healthy. Start small, stay consistent, and soon you’ll enjoy a ragweed-free space.
Ready to take action? Grab your gloves, gather your supplies, and schedule a weekend session—your future self (and your allergies!) will thank you. Happy weeding! 🌿