
Neem Oil
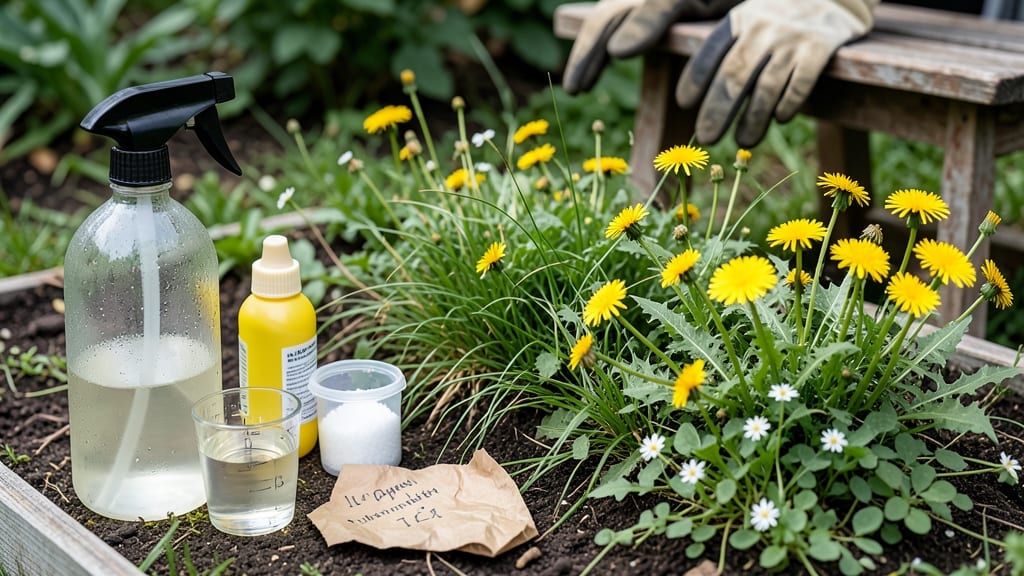
A vinegar-salt weed spray can turn your stubborn weeds into crispy reminders of what happens when they cross you—no digging required. I’ve used this mix for years to clear driveways and sidewalks without harsh chemicals, and it works faster than pulling weeds one by one.
The key is precision: this spray targets only what you aim at, so you’ll need to work carefully around your garden edges.
You’ll need just three ingredients: white vinegar (the acid that breaks down weed cells), salt (to dehydrate and kill roots), and dish soap (as a surfactant to help the mix stick). Mix equal parts vinegar and water, add 2 tablespoons of salt per quart, and a teaspoon of soap.
This combo is cheap, effective, and ready in minutes—but it’s not a cure-all for every weed type, especially thick or deep-rooted ones.
The results are immediate for annual weeds: they’ll wilt within hours and die within days. For tougher weeds like dandelions, you may need 2-3 applications spaced a week apart. Just remember, this spray is non-selective—it kills everything it touches, so avoid spraying near desirable plants, grass, or mulch.
A spray bottle with a fine nozzle gives you the control you need.
If you’re worried about environmental impact, this spray breaks down naturally and won’t linger in the soil like synthetic herbicides. For best results, apply on a sunny, wind-free day when weeds are actively growing.
Test a small area first to ensure it won’t harm nearby plants, and always wear gloves—vinegar can irritate skin. Ready to reclaim your space without backbreaking work?
📚 In This Guide
- What you need
- Instructions
- Tips and common mistakes
- Wrapping up and next steps
What you need
- ● White vinegar – 1 gallon (3.8 liters) (ensure it’s 5% acetic acid or higher for best results).
- ● Salt – 1 cup (200g) (non-iodized, fine-grain works best).
- ● Dish soap – 1 tablespoon (15 mL) (any liquid dish soap, like Dawn or Palmolive).
- ● Spray bottle or garden sprayer – 1-2 gallons capacity (a pump sprayer is ideal for larger areas).
- ● Protective gear – Gloves, long sleeves, and safety goggles (vinegar can irritate skin and eyes).
- ○ Water – Optional, up to 1 gallon (for dilution if needed, especially in hot climates).
- ● Measuring cups and spoons – For precise mixing.
- ● Funnel – To avoid spills when pouring vinegar into the sprayer.
- ● Label or marker – To tag your spray bottle (e.g., "WEED KILLER – TOXIC TO PLANTS").
- ○ Fine-mesh strainer – If using Epsom salt (optional additive for extra potency).
- ● Old newspaper or cardboard – To protect nearby plants or soil from accidental splashes.
Step-by-Step instructions for making an effective vinegar-salt weed killer
Here's how to mix and apply a potent, natural weed killer using common household items.
Gather and Mix the Core Ingredients
In a clean, non-reactive container, combine 1 gallon of white vinegar (5% acidity or higher) with 1 cup of coarse salt. The salt acts as a drying agent while the vinegar's acetic acid breaks down plant cell walls. Stir thoroughly until the salt fully dissolves—this ensures even distribution when applied. I like to use a wooden or plastic spoon to avoid metal reactions that could alter the solution's effectiveness.
For tougher weeds like dandelions or clover, add 1 tablespoon of dish soap to help the mixture cling to leaves. The soap acts as a surfactant, breaking surface tension so the solution spreads evenly rather than beading up. Avoid using heavily scented soaps—they may contain additives that could harm plants you want to keep.
Transfer to a Spray Bottle for Precision Application
Pour the mixture into a 1-gallon spray bottle with a fine mist nozzle. A spray bottle gives you control over application—you can target weeds directly without overspraying desirable plants. Fill it completely to avoid air pockets that could clog the nozzle. If you don't have a spray bottle large enough, use a 1-quart sprayer and apply the mixture in two passes, allowing the first coat to dry slightly before the second.
Shake the bottle vigorously before each use. The ingredients separate over time, so thorough mixing ensures consistent strength. Test the spray pattern on a small area first—if the solution drips instead of misting, adjust the nozzle or dilute slightly with a splash of water to improve sprayability.
Apply on a Sunny, Wind-Free Day
Choose a bright, sunny day with temperatures above 70°F for best results. The heat helps the vinegar penetrate weed foliage more effectively. Avoid applying when rain is forecast within 24 hours—the solution will wash away before it can work. Early morning applications work well because the sun amplifies the vinegar's drying effect throughout the day.
Spray the mixture directly onto weed leaves, avoiding desirable plants entirely. The solution works by contact, so thorough coverage is critical. Focus on the top growth—vinegar doesn't penetrate soil to kill roots, so repeated applications may be needed for deep-rooted weeds. A light mist is sufficient; heavy saturation can cause the solution to run off before it takes effect.
Monitor and Reapply as Needed
Weeds typically show signs of damage within 6-12 hours, with full browning and wilting in 24-48 hours. The vinegar breaks down plant cell membranes, causing immediate dehydration. For persistent weeds, reapply every 3-5 days until the plant is completely dead. Deep-rooted weeds like bindweed may require 2-3 weeks of consistent treatment to fully eradicate.
After application, avoid disturbing the area for 48 hours—this allows the vinegar to work without diluting its effect. If you notice any desirable plants showing signs of stress (yellowing or wilting), flush the soil immediately with water to dilute the vinegar. The solution is selective but not foolproof, especially in dry conditions or on sensitive plants.
Prevent Regrowth and Maintain the Area
Once weeds are dead, remove the dried foliage by hand or with a rake to prevent seed dispersal. Pulling weeds by the root reduces the chance of regrowth, though vinegar alone won't eliminate underground rhizomes. For long-term control, apply a 2-inch layer of mulch (like straw or wood chips) to smother new weed seeds and conserve moisture.
Reapply the vinegar-salt spray monthly in high-weed areas or after heavy rain, which can wash away residual effects. Over time, consistent use will reduce weed pressure significantly. Store any leftover mixture in a cool, dark place—it remains effective for up to 2 weeks if kept sealed.
Tips & tricks for perfect vinegar-salt weed killer
These practical strategies will help you maximize effectiveness while avoiding common pitfalls with your natural weed control solution.
Solution Strength: For optimal results, use white vinegar with 5% or higher acidity—the higher the concentration, the more potent the weed-killing action. I've found that store-brand vinegars often meet this standard, but check the label if possible. The acetic acid content is what actually breaks down plant cell membranes, so don't skimp on quality here. Remember, this is the core active ingredient in your mixture, so proper concentration makes all the difference.
Application Technique: When spraying in Step 3, focus on the undersides of leaves—this is where the stomata (tiny openings) are most concentrated, allowing the vinegar to penetrate more effectively. Use a light mist rather than a heavy spray; this prevents runoff while ensuring thorough coverage. I've learned this the hard way—heavy saturation just makes the solution bead up and roll off before it can work its magic. For stubborn weeds, consider applying in two light coats with a 10-minute break between applications.
Timing is Everything: The 6-12 hour window after application is critical for monitoring results. During this time, you should see initial signs of wilting and browning at the leaf edges. If you don't notice any changes within 12 hours, reapply—this often indicates either insufficient coverage or weeds that are particularly resilient. For best results, apply when weeds are actively growing (typically in warm weather) as they'll be more susceptible to the vinegar's effects. The 24-48 hour period is when you'll see complete browning and death of most annual weeds.
Safety Precautions: While this solution is generally safe for most plants, always conduct a spot test on desirable plants first, especially those with delicate foliage. The vinegar's acidity can cause damage even to hardy plants if applied carelessly. I recommend testing on a small, inconspicuous area first. Also, avoid applying when children or pets might come into contact with the treated area until it has fully dried (48 hours). The salt residue can be irritating to sensitive skin, so wear gloves when handling the mixture.
Pro Tips for Weed Spray Vinegar Salt
- These practical strategies will help you maximize effectiveness while avoiding common pitfalls with your natural weed...
- Solution Strength: For optimal results, use white vinegar with 5% or higher acidity—the higher the concentration, the...
- Application Technique: When spraying in Step 3, focus on the undersides of leaves—this is where the stomata (tiny ope...
Frequently asked questions
Got questions about using vinegar and salt to kill weeds? You’re not alone!
Here are answers to the most common concerns—plus pro tips to make your weed-fighting spray work like a charm.
How long does it take for vinegar and salt to kill weeds?
The effects are usually visible within 24–48 hours, but full eradication can take 3–7 days, depending on the weed type and weather. Hot, sunny days speed up the process—think of it as nature’s weed sunburn! For tough weeds like dandelions, reapply if regrowth appears.
Will vinegar and salt harm my plants or grass?
This spray is selective: it targets broadleaf weeds but can damage desirable plants if it drifts. Always spot-test on a small area first and avoid spraying near flowers, veggies, or grass. For lawns, use a targeted spray bottle or a shield (like cardboard) to protect surrounding areas.
Can I use this recipe on all types of weeds?
This DIY spray works best on young, small weeds (like crabgrass, clover, or chickweed) and broadleaf weeds. For deep-rooted perennials (e.g., thistles, nutgrass) or grassy weeds, you may need to dig or repeat applications. For stubborn weeds, combine with dish soap to break down waxy leaves.
Do I need to water before or after applying the spray?
No watering is needed before or after!
Vinegar and salt work by dehydrating weeds—water would dilute the solution. However, if you’re dealing with a dry spell, spray in the early morning or evening to prevent rapid evaporation. Just avoid rain for 24 hours post-application.
What if the weeds come back after treatment?
Weeds often regrow if their roots aren’t fully destroyed. For persistent weeds, apply the spray 2–3 times over 2 weeks or dig up remaining roots. If the area is overrun, consider mulching or landscape fabric to prevent regrowth. Think of it as a long-term strategy, not a one-and-done fix!
Are there safer alternatives if I have pets or kids?
If vinegar and salt are too harsh, try boiling water (for driveways/walkways) or corn gluten meal (a natural pre-emergent). For organic gardens, neem oil or vinegar + dish soap (without salt) are gentler options. Always keep pets/kids away until the spray dries.How do I store leftover weed spray?
Store in a sealed, labeled container (like a spray bottle) in a cool, dark place for up to 1–2 weeks. The mixture may separate over time—just shake well before use. Avoid storing in metal containers (vinegar can corrode them).Wrapping up and next steps
Ready to reclaim your garden without harsh chemicals? The vinegar-salt weed spray is your secret weapon—natural, cost-effective, and powerful enough to tackle stubborn weeds in minutes. 🌱✨ Whether you're dealing with driveways, sidewalks, or garden beds, this DIY solution delivers fast results with minimal effort.
Now that you’re armed with the recipe and answers to common questions, grab your spray bottle and get to work! Start with a small test area, observe the results, and soon you’ll be enjoying a weed-free space—all while keeping your garden eco-friendly. Happy spraying! 🌿💚