
Neem Oil
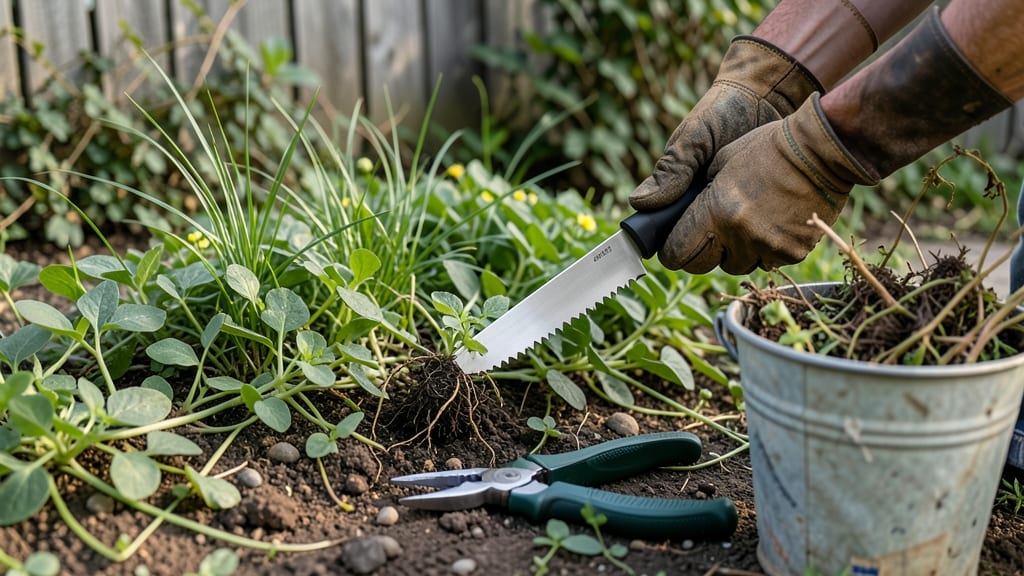
How to use a hand weeding tool saves your back and gets stubborn weeds out cleanly. 🌱 I used to wrestle with dandelions and grass until I learned the right grip and angle—now weeds come out with minimal effort and no digging fatigue. The key is matching the tool to the weed size and using controlled pressure to avoid breaking off roots. Start with a dandelion digger for deep-rooted weeds or a hoeing knife for shallow ones. Ergonomic handles reduce strain, so grip firmly but don’t squeeze—let the tool’s leverage do the work. For thick weeds, wiggle slightly as you pull to loosen soil around the roots without tearing the tool. You’ll notice fewer weeds returning if you remove them early, before seeds set. A 5-minute session daily keeps gardens tidy without the strain of full-body digging. The right technique turns weeding from a chore into a quick, satisfying task. Works for flower beds, vegetable patches, and even sidewalk cracks. Once you master it, you’ll wonder how you ever lived without one!
📚 In This Guide
- What you need
- Instructions
- Tips and common mistakes
- Wrapping up and next steps
What you need
- ● Hand weeding tool – Choose an ergonomic design (e.g., Fiskars X27 or GorillaClaw) for comfort and precision. Look for a stainless steel blade (3–5 inches long) and a non-slip grip.
- ● Garden gloves – Opt for nitrile-coated or breathable leather gloves (size medium/large) to protect your hands from thorns and dirt.
- ● Small hand trowel or cultivator – A 3–4 inch stainless steel trowel helps loosen stubborn weeds or dig shallow trenches.
- ● Watering can or hose with a gentle spray nozzle – A 1–2 gallon capacity is ideal for wetting soil before weeding.
- ● Garden waste bag or bucket – A 10–20 gallon capacity for disposing of weeds (avoid composting seed-bearing weeds!)
- ○ Knee pad or cushion – Optional but highly recommended for long sessions (look for gel-infused or foam pads).
- ● Neem oil or vinegar spray – For post-weeding treatment to prevent regrowth (mix 1 tbsp neem oil + 1 tsp dish soap per gallon of water or use 5% vinegar solution for tough weeds).
- ● Pruners or hedge shears – For thick-stemmed weeds (e.g., dandelions or bindweed).
- ● Portable stool or kneeling bench – If you have back/knee issues, a foldable stool (like the Gorilla Grip) saves your joints.
- ● Sun hat & sunscreen – Because no one wants a sunburn mid-weed!
Step-by-Step instructions for using a hand weeding tool
Mastering this tool makes weeding quick, efficient, and way less back-breaking than digging.
🌱 Step 1: Choose the Right Tool for Your Weeds
First, grab your hand weeding tool—look for one with a sturdy, ergonomic handle and a sharp, narrow blade or fork. The blade should be 3-4 inches long for precision, while fork-tipped tools work best for deep-rooted weeds. I like tools with a slight curve; they slide under weeds more easily without damaging nearby plants.
Check the blade's sharpness before starting. A dull tool tears weeds instead of cleanly removing them, leaving stubborn roots behind. If yours is dull, use a file or sandpaper to sharpen the edge—just a few strokes will make all the difference. You’ll know it’s sharp enough when it slices through a weed stem with minimal pressure.
💧 Step 2: Prep the Soil for Easier Removal
Work on a dry, sunny day when the soil is slightly damp but not soggy. Wet soil sticks to the tool and clumps around weed roots, making extraction harder. Lightly loosen the soil around the weed with your fingers or the tool’s tip—just enough to create space for the blade to slide under the root ball.
If the weed is deeply embedded, wiggle the tool gently side-to-side to break up the soil without disturbing nearby plants. Think of it like unscrewing a stubborn lid: patience and steady pressure work better than brute force. You’ll feel resistance give way as the root loosens—this is your cue to switch to the extraction phase.
✂️ Step 3: Slide Under and Lift the Weed
Position the tool’s blade or fork just beneath the weed’s base, angling it slightly downward to follow the root’s natural curve. Press gently but firmly until the blade reaches the weed’s full depth. For stubborn weeds, I often make a small vertical cut around the root first—this helps sever any hidden lateral roots that might regrow.
Once the blade is fully seated, lift upward with steady pressure. You’ll feel the weed release from the soil when the root breaks free. If it resists, don’t force it—wiggle the tool slightly to free it completely. The goal is to remove the entire root system; even a tiny fragment left behind will sprout again. Toss the weed into a trash bag or compost pile (if it’s weed-free).
☀️ Step 4: Maintain Your Tool and Soil Health
After weeding, clean the tool immediately to prevent soil buildup and rust. Scrape off debris with a small brush or wipe it down with a damp cloth. Store it in a dry place, preferably hanging or propped upright to air out. I keep mine in a shed with a few drops of mineral oil on the blade to protect it between uses—this extends its life and keeps it sharp longer.
To prevent weeds from returning, mulch the area with 2-3 inches of organic mulch like straw or wood chips. Mulch blocks sunlight, which weeds need to germinate, and retains moisture, reducing the need for frequent watering. Reapply mulch every few months or after heavy rain to maintain coverage. Over time, you’ll notice fewer weeds popping up as the soil stays healthier and more compacted.
⏰ Step 5: Ergonomic Tips to Avoid Strain
Weeding is a marathon, not a sprint—so protect your back and hands. Kneel on a small pad or cushion to reduce knee strain, and use the tool with your arms extended but elbows slightly bent. I find that gripping the handle closer to the blade gives me more control, while a wider grip reduces hand fatigue during long sessions.
Take breaks every 15-20 minutes to stretch your wrists and shoulders. Roll your shoulders back, shake out your hands, and avoid twisting your torso—weeding should never feel like a workout. If you feel tension building, switch to a different section of the garden or take a quick walk. Your body will thank you later, and you’ll weed faster without exhaustion.
Tips & tricks for perfect hand weeding
A few simple tricks will turn weeding from a chore into an efficient, even satisfying part of garden maintenance.
Tool Sharpness is Everything: I can't stress this enough—your tool's effectiveness depends on a sharp blade. Test it before starting by slicing through a weed stem with minimal pressure; if it feels like you're tearing rather than cutting, sharpen it immediately. A dull blade means more effort and leaves stubborn roots behind. Keep a small file or sandpaper in your gardening caddy for quick touch-ups between sessions.
The Right Soil Conditions Matter: That perfect "slightly damp but not soggy" soil in Step 2 is your golden zone. If your soil feels too dry, give it a light misting before weeding—this helps the blade slide smoothly. For stubborn weeds, I sometimes add a tiny bit of water directly around the base to loosen the soil without making it muddy. The goal is to create that ideal working condition where the blade glides effortlessly.
Ergonomic Workflow for Long Sessions: Between those 15-20 minute breaks, try this pro move: alternate hands every few weeds to prevent overuse in one arm. I also keep a small stool nearby to sit on when needed—this takes pressure off your knees while still keeping you at weed-height. The key is maintaining good posture: keep your back straight and avoid leaning over weeds for extended periods. Your body will thank you after just one session.
Preventative Maintenance Wins: That 2-3 inches of mulch in Step 4 isn't just about looks—it's your first line of defense. I apply mulch right after weeding while the soil is still loose. This creates a barrier that blocks sunlight (weeds' #1 growth trigger) and makes future weeding sessions much lighter. Think of it as investing 10 minutes now to save hours later.
Pro Tips for Use A Hand Weeding Tool
- A few simple tricks will turn weeding from a chore into an efficient, even satisfying part of garden maintenance.
- Tool Sharpness is Everything: I can't stress this enough—your tool's effectiveness depends on a sharp blade.
- The Right Soil Conditions Matter: That perfect "slightly damp but not soggy" soil in Step 2 is your golden zone.
Frequently asked questions
Got questions about hand weeding tools?
You’re not alone! Here are answers to the most common queries to help you tackle weeds like a pro—without the backache.
What’s the best time of day to use a hand weeding tool?
Early morning or late afternoon is ideal! The soil is softer and cooler, making weeds easier to pull. Avoid midday heat, which can dry out the ground and make weeds more stubborn. Plus, you’ll avoid the dreaded afternoon slump while weeding.
Can I use a hand weeding tool on wet or muddy soil?
Nope—stick to dry or lightly damp soil. Mud clumps around the tool, making it harder to grip weeds and increasing strain on your hands. If the ground is soggy, wait for it to dry out or switch to a dandelion digger for tougher jobs.
How do I clean and store my hand weeding tool?
Rinse it with water after use to remove dirt and sap, then wipe dry with a cloth. Store it in a dry place (like a garden shed or tool caddy) to prevent rust. Pro tip: A quick spray with vinegar can remove stubborn residue!
Is a hand weeding tool better than digging by hand?
Hand tools like hula hoop weeders or loop tools save your knees and back while making quick work of weeds. They’re especially great for small gardens or between plants where digging could damage roots.
What if my hand weeding tool keeps slipping or breaking?
Check for dull edges—file or replace the blade if needed. If it’s still slipping, try gripping the handle with a rubber glove for better traction. For flimsy tools, invest in a sturdier model (like stainless steel) for long-term durability.
Can I use a hand weeding tool for weeds with deep roots?
Not ideal! For deep-rooted weeds (like dandelions), pair it with a dandelion digger or a weeding knife. Hand tools work best for shallow weeds—save the deep dives for specialized tools.
Wrapping up and next steps
Mastering your hand weeding tool is a game-changer for effortless garden maintenance! 🌱 With the right technique—like ergonomic grip, precision angles, and consistent pressure—you’ll tackle stubborn weeds without strain or digging. Start small, practice patience, and watch your garden thrive with minimal effort.
Ready to level up? Try a test run in a small patch first, then expand your skills to larger areas. Happy weeding—your green space will thank you! 🌿