
Neem Oil
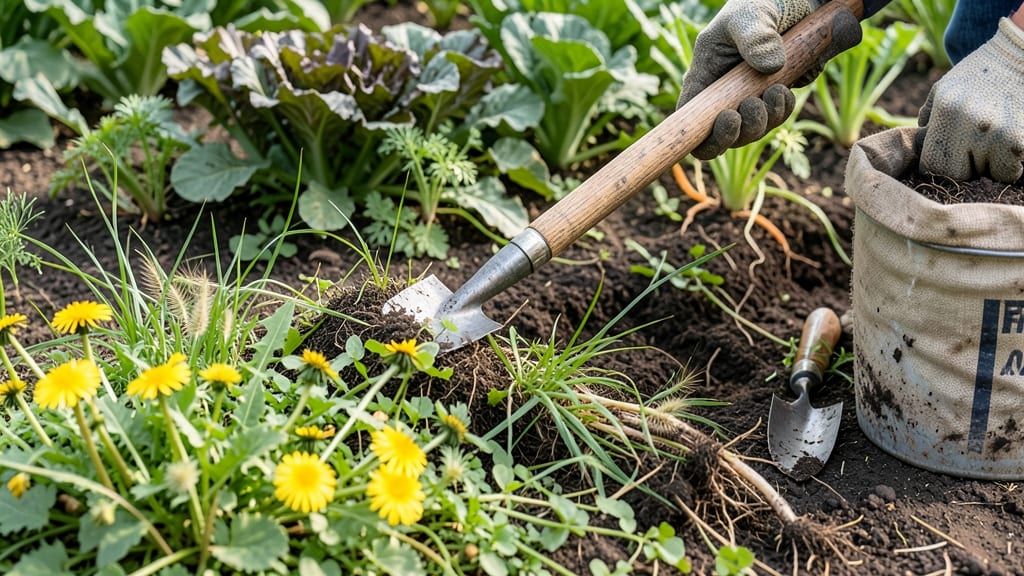
How to use a hoe to remove weeds—it’s not just for digging, it’s your secret weapon against weeds. 🌱 The twist-out technique removes stubborn weeds without disturbing the soil, saving you hours of backbreaking work. I’ve used this method for years, and it’s become my go-to for maintaining garden beds with minimal effort. The right hoe makes all the difference: a stiff-handled, flat-bladed hoe works best for this technique. Early intervention is key—target weeds when they’re small, before they establish deep roots. The method relies on dry soil, so avoid watering before you work. With just a few twists of the hoe, you’ll see weeds pop right out by their roots. No digging, no bending over, and no chemical sprays. Your garden will stay cleaner, and your back will thank you for the reduced strain. This technique fits perfectly into a larger weed management strategy. Combine it with mulching and regular inspections to keep weeds at bay all season long. Here’s how to master it step by step.
📚 In This Guide
- What you need
- Instructions
- Tips and common mistakes
- Wrapping up and next steps
What you need
- ● Hoe: A stirrup hoe (for the twist-out technique) or a standard draw hoe (for cutting weeds at the base). Look for a 5- to 7-inch blade with a comfortable grip and a sturdy, lightweight shaft (wood, aluminum, or fiberglass).
- ● Garden gloves: A pair of durable, breathable gloves (e.g., nitrile-coated or leather) to protect your hands from thorns, dirt, and blisters.
- ● Water source: A hose, watering can, or bucket to dampen the soil slightly (especially for twist-out technique).
- ○ Knee pads or cushion: Optional but highly recommended for long sessions—look for ergonomic, breathable pads with gel inserts.
- ● Weed barrier cloth: Lay down landscape fabric after removal to suppress regrowth (especially in high-weed areas).
- ● Compost bin: A small bucket or bag to collect weeds for mulch or compost (avoid adding seeds to compost!).
- ● Pruning shears: For tough, woody weeds (e.g., bindweed) that need pre-cutting before hoeing.
- ● Sunscreen & hat: Protect your skin if working in direct sunlight for extended periods.
Step-by-step instructions for mastering the twist-out weeding technique
Here's the method I rely on for clean garden beds—no digging, no bending over, just efficient weed removal.
🪴 Step 1: Choose the Right Hoe and Timing
Pick a stiff-bladed hoe (like a stirrup hoe or warrior hoe)—flexible blades bend and skip weeds. The best time to weed is after rain when soil is moist but not soggy. You'll see weeds pop right out with minimal effort when the soil is just damp enough to hold moisture but not sticky.
I like to work in the early morning when weeds are still turgid with water. Avoid midday heat—it makes the soil dry out too fast, and weeds become stubborn. If your garden is dry, water lightly first, then wait 30-60 minutes until the surface feels slightly damp to the touch.
✂️ Step 2: Master the Twist-Out Motion
Hold the hoe with both hands, blade angled slightly downward (about 15-20 degrees). Push the blade straight down 1-2 inches into the soil until it hits the weed's root base. This isn't a chopping motion—think of it like twisting a jar lid—firm but controlled.
Once the blade is seated, rotate your wrists sharply (like turning a doorknob) to sever the weed's roots at the soil line. The twist motion creates a clean break, and the weed will pop right out. You'll hear a satisfying plop when it works—no more tugging or pulling.
💧 Step 3: Work in Sections for Maximum Efficiency
Divide your garden into 2-3 foot sections and focus on one area at a time. Start at the outer edges and move inward—this prevents stepping on freshly weeded soil and disturbing new weeds. I like to work in rows or grids, keeping the hoe blade parallel to the plants I want to keep.
After each twist-out, flick the weed away with your foot or a quick wrist flick—don’t let them pile up. If a weed resists, it’s often because the soil is too dry. Pause, water lightly, and wait 10-15 minutes for the moisture to penetrate before trying again.
☀️ Step 4: Prevent Future Weeds with Mulch
Once your bed is clear, cover the soil with 1-2 inches of mulch (straw, wood chips, or shredded leaves). Mulch blocks sunlight, which weeds need to germinate. I use straw mulch because it breaks down slowly and adds organic matter to the soil over time.
Reapply mulch every 2-3 months or after heavy rain washes it away. You’ll notice fewer weeds popping up over time—this step cuts down on future work by 70%. Just keep the mulch layer thick enough to smother weeds but thin enough to let water and air reach your plants.
🌱 Step 5: Maintain Your Garden’s Health
Weeds thrive in disturbed soil, so avoid tilling—it brings buried weed seeds to the surface. Instead, use the twist-out method weekly during peak growing season (spring to early fall). You’ll see a dramatic difference in just a few sessions.
If weeds keep returning in the same spot, it might mean compacted soil or poor drainage. Loosen the top ½ inch of soil with a fork or your hoe’s blade to improve air and water flow. Healthy soil = fewer weeds.
Tips & tricks for perfect weed removal with a hoe
These simple strategies will make your twist-out weeding faster and more effective than ever.
Tool Selection: If you don't have a stiff-bladed hoe like a stirrup or warrior hoe, a standard garden hoe will work in a pinch—but you'll need to press harder to get that clean twist. I've even used a putty knife in tight spaces (yes, really!) when dealing with weeds between pavers or along fences. The key is always keeping that blade sharp—dull edges make the twist motion ineffective.
Soil Prep: The 30-60 minute wait after watering isn't just about moisture—it's about giving the soil time to absorb water evenly. I test soil readiness by pressing my thumb into the surface: if it leaves a slight imprint that holds its shape for about 5 seconds, it's perfect. Too dry? Add a little more water and wait another 10 minutes. Too wet? Spread out and let it dry slightly—you want that "damp but not sticky" texture.
Efficiency Hack: When working in 2-3 foot sections, I like to use the "two-hoe method" for larger beds: one hoe for twisting out weeds, and a second (smaller) hoe to clear the debris. This keeps your workspace tidy and prevents accidentally re-planting weed seeds. For really stubborn weeds like dandelions, I'll make two quick twist motions—first to sever the main root, then again 10-15 minutes later to catch any regrowth.
Mulch Maintenance: That 1-2 inch mulch layer should feel like a cozy blanket—thick enough to block light but light enough to breathe. I test mulch effectiveness by poking through it: if you can see soil below, add more. And here's a pro move: sprinkle a thin layer of wood ash (from untreated wood) under your mulch—it helps prevent fungal growth while keeping weeds at bay. Just don't overdo it, or you'll raise your soil's pH too much.
Pro Tips for Use A Hoe To Remove Weeds
- These simple strategies will make your twist-out weeding faster and more effective than ever.
- Tool Selection: If you don't have a stiff-bladed hoe like a stirrup or warrior hoe, a standard garden hoe will work in a pinch—but you'll need to press harder to get that clean twist.
- Soil Prep: The 30-60 minute wait after watering isn't just about moisture—it's about giving the soil time to absorb water evenly.
Frequently asked questions
Got questions about using a hoe to tackle weeds? You’re not alone! Here are some of the most common queries—and their straightforward answers—to help you master the twist-out technique like a pro.
What’s the best time of day to hoe weeds?
The ideal time is early morning or late afternoon when the soil is moist but not soggy. Weeds are easier to twist out when their roots are soft, and you’ll avoid the midday heat. Plus, you’ll save water by hoeing before evaporation peaks!
Do I need to pull weeds by the roots, or is cutting them enough?
For stubborn weeds, always aim to twist them out by the roots—cutting just the tops lets them regrow! The twist-out technique ensures you remove the entire root system, preventing regrowth. If a weed resists, wiggle it gently while twisting to loosen it.
Can I use a hoe on grassy lawns, or is it only for garden beds?
A hoe works best in garden beds, vegetable patches, or mulched areas where weeds are concentrated. For lawns, a hoe can damage grass blades, so opt for a lawn-specific tool like a dandelion digger or spot-treat with vinegar (but avoid near desirable plants!).
What if my hoe keeps getting stuck in the soil?
Sticky soil is usually a sign of compacted ground or dry conditions. Lightly water the area before hoeing, or sharpen your hoe’s blade if it’s dull. A stainless steel hoe (like the one in our guide) resists rust and glides better in tough soil. If the soil is rock-hard, consider aerating first!
Are there alternatives to a hoe for small gardens?
For tiny spaces, try a hand weeder (like a Japanese puller) or a hula hoe for quick, low-impact removal. A string trimmer with a weeding blade also works for larger areas—just be cautious near plants. For organic gardeners, boiling water or corn gluten meal can suppress weeds naturally.
Still unsure? Drop your question in the comments—we’re happy to help you weed out the confusion!
Wrapping up and next steps
Mastering the twist-out technique with a hoe is a game-changer for keeping your garden weed-free without the backbreaking work! 🌱 With the right tool, a little patience, and the tips you’ve learned, you’ll be efficiently tackling even the toughest weeds like a pro.
Remember, consistency is key—just a few minutes of weeding weekly can save you hours of digging later.
Ready to level up your gardening skills? Try this method on a small patch first, then expand as you gain confidence. Soon, you’ll be enjoying a pristine, low-maintenance garden—and maybe even sharing your newfound expertise with fellow green thumbs! 🌿