
Neem Oil
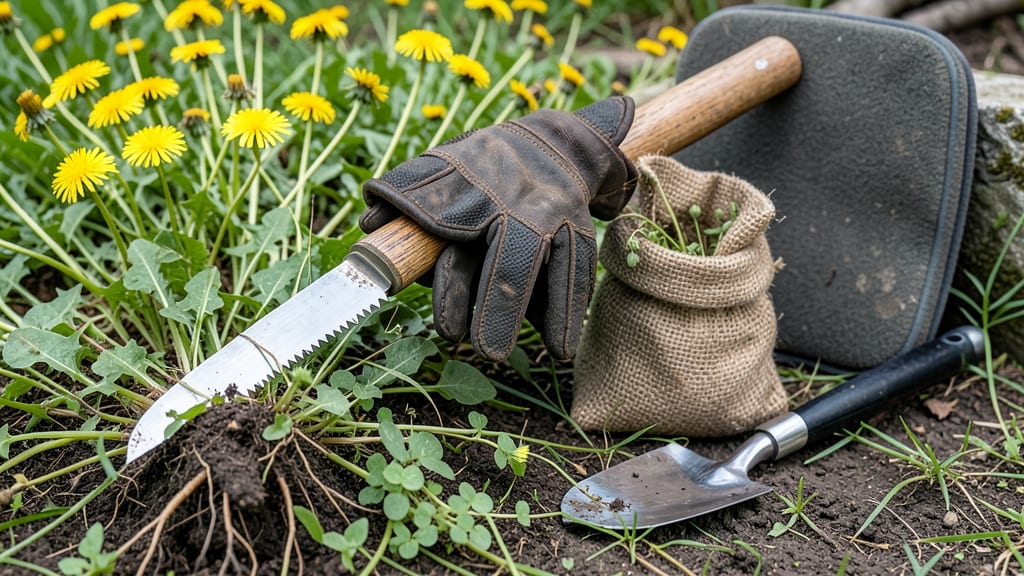
A stubborn weed can ruin a garden bed in minutes—until you master how to use a weeding tool with the twist-grip technique. I spent years wrestling with hand weeding before discovering this method: a simple rotation that pulls weeds cleanly from the root without digging.
It’s the difference between a patchy garden and one that stays neat and productive all season long.
Start with the right tool—a sturdy dandelion digger or hand weeder with a twist grip. The key is leverage: grip the weed at the base, twist firmly, and pull upward in one motion.
Most beginners overcomplicate it by tugging sideways or using too much force. A 30-second twist is all it takes for most weeds, and your hands stay clean.
Your garden will transform when weeds stop coming back. The twist-grip method prevents regrowth by removing the entire root system, so you won’t waste time on repeat pulls.
Plus, it’s gentler on your knees than kneeling to dig. For tougher weeds like bindweed, add a little soapy water to loosen the soil first.
This technique works for container gardens, raised beds, and in-ground plots—anywhere weeds pop up. Once you try it, you’ll wonder how you ever lived without it. Let’s get those weeds out for good.
📚 In This Guide
- What you need
- Instructions
- Tips and common mistakes
- Wrapping up and next steps
What you need
- ● Twist-Grip Weeding Tool – A sturdy, ergonomic tool with a twist-action handle (e.g., Fiskars StaySharp Weeder or similar). Look for one with a sharp, forked metal tip (1.5–3 inches long).
- ● Garden Gloves – Durable, breathable (e.g., nitrile-coated or leather) to protect your hands from thorns and dirt.
- ○ Knee Pads or Mat – Optional but highly recommended for comfort during prolonged kneeling (e.g., foam or gel pads).
- ● Garden Twine or String – A 5–10 ft coil (for tying weeds into bundles).
- ● Small Bucket or Bag – For disposing of weeds (aim for a 5-gallon capacity to avoid frequent trips).
- ● Water Spray Bottle – A 16–32 oz bottle with a fine mist setting to dampen soil before weeding (reduces dust and makes extraction easier).
- ○ Neem Oil (Optional but Helpful) – 1–2 tbsp diluted in water (spray on weeds 1–2 days before pulling to weaken roots).
- ● Hand Trowel – For loosening stubborn soil around deep-rooted weeds.
- ● Pruners or Scissors – To trim thick weed stems before twisting.
- ● Sun Hat & Sunglasses – For outdoor comfort (especially in sunny conditions).
- ● Portable Stool – If you have back issues or large garden areas to cover.
Step-by-step guide to mastering the twist-grip weeding technique
This method saves your back and eliminates weeds at the root—no digging required.
Select the Right Tool and Prepare the Work Area
Choose a weeding tool with a twist-grip handle designed for leverage and torque. The blade should be sturdy and slightly curved to penetrate soil without bending. I prefer tools with a D-shaped handle—they fit comfortably in your palm for prolonged use. Clear the area of loose debris first; rocks or sticks can dull the blade or damage your hands.
Kneel or sit on a small stool to work at soil level. This prevents back strain and gives you better control. Wet the soil slightly if it's dry—damp earth holds weeds more securely, making extraction easier. Avoid working when the ground is muddy, as this can clog the tool and make it harder to grip.
Position the Tool and Engage the Weed
Identify the weed by its root collar, the thickened base where the stem meets the soil. This is your target—gripping here ensures you remove the entire root system. Insert the tool's blade just beside the weed, angling it slightly toward the root. Press firmly until the blade reaches 1-2 inches deep, but don’t force it; stubborn resistance often means you’re hitting a rock or hardpan.
Grasp the handle with both hands, fingers wrapped around the twist-grip section. Your dominant hand should control the twisting motion, while your other hand stabilizes the tool. Apply steady pressure—think of unscrewing a jar lid, not prying it open. You’ll feel the weed loosen as the blade cuts through the soil and severs the root.
Twist and Extract the Weed
Rotate the handle clockwise with a firm, controlled motion. The twist action leverages the tool’s design to slice through roots while the blade’s curvature helps pry the weed free. You’ll hear a slight pop or feel resistance break as the root detaches. For deep-rooted weeds like dandelions, you may need two full rotations—don’t rush, or you’ll snap the weed off at the surface, leaving fragments to regrow.
Once the weed is loose, lift it straight up with the tool still engaged. If the root breaks off, use the blade to scrape the remaining fragments from the soil. Discard weeds immediately—composting them risks spreading seeds. For weeds with thick taproots, repeat the twist motion 2-3 times to ensure complete removal.
Clean and Maintain Your Tool
After weeding, remove soil and plant debris from the blade with a stiff brush or by wiping it on a clean cloth. A damp towel works well for stubborn residue. Store the tool in a dry, shaded area to prevent rust—moisture trapped in the blade or handle accelerates corrosion. I keep mine in a tool caddy with a silicone sleeve to protect the grip and prevent scratches.
Sharpen the blade seasonally or when you notice it’s dull. A file or whetstone works best; angle the blade at 20-30 degrees to maintain its effectiveness. A sharp tool requires less force, reducing fatigue. If the handle’s twist mechanism feels stiff, apply a dry lubricant like graphite powder to the moving parts—this keeps it smooth for years.
Prevent Future Weed Growth in Treated Areas
Weed-free soil stays that way with consistent maintenance. After removing weeds, apply a 2-3 inch layer of mulch (straw, wood chips, or shredded leaves) to block sunlight and suppress new growth. Focus on high-traffic areas like garden beds and pathways—these spots see the most weed pressure. For persistent weeds like clover, reapply the twist technique every 2-3 weeks until the soil stabilizes.
Improve soil health long-term by amending with compost or organic matter. Weeds thrive in compacted, nutrient-poor soil, so aerating with a garden fork and top-dressing with 1-2 inches of compost discourages regrowth. Water deeply after weeding to help plants recover and outcompete weeds for resources. Over time, your garden will demand less weeding as the ecosystem balances.
Tips & tricks for mastering the twist-grip weeding technique
This method transforms weeding from a back-breaking chore into a precise, satisfying process—here's how to get every detail right.
Tool Selection Matters: Not all weeding tools are created equal. Look for a blade with a slight curve—this design naturally follows the root's path as you twist. The twist-grip handle should feel substantial in your hand; cheap plastic handles won't provide the leverage needed for stubborn weeds. I've found that tools with a D-shaped handle reduce hand fatigue during long sessions, especially when tackling large garden beds.
The Right Soil Consistency: The instructions mention wetting dry soil, but there's more to it. Aim for soil that's moist enough to hold the weed firmly but not so wet that it clings to your tool. Think of it like working with clay—you want it malleable but not sticky. For particularly sandy soil, I add a light misting of water and wait 10 minutes before weeding to let it absorb properly. This prevents the tool from slipping or getting clogged with loose particles.
Root Identification is Key: In Step 2, the instructions highlight the root collar, but what if you're dealing with weeds that don't have obvious collars? Look for the thickest part of the stem closest to the soil—this is where the main root system begins. For weeds like chickweed that spread through runners, focus on cutting these horizontal stems at their junction points with vertical shoots. This prevents regrowth from the remaining plant fragments.
Maintenance Extends Tool Life: Seasonal sharpening is crucial, but don't wait until the blade looks visibly dull. Test it on a weed—if you're pushing hard or the blade skips instead of cutting cleanly, it's time to sharpen. I keep a small file in my gardening caddy and touch up the blade after every 50-60 minutes of use during peak weed seasons. The 20-30 degree angle mentioned in the instructions is perfect, but remember to maintain equal bevels on both sides for balanced cutting.
Pro Tips for Use Weeding Tool
- This method transforms weeding from a back-breaking chore into a precise, satisfying process—here's how to get every ...
- Tool Selection Matters: Not all weeding tools are created equal. Look for a blade with a slight curve—this design nat...
- The Right Soil Consistency: The instructions mention wetting dry soil, but there's more to it. Aim for soil that's mo...
Frequently asked questions
Got questions about mastering your weeding tool? You’re not alone!
Here are answers to the most common queries—so you can tackle weeds like a pro without breaking a sweat.
What’s the best time of day to use a weeding tool for maximum effectiveness?
The ideal time is early morning or late afternoon when the soil is moist but not soggy. Weeds are easier to twist out when their roots are hydrated, and you’ll avoid the midday heat. Pro tip: Water the area lightly 1–2 hours before weeding for even better results!
What if my weeding tool keeps slipping or not gripping the weed?
Slippage usually means the tool isn’t sharp or the weed isn’t fully exposed. Sharpen the blade or use a twist-grip tool designed for stubborn weeds—its serrated edges dig into roots better. For slippery stems, wet the soil slightly or try a fork-style weeder for extra grip.
Can I use a weeding tool on all types of weeds, or are some too tough?
Most weeds—like dandelions, crabgrass, and clover—are fair game, but deep-rooted perennials (e.g., bindweed or nutgrass) may need a second tool or repeated twisting. For these, combine your weeding tool with a digging fork or vinegar spray for stubborn roots.
What’s a good alternative if I don’t have a twist-grip weeding tool?
No problem! Use a hula hoe, dandelion digger, or even a sturdy butter knife (sterilized first!). For small weeds, a gloved hand with a firm twist works too. Just avoid pulling—always twist to break the root.
Should I weed when it’s raining or after it rains?
Wait until the rain stops! Wet soil can clump around roots, making weeds harder to remove. If you must weed post-rain, let the ground dry for 4–6 hours to avoid muddy messes. Bonus: Rain softens weeds naturally—just don’t overdo it.
How often should I use a weeding tool to keep weeds under control?
Consistency is key! Check your garden weekly during growing seasons (spring–fall) and remove weeds before they seed. A quick 10-minute session prevents regrowth better than a marathon session once a month. Pro tip: Mulch afterward to suppress new sprouts!
Wrapping up and next steps
Mastering the twist-grip weeding technique is a game-changer—no more backbreaking digging or stubborn weeds winning the battle! 🌱 With the right tool, a little patience, and the steps you’ve learned, you’ll keep your garden thriving while saving time and effort.
Ready to see the difference? Grab your weeding tool and give it a try—your garden (and future you) will thank you!
👉 Next step: Try it on a small patch first, then expand your weeding prowess to the whole yard. Happy gardening!