
Pests
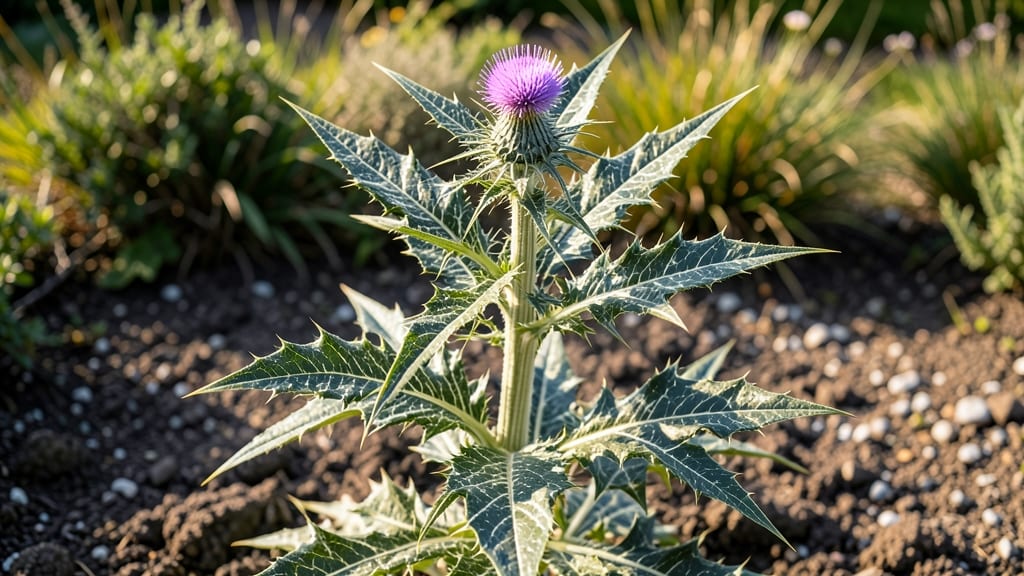
Milk thistle weeds twist their way into gardens with stubborn purple flowers and spiky leaves that make removal feel like a battle. ✂️ I’ve wrestled with these invasive plants for years, and the twist-out method finally gave me the control I needed—no more uprooting shallow roots or watching them regrow.
This technique works because milk thistle’s deep taproot weakens when you break it free with leverage, not brute force.
The key is timing: tackle them in early spring or fall when the soil is moist but not waterlogged, making the roots easier to grip. You’ll need sturdy gloves (those leaves pack a punch), a garden fork for leverage, and patience—each plant takes 30-60 seconds to remove properly.
The method isn’t just about pulling; it’s about strategic twisting to snap the root cleanly at the base.
What you’ll end up with is a weed-free patch that stays clear for months, not just days. The twist-out method leaves no broken root fragments behind, so regrowth is rare. Plus, you avoid the mess of digging or the chemical residue of herbicides.
My garden’s edges now stay tidy without constant vigilance—no more purple blooms crowding out my perennials.
This works best for small to medium patches, but the principle scales: repeat the process every 2-3 weeks in the growing season for stubborn clusters. For larger infestations, combine it with mulching to smother new shoots.
Safety first—always wear gloves, and avoid disturbing the soil if you’re near desirable plants, as milk thistle seeds spread easily.
📚 In This Guide
- What you need
- Instructions
- Tips and common mistakes
- Wrapping up and next steps
What you need
- ● Gloves – Heavy-duty gardening gloves (1 pair) to protect your hands from prickly stems and sap.
- ○ Weed Puller or Digger – A sturdy hand fork or weed wrench (optional but helpful for stubborn roots).
- ● Garden Shears or Pruners – Sharp, clean pruners (1 pair) to trim thick stems before pulling.
- ● Bucket or Trash Bag – A large container (1) to collect weeds and debris.
- ● Water Source – A hose or watering can to soften the soil before pulling.
- ○ Mulch or Landscape Fabric – Organic mulch or weed barrier (optional) to prevent regrowth.
- ● Knee pads – For comfort during long sessions.
- ● Vinegar or herbicide – For spot-treatment if weeds persist (use cautiously!).
- ● Rake – To loosen soil in large patches.
Step-by-step guide to the twist-out method for milk thistle weeds
Here’s how to eliminate these prickly invaders without chemicals or backbreaking digging.
🌱 Step 1: Identify and Prepare the Plant
Start by confirming you’re dealing with milk thistle—look for its spiky, purple flower heads and deeply lobed leaves. Avoid pulling when the ground is frozen or waterlogged; the twist-out method works best when the soil is slightly moist but not soggy. I like to tackle this on a warm, dry afternoon when the roots are more pliable.
Grab the plant’s base near the soil line with one hand and use a pair of thick gardening gloves to protect yourself from the sharp spines. If the plant is tall, you may need to cut it down to about 6 inches first—this makes the twist-out process easier and reduces the risk of breaking the stem.
🌿 Step 2: Twist and Wiggle the Root Out
Wrap your gloved fingers around the base of the stem and twist firmly in one direction. You’ll feel resistance at first, but keep twisting while applying gentle upward pressure. The key is to work the root loose gradually—don’t yank too hard or you’ll snap the stem and leave fragments behind.
If the root resists, switch to a wiggling motion while twisting. Think of it like loosening a stubborn bolt: steady pressure combined with slight movement is more effective than brute force. You’ll know you’re on the right track when you feel the root give way and the plant starts to lift from the soil.
✂️ Step 3: Remove All Root Fragments
Once the main plant is out, inspect the hole for any remaining root pieces. Milk thistle roots can regrow from even small fragments, so this step is critical. Use your fingers or a small hand trowel to dig around the edges of the hole, removing every bit of root you can find.
If you spot stubborn root pieces that won’t come out easily, leave them for now and mark the spot with a small stake or garden flag. You can return later to dig deeper or use a screwdriver to pry them out. The goal is to leave nothing behind that could sprout again.
💧 Step 4: Prevent Regrowth and Replant
After removing the milk thistle, water the area thoroughly to help settle the soil and encourage any remaining root fragments to surface. This makes it easier to spot and remove them if they haven’t come out completely. Once the soil is moist, you can fill the hole with fresh mulch or compost to suppress any hidden roots.
If you’re replanting, choose a ground cover or low-growing plant that will outcompete weeds. I’ve had great success with clover or creeping thyme in areas prone to milk thistle—they fill in quickly and make it harder for new weeds to take hold.
☀️ Step 5: Monitor and Repeat as Needed
Keep an eye on the area over the next few weeks. New milk thistle shoots will appear as small, spiky rosettes. If you spot any, remove them immediately using the same twist-out method—young plants are much easier to pull than mature ones.
For stubborn patches, repeat the process every few weeks until the area is clear. Consistency is key—milk thistle is persistent, but with patience, you’ll reclaim your garden without resorting to harsh chemicals.
Tips & tricks for stubborn milk thistle removal
Milk thistle might look intimidating, but these tricks make the twist-out method foolproof—even for first-timers.
Timing is Everything: The twist-out method works best when the soil is slightly moist but not waterlogged. I've found that early morning or late afternoon works best—soil is damp from dew or recent watering but hasn't dried out completely. If your soil feels dry, give it a quick watering 1-2 hours before you start. This makes the roots more pliable and easier to remove without breaking.
The Right Tools Make All the Difference: While you can use your hands, a small hand trowel and a screwdriver are absolute game-changers for Step 3. I keep a pair of heavy-duty gardening gloves (the kind with reinforced palms) and a trowel with me whenever I tackle milk thistle. For stubborn roots that resist, a screwdriver works better than fingers—just slide it under the root and gently pry. This prevents those frustrating broken root pieces that can regrow.
Prevent Regrowth Like a Pro: After removing the main plant, don't just toss the roots in the trash—burn them if possible. Milk thistle roots can survive in compost piles and sprout again. I also recommend covering the empty holes with a thick layer of mulch or compost immediately after removal. This smothers any hidden root fragments and prevents new shoots from emerging. Think of it as creating a protective barrier between your soil and potential regrowth.
Monitor Like a Hawk: The most common mistake I see is giving up too soon. Milk thistle is sneaky—you might think you've eradicated it, only to find new shoots popping up weeks later. Make it a habit to inspect your garden every 5-7 days for the first month after removal. New shoots appear as small, spiky rosettes that look nothing like mature plants. The earlier you catch them, the easier they are to remove.
Pro Tips for Milk Thistle Weeds
- Milk thistle might look intimidating, but these tricks make the twist-out method foolproof—even for first-timers.
- Timing is Everything: The twist-out method works best when the soil is slightly moist but not waterlogged. I've found...
- The Right Tools Make All the Difference: While you can use your hands, a small hand trowel and a screwdriver are abso...
Frequently asked questions
How do I know if I’m dealing with milk thistle weeds?
Milk thistle (Silybum marianum) has spiky, purple flower heads and jagged, lobed leaves with white veins. If you see these growing in your yard or garden, it’s likely milk thistle. These weeds are highly invasive and can spread quickly, so early action is key!
When is the best time to remove milk thistle weeds?
The twist-out method works best in early spring or fall when the soil is moist but not waterlogged. Avoid peak summer heat—roots are easier to grip and pull when the plant isn’t stressed. Pro tip: Target young plants (under 12 inches) for the easiest removal!
What if the root breaks off when twisting?
Don’t worry—broken root pieces won’t regrow like some weeds (e.g., dandelions). However, if you notice new shoots, dig deeper to ensure the entire taproot is gone. For stubborn stumps, apply vinegar or herbicide to the base to prevent regrowth.
Are there natural alternatives to the twist-out method?
Yes! For large infestations, try solarization (covering weeds with clear plastic for 4–6 weeks) or smothering with cardboard/mulch. For spot treatment, a vinegar-based herbicide (20–30% acetic acid) can work—but always test a small area first to avoid damaging nearby plants.
Will milk thistle regrow if I miss part of the root?
Milk thistle is less likely to regrow from root fragments compared to weeds like bindweed. However, if you see new growth, dig again or use a copper-based herbicide for stubborn cases. Pro tip: Monitor the area for 2–3 weeks post-removal to catch any surprises!
Wrapping up and next steps
Mastering the twist-out method for removing milk thistle weeds is a game-changer—especially when dealing with those stubborn roots! 🌱 With the right tools and a little patience, you can reclaim your garden without breaking a sweat. Start small: tackle one patch at a time, and soon, your yard will be weed-free and thriving.
Ready to take action? Grab your gloves, gather your supplies, and roll up your sleeves! Your future self (and your garden) will thank you. 💪