
Flowers
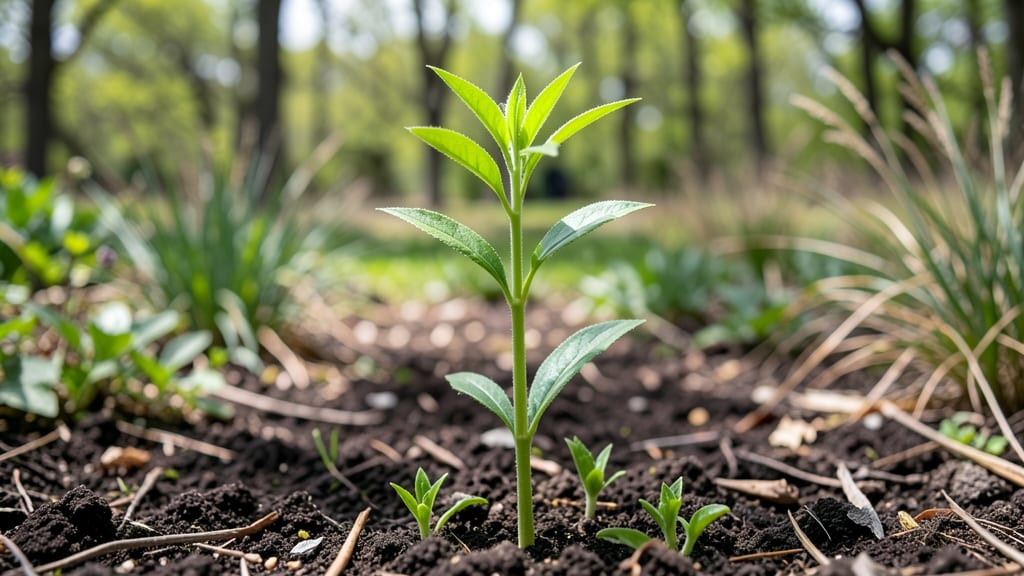
Early spring is when milkweed wakes up from winter dormancy—and your preparation makes all the difference. 🌱 The right timing, soil prep, and care now mean a fragrant canopy by summer that monarch butterflies will flock to.
I’ve seen firsthand how plants that get early attention produce twice as many seed pods by July, giving caterpillars the food they desperately need.
The secret starts with soil that’s loose and rich in organic matter—think compost mixed into the top 6 inches. Milkweed roots need room to spread, so avoid heavy clay unless you amend it.
Plant seeds or transplants after the last frost but before soil hits 60°F, or they’ll bolt too fast. In cooler climates, wait until early May; in warmer zones, late March works. A little shade cloth helps young plants if your spring sun is fierce.
What you’ll end up with is a vibrant, thriving milkweed patch that smells faintly sweet and attracts pollinators from day one. The key is consistent moisture—keep soil damp but not soggy—until plants establish roots.
By midsummer, you’ll have a monarch magnet that keeps caterpillars fat and happy while your garden hums with life.
This method works for all milkweed varieties, from towering swamp milkweed to compact butterfly weed. Just remember: early spring care pays off in ecological dividends you’ll see all season. Let’s get those seeds in the ground!
📚 In This Guide
- What you need
- Instructions
- Tips and common mistakes
- Wrapping up and next steps
What you need
- ● Milkweed seeds: Choose native varieties like Asclepias tuberosa (butterfly weed) or Asclepias syriaca (common milkweed). Buy 1–2 seed packets (50–100 seeds each) for a small garden or 5+ packets for a larger plot.
- ● Well-draining soil: Mix 2 parts native soil with 1 part compost or coconut coir for moisture retention. Avoid heavy clay.
- ● Garden space: Direct sowing: 6–12 inches apart in rows 18–24 inches apart.
- ● Container gardening: 5–7 gallon pots with drainage holes (1–2 plants per pot).
- ● Sunlight: Full sun (6+ hours/day)—milkweed thrives in warmth!
- ● Hand trowel or transplant spade (for digging seed holes or moving seedlings).
- ● Watering can or hose with gentle spray nozzle (keep soil moist but not soggy).
- ● Pruners or scissors (for trimming dead foliage or harvesting seeds later).
- ○ Mulch (optional): 2–3 inches of straw or wood chips to retain moisture and suppress weeds.
- ○ Fertilizer (optional): Low-phosphorus, balanced organic fertilizer (e.g., 5-5-5)—apply lightly after germination.
- ● Best planting time: Late winter to early spring (February–April), 4–6 weeks before your last frost date.
- ● Cold stratification (for seeds): Chill seeds in a damp paper towel in the fridge for 2–4 weeks to mimic winter conditions (boosts germination!).
- ● Patience: Germination can take 2–6 weeks—stay consistent with moisture!
Step-by-Step guide for reviving milkweed in early spring
Early spring is your chance to transform last year’s milkweed into a thriving monarch magnet.
🌱 Step 1: Prune Back Dead Growth and Inspect Roots
Use sharp pruners to cut back all brown, woody stems to about 6 inches above the ground. This removes winter damage while leaving enough growth for new shoots to emerge. I always prune on a dry morning—wet stems tear instead of cleanly cutting. Look for any hollow stems or blackened areas, which signal rot that can kill the plant.
Gently loosen the soil around the base with a hand fork to check for root health. Healthy roots are firm and white or tan, while mushy or dark roots need immediate action. If you spot rot, trim affected areas with sterilized pruners and reapply a thin layer of compost around the base to encourage new root growth.
☀️ Step 2: Apply Fertilizer and Mulch for New Growth
Spread ½ cup of 10-10-10 fertilizer around the plant’s drip line, keeping it 6 inches away from the stem to avoid burning roots. Lightly scratch it into the top inch of soil with your fingers. Milkweed isn’t heavy feeder, but early spring gives it the boost it needs to push through dormancy.
Top with 2-3 inches of mulch—I use shredded hardwood bark—to retain moisture and suppress weeds. Keep mulch 2 inches away from the stem to prevent rot. Water deeply after mulching to settle everything in place. You’ll know it’s right when the soil feels damp down to 3 inches.
💧 Step 3: Water Strategically for Early Growth
Water deeply once weekly until you see new shoots—usually within 2-3 weeks. Use a soaker hose or drip irrigation to deliver moisture directly to the roots without wetting the foliage, which reduces disease risk. Early spring watering should be 1-2 gallons per plant to encourage deep root development.
Check soil moisture by sticking your finger 2 inches deep. If it feels dry, water again. Overwatering now can lead to root rot, especially if temperatures stay cool. You’ll see the first sign of success when bright green shoots emerge from the base—this means your plant is waking up.
✂️ Step 4: Monitor for Pests and Adjust Care
Inspect leaves weekly for aphids or spider mites, which love tender new growth. A strong spray of water usually knocks them off, but for stubborn infestations, I use neem oil mixed with water. Apply in the early morning so the plant has time to dry before evening dew settles.
As shoots reach 6-8 inches tall, thin them to the 3-4 strongest stems per plant. This ensures better airflow and stronger growth. You’ll know you’ve done it right when the remaining stems stand upright and show no signs of yellowing or wilting.
🌿 Step 5: Prepare for Monarch Visits
Once new growth reaches 12 inches tall, start monitoring for monarch eggs or caterpillars. Milkweed leaves should be fully unfurled and healthy before you expect visitors. I like to gently brush the leaves with my fingers to check for tiny eggs—look for white, oval shapes about the size of a pinhead.
If you spot caterpillars, leave them be! They’ll eat voraciously, but this is good—they’ll turn into monarchs that will pollinate your garden. Just avoid using pesticides. By late spring, your milkweed should be lush enough to support a full monarch lifecycle, turning your garden into a butterfly hotspot.
Tips & tricks for reviving milkweed in early spring
Here’s what nobody tells you about bringing milkweed back to life—these details make all the difference between a struggling plant and a monarch magnet.
Pruning Precision: When cutting back those woody stems in Step 1, aim for a clean cut just above a leaf node or bud. This hidden growth point is where new shoots will emerge, and cutting too close can leave your plant vulnerable to disease. I’ve seen plants recover beautifully when I took the extra second to find that perfect spot—it’s like giving your milkweed a fresh start. The 6-inch height guideline works for most varieties, but if you’re working with a particularly tall plant, you can extend this slightly to 8 inches without harming growth.
Fertilizer Placement Matters: In Step 2, the 6-inch distance from the stem isn’t just arbitrary—it prevents fertilizer burn, which can kill your plant before it even wakes up. I’ve learned this the hard way after seeing crispy brown edges where fertilizer touched the stem. For extra insurance, mix a handful of compost into the soil before adding fertilizer; this buffers the roots and improves nutrient absorption. And if you’re using a different fertilizer ratio, stick to the same ½ cup amount—milkweed doesn’t need much, but it does need balance.
Mulch Depth and Timing: That 2-3 inch mulch layer in Step 2 is your moisture insurance policy, but timing is everything. Apply mulch after watering—this locks in moisture and prevents evaporation. I’ve found that adding mulch too early can create a damp, suffocating layer that encourages rot. For best results, wait until the soil is damp but not soggy, then top with mulch. And if you’re in a particularly rainy region, reduce to 1-2 inches to avoid over-moisture.
Pest Patrol: The weekly inspection in Step 4 is your first line of defense against aphids and spider mites. I’ve caught infestations early by simply running my fingers along the undersides of leaves—aphids love to hide there. For stubborn pests, mix 1 teaspoon of neem oil with 1 quart of water and spray thoroughly. The key is consistency: check leaves every 5-7 days, especially on the undersides where pests thrive. Early detection means you won’t need harsh chemicals to save your plant.
Pro Tips for Milkweed Early Spring
- Here’s what nobody tells you about bringing milkweed back to life—these details make all the difference between a struggling plant and a monarch magnet.
- Pruning Precision: When cutting back those woody stems in Step 1, aim for a clean cut just above a leaf node or bud.
- Fertilizer Placement Matters: In Step 2, the 6-inch distance from the stem isn’t just arbitrary—it prevents fertilizer burn, which can kill your plant before it even wakes up.
Frequently asked questions
Got questions about milkweed in early spring?
You’re not alone! Here are answers to the most common queries to help you get started with confidence.
When is the best time to plant milkweed in early spring?
Plant milkweed as soon as the soil is workable (around 40–50°F), typically 4–6 weeks before your last frost date. Early spring planting gives roots time to establish before summer heat. For container-grown plants, transplant after the danger of frost has passed for faster growth.
Will milkweed attract pests or diseases in early spring?
Milkweed is generally low-maintenance, but aphids or milkweed beetles may appear. Monitor leaves for sticky residue (aphids) or chewed foliage (beetles). Spray with water or introduce ladybugs for natural control. Healthy plants with good airflow resist most issues.
Can I grow milkweed from seed instead of buying plants?
Start seeds indoors 6–8 weeks before the last frost or sow directly outdoors after soil warms. Cold stratification (chilling seeds for 2–4 weeks) improves germination. Seed-grown milkweed may take longer to bloom but often thrives longer than nursery plants.
How much sun does early spring milkweed need to thrive?
Milkweed prefers full sun (6+ hours/day), but young seedlings tolerate partial shade (4–6 hours) in early spring. Once established, move plants to sunnier spots for robust growth and better monarch attraction. Avoid deep shade, which weakens stems and reduces flower production.
Why isn’t my milkweed flowering yet in early spring?
Milkweed often waits until late spring or summer to bloom. If planted late, give it time—some varieties (like Asclepias tuberosa) need 2+ years to mature. Ensure it has well-draining soil and regular water (but not soggy roots). Patience pays off!
Wrapping up and next steps
Milkweed in early spring isn’t just a feast for monarch butterflies—it’s a fragrant, vibrant promise of life returning to your garden. 🌱 Whether you’re planting for pollinators, restoring ecosystems, or simply savoring its delicate blooms, every seed you sow contributes to a brighter, buzzing future.
Ready to take the next step? Start small—grow bold! Research your local milkweed varieties, sketch a sunny patch in your yard, and let nature’s magic unfold.
- Pro tip: Share your journey with fellow gardeners—inspiration grows together! 🌟
- Need more guidance? Dive into our comprehensive planting guide for step-by-step success.