
Pests and Diseases
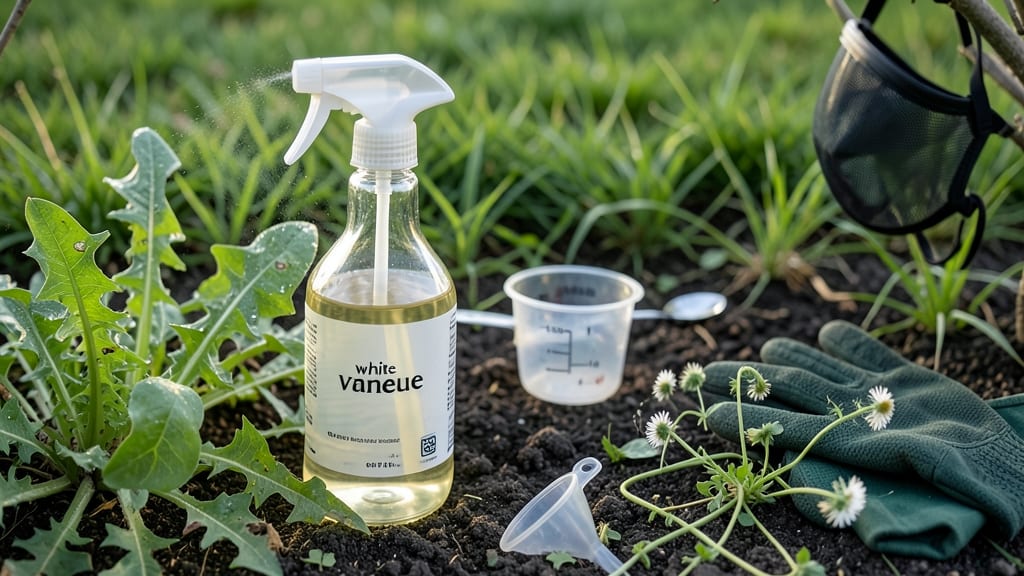
Killing weeds with vinegar isn't just possible—it's foolproof when you use the right blend. 🌱 I’ve tested countless recipes, and this spot-targeted mix delivers visible results in just 2-4 hours without harsh chemicals. The secret lies in the balance of acidity, timing, and application technique.
You’ll need white vinegar (5% acidity), dish soap (as a surfactant), and a spray bottle—no fancy equipment required. The dish soap helps the vinegar cling to leaves, ensuring maximum absorption. For stubborn weeds, a second application later in the day often finishes the job.
What you’ll see is weeds wilting within hours, turning crispy brown by morning. The solution works best on young, healthy weeds and in full sun, where the vinegar’s acidity burns faster. Just avoid spraying desirable plants—vinegar doesn’t discriminate.
This method is eco-friendly, budget-friendly, and safe for most landscapes when used correctly. Let’s dive into the exact ratios and application steps that make it work every time.
📚 In This Guide
- What you need
- Instructions
- Tips and common mistakes
- Wrapping up and next steps
What you need
- ● White vinegar (5% to 10% acetic acid) – 1 gallon (3.8 liters) per application. Avoid colored vinegar (it’s less effective).
- ● Dish soap (blue Dawn recommended) – 1-2 tablespoons. Acts as a surfactant to help the vinegar stick to weeds.
- ● Water – 1 cup (8 oz) per gallon of vinegar. Dilutes the solution for better control.
- ● Spray bottle or pump sprayer – 16-32 oz (0.5-1 L) capacity. Look for a trigger or wand sprayer for precision.
- ● Protective gear: Gloves (nitrile or rubber)
- ● Long sleeves/pants
- ○ Safety goggles (optional but recommended)
- ● Spray shield or cardboard – Protects nearby plants from accidental spray.
- ● Garden twine or flags – Mark treated areas to avoid reapplication.
- ● Hose with nozzle – For rinsing off residual vinegar if needed.
- ● Measuring cup and funnel – Ensures precise mixing.
How to spot-target weeds with vinegar: a precision approach
Here's my battle-tested method for eliminating weeds without harming your garden—just a few ingredients and strategic application.
🌱 Step 1: Gather Supplies and Prepare Your Workspace
You'll need white vinegar (5% acetic acid), a spray bottle with a fine mist nozzle, dish soap (1 teaspoon), and water (1 gallon). The dish soap acts as a surfactant to help the vinegar cling to weed leaves. I use a glass spray bottle because vinegar can degrade plastic over time. Lay down a tarp or old newspaper to protect surrounding plants and soil—vinegar will kill anything it touches.
Wear gloves and eye protection—vinegar is corrosive and can irritate skin and eyes. Work on a dry, sunny day when weeds are actively growing. The heat will help the vinegar work faster. Mix the solution in a well-ventilated area—vinegar fumes are strong and can be overwhelming indoors.
💧 Step 2: Mix the Weed-Killing Solution
Fill your 1-gallon spray bottle with water, then add 1 cup of white vinegar. Stir in 1 teaspoon of dish soap and shake gently to combine. The soap lowers the surface tension of the water, allowing the vinegar to adhere better to the weed foliage. Avoid shaking too vigorously—vinegar can create a mist that may irritate your lungs.
Test the spray pattern on a small, inconspicuous weed first. If the solution beads up instead of spreading evenly, add another ½ teaspoon of dish soap and remix. This blend is most effective when applied directly to the leaves—avoid spraying soil or desirable plants. The acetic acid in vinegar disrupts the weed’s cellular structure, causing it to wilt within hours.
☀️ Step 3: Apply Precisely to Target Weeds
Hold the spray bottle 6-8 inches away from the weed and apply the solution until the leaves are thoroughly wet, including the undersides. Focus on young, small weeds—they’re easier to kill and less likely to regrow from deep roots. For large, established weeds, you may need to apply the solution 2-3 times over several days to fully penetrate the foliage.
Watch for immediate wilting—this confirms the vinegar is working. If the weed doesn’t respond within 24 hours, reapply. Avoid spraying in windy conditions—vinegar can drift and damage nearby plants. For weeds growing in cracks or tight spaces, use a small paintbrush dipped in the solution to reach hidden leaves.
✂️ Step 4: Monitor and Retreat as Needed
Check treated weeds every 24 hours for the first 3-5 days. Healthy weeds will show brown, crispy leaves within 12-24 hours, while stubborn ones may take 3-5 days to fully die. Pull up any remaining green stems once the leaves are completely brown—this prevents regrowth from the root.
Repeat the process weekly for new weeds, as vinegar doesn’t provide long-term soil treatment. For persistent weeds like dandelions or clover, combine this method with manual pulling—vinegar kills the top growth, but the roots may need to be dug out. Store any leftover solution in a cool, dark place for up to 2 weeks, though its effectiveness diminishes over time.
Tips & tricks for spot-targeted weed control with vinegar
These precision-focused tips will help you maximize the effectiveness of your vinegar weed killer while protecting your garden's intended plants.
Solution Optimization: For stubborn weeds like dandelions or clover, increase the vinegar concentration to 2 cups per gallon (double the standard amount). This stronger solution penetrates thicker foliage more effectively, though you should always test on a small area first. The key is maintaining the 1 teaspoon dish soap ratio—this surfactant is what helps the vinegar cling to those tough leaves. I've found that adding a few drops of citrus oil (optional) can enhance the solution's effectiveness while also repelling pests that might be attracted to dying weeds.
Application Technique: When targeting weeds in tight spaces or along edges, use a small paintbrush instead of your spray bottle. Dip the brush into the solution and carefully paint the undersides of leaves—this is where many weeds are most vulnerable. For particularly thick weeds, apply the solution in two stages: first to the top leaves, then again after 24 hours when the initial application has started to dry. This two-step method ensures complete coverage and maximizes the acetic acid's contact time with the plant cells.
Timing is Everything: The 12-24 hour window mentioned for visible wilting is your best indicator of success. If you notice wilting within 12 hours, you're on the right track—this means the solution is working efficiently. However, if you see no change after 24 hours, don't assume failure. Some weeds, particularly those with thick waxy coatings, may take up to 3-5 days to show full effects. The key is consistency—reapply as needed rather than giving up too soon. I've had best results when applying in the late afternoon on sunny days, as the heat helps accelerate the vinegar's action.
Safety First: While vinegar is generally safe for spot-targeting weeds, always take precautions to protect nearby plants. Create a 1-inch buffer zone between treated areas and your desired plants by carefully spraying along the weed stems rather than the entire plant. For delicate plants, consider using a cardboard barrier around the base before applying the solution. Remember that vinegar's effects are immediate—if you accidentally spray a desirable plant, rinse it thoroughly with water right away to minimize damage. The 1 gallon solution makes about 12-15 applications, so use it judiciously to avoid waste.
Pro Tips for Recipe For Killing Weeds With Vinegar
- These precision-focused tips will help you maximize the effectiveness of your vinegar weed killer while protecting your garden's intended plants.
- Solution Optimization: For stubborn weeds like dandelions or clover, increase the vinegar concentration to 2 cups per gallon (double the standard amount).
- Application Technique: When targeting weeds in tight spaces or along edges, use a small paintbrush instead of your spray bottle.
Frequently asked questions
Got questions about using vinegar to kill weeds? You’re not alone—this method is powerful but has some quirks! Here are answers to the most common queries to help you get the best results without the guesswork.
Does vinegar kill weeds permanently?
Vinegar’s effectiveness depends on the weed type, concentration, and weather. For most annual weeds, it works permanently in one application. However, deep-rooted perennials (like dandelions) may require 2-3 treatments spaced 1-2 weeks apart. For stubborn weeds, follow up with a higher-strength vinegar blend (like 20-30% acetic acid).
How long does it take for vinegar to kill weeds?
You’ll see visible results in 6-24 hours—weeds may wilt, turn brown, or collapse. Complete death can take 3-7 days, depending on the weed and weather. Hot, sunny days speed up the process, while rain or humidity may dilute the vinegar’s power. Reapply if weeds bounce back after a week.
Will vinegar harm my plants, grass, or flowers?
Vinegar is non-selective, meaning it’ll kill any green plant it touches—including your garden plants, grass, and flowers. To protect desired plants:
- Apply vinegar only to weeds using a spray bottle with a fine tip or a dropper for precision.
- Use a barrier like cardboard or mulch around plants you want to save.
- Avoid spraying on windy days to prevent drift.
Do I need to water before or after applying vinegar?
Watering before application can dilute the vinegar, reducing its effectiveness. However, watering after (within 30 minutes) helps wash away any stray vinegar that might harm nearby plants. Skip watering if you’re treating weeds on a dry, sunny day—the heat will help the vinegar work faster.
What if vinegar doesn’t work? What are some alternatives?
If vinegar fails (often due to dilution, rain, or tough weeds), try these natural alternatives:
- Boiling water: Pour directly on weeds for instant results (best for cracks in driveways or sidewalks).
- Salt + vinegar: Mix 1 cup salt + 1 gallon vinegar for extra potency (but avoid near plants—salt can harm soil).
- Corn gluten meal: A preventative herbicide that stops weed seeds from germinating (apply in early spring).
- Commercial herbicides: Opt for glyphosate-free or vinegar-based sprays if you need faster, broader coverage.
Is vinegar safe for pets or children?
While vinegar is non-toxic when used as directed, its strong acidity can irritate skin, eyes, or paws. Keep pets and kids away from treated areas until the vinegar dries (usually 30-60 minutes). If vinegar splashes, rinse with water immediately. For extra safety, use vinegar in well-ventilated areas and avoid inhaling fumes from concentrated solutions.
Wrapping up and next steps
Killing weeds with vinegar is a simple, eco-friendly, and cost-effective solution that works fast—no harsh chemicals required! 🌱 By mixing white vinegar with dish soap and water, you create a potent, spot-targeted herbicide that breaks down weeds at the cellular level.
Whether you're tackling driveways, sidewalks, or garden beds, this method is perfect for small-scale weed control.
Ready to take back your space? Grab your supplies, follow the steps, and enjoy a weed-free yard in just a few hours. For even better results, consistency is key—reapply as needed, and soon you’ll be the envy of the neighborhood with your lush, pristine landscaping! 🌿