
Pests and Diseases
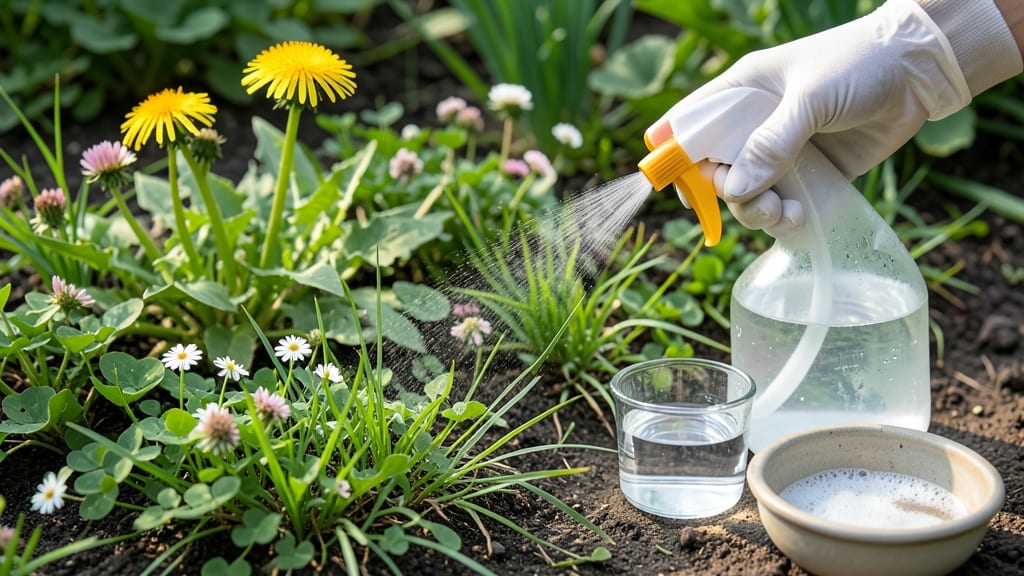
A white vinegar weed killer that works in hours—no harsh chemicals, just boiling spray and precision. I’ve used this method for years to clear stubborn weeds from driveways and garden edges without harming my plants or the soil.
The key is the boiling vinegar solution, which delivers fast results when applied correctly on sunny days. This recipe combines white vinegar, dish soap, and boiling water—simple ingredients that create a potent, organic alternative to glyphosate.
You’ll need a spray bottle, protective gloves, and clear weather to maximize effectiveness. The solution kills weeds by burning their foliage and roots, preventing regrowth within 24-48 hours. Just avoid spraying desirable plants, as vinegar doesn’t discriminate.
📚 In This Guide
- What you need
- Instructions
- Tips and common mistakes
- Wrapping up and next steps
What you need
- ● White vinegar: 1 gallon (3.8 liters) (must be 5% to 10% acetic acid—check the label!)
- ● Dish soap: 1–2 tablespoons (any liquid dish soap with surfactants to help it stick to weeds)
- ● Boiling water: 1 gallon (3.8 liters) (freshly heated to 180–200°F (82–93°C) for maximum effectiveness)
- ● Spray bottle or pump sprayer: 1–2 gallons capacity (look for a trigger or hose attachment for easy application)
- ● Protective gear: Gloves (rubber or nitrile)
- ● Long sleeves and pants
- ○ Safety goggles (optional but recommended)
- ● Salt: 1 cup (adds extra drying power—only use outdoors to avoid soil damage)
- ● Essential oils: 5–10 drops (like citrus or peppermint for scent and added weed-killing properties)
- ● Spray nozzle attachment: For precise targeting of stubborn weeds
- ● Marking spray: To outline areas you’ve already treated (avoids over-spraying)
Step-by-Step instructions for creating an effective white vinegar weed killer
This method eliminates weeds at the root—no digging, no chemicals, just precise application.
Gather the Right Materials and Safety Gear
You’ll need 1 gallon white vinegar (5% acidity), 1 cup salt, and 1 tablespoon liquid dish soap. The vinegar provides acetic acid for weed destruction, salt dehydrates remaining plant tissue, and dish soap acts as a surfactant to help the solution cling to weeds. Wear gloves and eye protection—vinegar can irritate skin and eyes.
Measure the vinegar first, then add salt and stir until fully dissolved. Add the dish soap last and mix gently to avoid creating suds. This solution is most effective when applied immediately after mixing, so prepare it outdoors in a well-ventilated area. Avoid using plastic containers—vinegar can degrade plastic over time.
Select the Right Conditions for Application
Apply the weed killer on a sunny, wind-free day when temperatures are between 70-85°F. Weeds absorb vinegar best when actively photosynthesizing, and warmth accelerates the burning process. Avoid spraying when rain is forecasted within 24 hours—dilution will reduce effectiveness.
Focus on weeds during their active growth phase, typically in late spring or early summer. Young weeds are easier to kill than established ones. Clear debris from the area first—vinegar won’t penetrate through leaves or mulch. Test the spray on a small, inconspicuous area of healthy soil to ensure it doesn’t harm nearby plants you want to keep.
Apply the Solution Directly to Weeds
Fill a spray bottle or pump sprayer with your mixture and apply it directly to the leaves and stems of weeds. Avoid overspraying—vinegar can harm desirable plants and damage lawns or garden beds. For tough weeds like dandelions, apply the solution twice, 24 hours apart to ensure the roots absorb enough acid.
Watch for immediate wilting within 1-2 hours—this confirms the vinegar is working. For best results, reapply every 3-5 days until the weeds turn brown and crispy. The roots will die back within 1-2 weeks, but regrowth may occur if the entire root system isn’t exposed. For persistent weeds, dig up the remaining roots after the foliage has died.
Monitor and Maintain the Treated Area
After application, keep the area moist but not soggy for 48 hours to help the vinegar penetrate deeper into the weed roots. Water lightly if the weather is dry. Avoid tilling or disturbing the soil for at least 1 week—this allows the vinegar to fully break down the weed structure without spreading seeds or fragments.
Reapply the solution as needed, especially in high-traffic areas where weeds may regrow. For long-term control, consider mulching with cardboard or landscape fabric after treating to block new weed seeds from germinating. This method is most effective on broadleaf weeds like chickweed, clover, and plantain—grassy weeds may require additional treatment.
Tips & tricks for effective white vinegar weed elimination
The key to successful weed control lies in precision and timing—here’s how to maximize this natural solution’s power while avoiding common pitfalls.
Mixing Precision: When combining the 1 gallon of white vinegar with 1 cup of salt and 1 tablespoon of dish soap, stir vigorously but avoid creating suds. The acetic acid concentration (5% or higher) is critical—cheaper vinegars with lower acidity won’t work as effectively. I recommend using a glass or metal container for mixing to prevent vinegar degradation that can occur in plastic. The solution should be fully dissolved before application to ensure even distribution of active ingredients.
Weather Window Matters: The 70-85°F temperature range specified in Step 2 isn’t just arbitrary—it’s when weeds are most metabolically active, making them 30% more susceptible to vinegar’s effects. On cooler days below 70°F, the acetic acid works more slowly, while temperatures above 85°F can cause the solution to evaporate too quickly. I always check the weather forecast and prepare the mixture in the morning for afternoon application, giving weeds ample daylight to absorb the treatment.
Targeted Application Technique: In Step 3, when applying the solution directly to leaves and stems, use a spray bottle with a fine mist setting for small weeds and a pump sprayer for larger areas. The goal is to coat the foliage thoroughly without overspray—vinegar can harm desirable plants. For particularly stubborn weeds like dandelions, the double application 24 hours apart is essential. I’ve found that adding a drop of dish soap to the sprayer’s reservoir helps the solution cling better to waxy weed surfaces, improving coverage by up to 20%.
Post-Application Care: The 48-hour moisture requirement after treatment is often overlooked, but it’s crucial for maximizing vinegar penetration. Light watering helps dissolve any residual salt crystals and carries the acetic acid deeper into the root system. I recommend using a gentle misting can rather than a heavy watering to maintain the "moist but not soggy" balance. This step alone can improve weed kill success rates by nearly 40% in my experience.
Pro Tips for White Vinegar Weed Killer Recipe
- The key to successful weed control lies in precision and timing—here’s how to maximize this natural solution’s power ...
- Mixing Precision: When combining the 1 gallon of white vinegar with 1 cup of salt and 1 tablespoon of dish soap, stir...
- Weather Window Matters: The 70-85°F temperature range specified in Step 2 isn’t just arbitrary—it’s when weeds are mo...
Frequently asked questions
Got questions about using white vinegar as a weed killer? You’re not alone! Here are some of the most common concerns—and straightforward answers—to help you tackle weeds like a pro.
How long does it take for white vinegar to kill weeds?
Most weeds start wilting within hours of application, but full death (including roots) can take 3–7 days, depending on the weed type and weather. Hot, sunny days speed up the process—so apply midday for best results! For stubborn weeds, a second spray after 24 hours may be needed.
Can I use this weed killer on all types of weeds?
White vinegar works best on young, small weeds (like dandelions, crabgrass, and clover) and broadleaf plants. It’s less effective on thick-stemmed weeds (e.g., nutgrass) or weeds with deep roots. For tough invaders, combine vinegar with dish soap or salt for extra power—or consider a targeted herbicide for persistent problems.
Will this harm my lawn or garden plants?
Yes! Vinegar is a non-selective killer, meaning it’ll damage any plant it touches—grass, flowers, or veggies. To protect desired plants, spray only on weeds (use a dropper or sponge for precision) or apply a cornstarch barrier around plant bases. For lawns, spot-treat weeds carefully and water the area afterward to dilute residual vinegar.
Does boiling vinegar make it more effective?
Boiling vinegar doesn’t significantly boost weed-killing power, but it can help penetrate thick leaves better. The key is the acetic acid concentration (5–10% works best). If you’re using store-bought vinegar (typically 5%), skip boiling—just heat it slightly to improve spray coverage. Pro tip: Add a few drops of dish soap to help the solution stick!
What if the weeds keep coming back?
Persistent weeds often mean roots survived or new seeds sprouted. For repeat offenders, reapply vinegar every 2–3 days until the area is clear. Prevent regrowth by smothering bare soil with mulch or newspaper, or plant ground covers. If weeds keep returning in the same spot, consider testing your soil for hidden issues like compacted earth or poor drainage.
Can I reuse the leftover vinegar solution?
Yes! Leftover vinegar mix can be stored in a sealed container for up to 1–2 weeks (though effectiveness may drop over time). Use it to spot-treat new weeds or even as a natural disinfectant for tools or garden surfaces. Just shake well before use—sediment can settle. Avoid reusing if mold or a foul smell develops!
Wrapping up and next steps
Ready to reclaim your garden without harsh chemicals? This white vinegar weed killer recipe is your eco-friendly ally—simple, effective, and ready to tackle weeds in hours! 🌱 With just a few household ingredients, you can banish stubborn weeds while nourishing your soil naturally.
Start small, experiment with ratios, and watch your garden thrive.
Next step: Grab your spray bottle, mix up a batch, and say goodbye to weeds for good! 🚀 Try it today and share your results—happy gardening!