
Mower
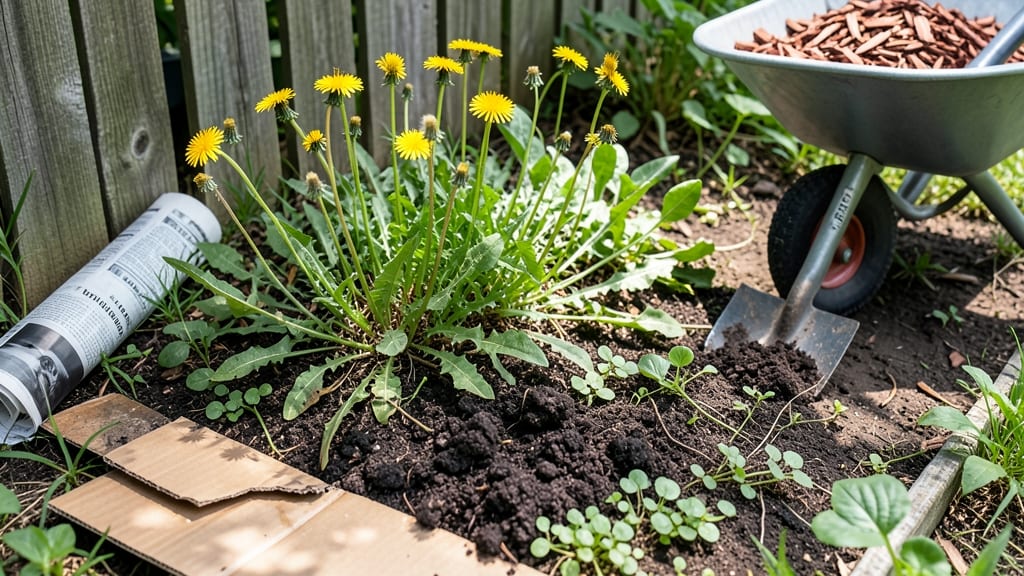
Sheet mulching for weeds is the lazy gardener's secret weapon—no digging, no chemicals, just layers that smother weeds while building soil. 🌱 I spent years wrestling with stubborn creeping Charlie until I discovered how a simple cardboard-and-mulch sandwich could turn a weed jungle into a thriving garden bed in just 3 months.
The magic happens in the layers: cardboard blocks light, mulch retains moisture, and compost feeds the soil. You’ll cut down on watering, eliminate tilling fatigue, and create a weed-free zone that actually improves your garden’s health over time. My 20-square-foot path now stays weed-free all summer with minimal effort.
This method works in flower beds, vegetable gardens, or even under fruit trees. The best part? You’re using materials you already have—cardboard, leaves, grass clippings, or wood chips. No fancy tools, no backbreaking labor, just a stack that does the work for you.
Ready to transform that weed patch into garden gold? Let’s break down the exact layers and timing that make this method foolproof—plus how to troubleshoot the few hiccups that might pop up.
📚 In This Guide
- What you need
- Instructions
- Tips and common mistakes
- Wrapping up and next steps
What you need
- ● Cardboard or thick paper: 1–2 layers (unbleached, no tape or staples). Cut to fit your garden bed (e.g., 3 ft x 4 ft for a small plot).
- ● Compost or aged manure: 2–4 inches (homemade or store-bought). Aim for rich, crumbly texture.
- ● Straw or dry leaves: 3–6 inches (straw is ideal; avoid grass clippings—they can mat down).
- ○ Wood chips or shredded bark: 2–3 inches (optional but helps retain moisture and suppress weeds long-term).
- ● Garden fork or shovel: For aerating soil and breaking up clumps.
- ● Rake: To smooth layers and remove debris.
- ● Scissors or box cutter: For trimming cardboard to size.
- ● Watering can or hose: To dampen layers (especially cardboard).
- ● Newspaper: If cardboard isn’t available (avoid glossy ink).
- ● Compost tea or mycorrhizal fungi: Boosts soil health.
- ● Landscape fabric (with holes): For weedy areas with aggressive roots (e.g., nutgrass).
- ● Mulch volcano blocker: Keeps wood chips from piling up against plant stems.
Step-by-step guide to sheet mulching for weeds
Here's how to create a weed-free garden bed that breaks down over time into rich compost.
🌱 Step 1: Choose and Clear Your Mulching Area
Select a space where you want to eliminate weeds permanently—this method works best on small to medium beds. Remove any existing plants or weeds by hand or with a hoe, being careful not to bury them too deeply. I like to pull weeds when the soil is moist so they come out easily without breaking at the roots.
Rake the area smooth and remove any large rocks or debris. The goal is a clean, flat surface so your layers will lie evenly. If your soil is compacted, spend a few minutes loosening the top 2-3 inches with a broadfork or garden fork to help water and nutrients penetrate later.
🪴 Step 2: Build Your Layered Barrier
Start with a 3-4 inch layer of cardboard (no tape or staples) or thick newspaper as your base. Overlap edges by 4-6 inches to prevent weeds from poking through. Wet the cardboard thoroughly—this prevents it from blowing away and helps it break down faster. I use a hose on gentle spray to avoid tearing the material.
Next, add a 2-3 inch layer of coarse material like wood chips or straw to improve drainage. This layer prevents the cardboard from smothering the soil completely while still blocking light. Top this with a 1-2 inch layer of finished compost to introduce nutrients. The compost will gradually mix into the soil as the mulch decomposes.
💧 Step 3: Add Moisture and Final Mulch Layer
Water the entire area thoroughly until the top 6 inches of soil feels damp. This helps the cardboard break down and encourages microbial activity that will convert the mulch into compost. I like to use a soaker hose for even distribution—it saves water and prevents runoff.
Finish with a 3-4 inch layer of finished compost or a mix of compost and straw. This top layer will prevent the mulch from drying out and provides immediate nutrients. Keep the surface slightly uneven—this helps water pool in low spots and prevents erosion. Within 3-6 months, you'll have a weed-free bed ready for planting.
☀️ Step 4: Maintain Your Mulched Bed
Check your mulched area every 2-3 weeks to ensure weeds aren't sprouting through gaps. If you see any weeds emerging, pull them immediately before they establish roots. Keep the top layer moist but not soggy—water when the surface feels dry to the touch.
After 6-12 months, the cardboard will have decomposed completely, and the mulch will have turned into rich, fluffy soil. You can plant directly into this improved soil without needing to till. The key is patience—this method works best when you let the layers break down naturally over time.
Tips & tricks for perfect sheet mulching
Let me save you the trial-and-error of figuring out what works best with this method.
Layer Order Matters: The sequence of layers is intentional—cardboard blocks light, coarse material prevents smothering, and compost adds nutrients. I've seen people skip the coarse layer and end up with compacted soil that doesn't improve over time. That 2-3 inch layer of wood chips or straw is what keeps air flowing while still blocking weeds.
Cardboard Prep is Non-Negotiable: Remove ALL tape and staples before using cardboard—those materials won't break down and can actually harm your soil. I like to tear cardboard into large sheets (about 3-4 feet square) rather than using whole boxes. This makes overlapping edges easier and prevents gaps where weeds might sneak through. Wet it thoroughly before adding other layers—dry cardboard will blow away or take forever to decompose.
Seasonal Timing Tip: Spring is actually the best time to sheet mulch because you're working with moist soil that's already warming up. In hotter months, you'll need to water more frequently to keep everything damp. If you're doing this in fall, consider adding an extra inch of compost to the top layer—it'll protect your soil through winter and give you a head start in spring.
Planting Ready Soil Check: When you're ready to plant after 6-12 months, do this quick test: Stick your finger into the mulched area. If it feels like rich, crumbly soil (not like you're pushing through layers), it's ready. If you still feel distinct layers, give it another month or two. I've seen people rush this and end up with uneven planting conditions—patience pays off with better plant establishment.
Pro Tips for Sheet Mulching For Weeds
- Let me save you the trial-and-error of figuring out what works best with this method.
- Layer Order Matters: The sequence of layers is intentional—cardboard blocks light, coarse material prevents smotherin...
- Cardboard Prep is Non-Negotiable: Remove ALL tape and staples before using cardboard—those materials won't break down...
Frequently asked questions
How long does sheet mulching take to kill weeds?
Sheet mulching typically suppresses weeds within 4–8 weeks, depending on layer thickness and local climate. In hot, dry conditions, weeds may die faster, while cooler or wetter areas may take longer. Patience is key—consistent moisture helps speed up decomposition and weed suppression.
When is the best time of year to sheet mulch?
The ideal time is early spring or late fall, when weeds are actively growing but not yet dominant. Avoid mulching in extreme heat (which can dry out layers) or freezing temperatures (which slows decomposition). If weeds are already out of control, apply mulch anytime—just expect slower results.
Can I use sheet mulching on a budget?
Skip expensive materials like cardboard and use free alternatives like newspaper, fallen leaves, or grass clippings. Even a thin layer of mulch (e.g., straw or wood chips) over bare soil can reduce weeds. Repurpose yard waste or compost scraps to cut costs further.
Will sheet mulching attract pests like rodents or insects?
Not if done correctly! Avoid using treated wood or meat scraps, which can draw pests. Stick to organic layers (cardboard, leaves, straw) and keep mulch 3–6 inches thick to deter burrowing. If rodents are a concern, add a wire mesh barrier under the mulch in problem areas.
What if weeds keep growing through the mulch?
Weeds may sprout if layers are too thin or gaps exist. Double-check for holes in cardboard/newspaper and add more mulch (aim for 4+ inches). For stubborn weeds, hand-pull them before mulching or top-dress with compost or straw to smother regrowth. Persistence pays off!
Wrapping up and next steps
Sheet mulching is a game-changer for gardeners tired of battling weeds the old-fashioned way! By layering organic materials, you’re not just suppressing weeds—you’re building healthier soil and reducing long-term effort. 🌱 This method is eco-friendly, cost-effective, and perfect for beginners or seasoned green thumbs alike.
Ready to transform your garden? Start small—pick one bed or patch—and give it a try! Before you know it, you’ll be saving time, cutting tools, and enjoying a lush, weed-free space—naturally. Happy mulching!