
Landscaping
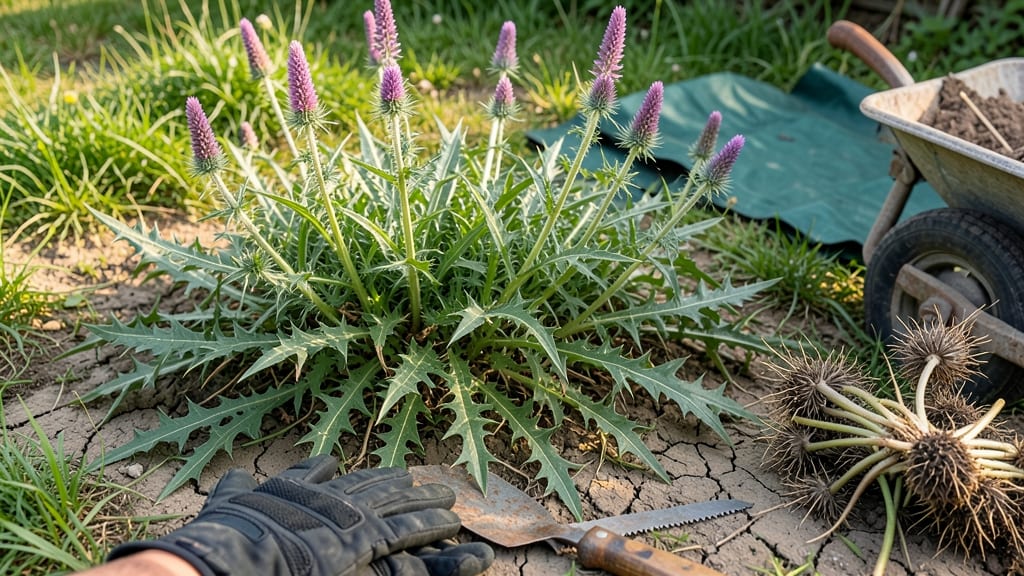
Spiky weeds in your yard aren’t just annoying—they’re like tiny landmines waiting to ruin your mower blades and your peace of mind. 🌱 I’ve spent years battling nutgrass, thistles, and crabgrass, and the root-cutting hack I’m about to share has finally given me the upper hand.
No more digging or pulling—just a clean, weed-free yard with minimal effort.
The secret lies in cutting those stubborn roots deep enough to starve the plant without letting it regrow. You’ll need a sharp spade or a weed-cutter tool, gloves (trust me, you’ll want them), and a clear sunny day.
This method works on almost any spiky weed, and the best part? You can do it in under an hour for a small yard. No chemicals, no waiting—just results.
By the time you’re done, you’ll have a yard that’s safe to walk barefoot in, and those pesky weeds won’t dare come back. The roots decompose, leaving your soil healthier, and you’ll finally be able to enjoy your lawn without flinching every time you step outside.
Plus, your neighbors will be jealous of how effortlessly yours looks.
This hack works year-round, but early spring or late fall are the best times to tackle it—when weeds are actively growing but before they’ve had a chance to spread seeds.
And if you’ve got kids or pets, this is the safest way to handle weeds without exposing them to harsh chemicals. Let’s get those spiky invaders out for good!
📚 In This Guide
- What you need
- Instructions
- Tips and common mistakes
- Wrapping up and next steps
What you need
- ● Heavy-duty gloves (2 pairs): Opt for leather or thick fabric gloves to protect against thorns and sharp edges.
- ● Long-sleeved shirt and pants: Wear sturdy, closed-toe footwear and long sleeves to avoid scratches.
- ● Pruning shears or hedge clippers: Choose sharp, bypass-pruning shears for clean cuts (avoid dull blades—they tear plants).
- ● Shovel or digging fork: A sturdy, flat-head shovel or landscape fork works best for root removal.
- ● Wheelbarrow or sturdy trash bags: For hauling weeds and debris away (aim for 30+ gallon capacity or a heavy-duty contractor bag).
- ● Garden hose with nozzle: A soaker nozzle or adjustable spray tip helps rinse tools and wet soil for easier digging.
- ● Vinegar (20-30% acetic acid) or herbicide: White vinegar (undiluted) or a glyphosate-based herbicide (follow label instructions).
- ○ Rake (optional but helpful): A bow rake or leaf rake for clearing loose debris before digging.
- ● Knee pads: For comfort during long digging sessions.
- ● Face mask or respirator: If handling large quantities of weeds (reduces dust inhalation).
- ● Garden twine or burlap sacks: For bundling weeds before disposal (prevents seeds from spreading).
- ● Post-emergent herbicide sprayer: If treating a large area, a backpack sprayer (1-3 gallon capacity) makes application easier.
- ● Compost bin or mulch: For repurposing weed-free soil or organic matter.
Step-by-Step instructions for eliminating spiky weeds permanently
Here's the method I use to banish those painful weeds for good—no harsh chemicals, just smart cuts and patience.
🌱 Step 1: Identify and Mark the Weed Roots
First, you'll need to spot where the weeds are growing most aggressively. Look for clusters of spikes or leaves—these are your targets. I like to use a white spray paint (the kind for marking grass) to outline the root zones. This helps you see exactly where to cut later. Paint a 2-inch wide band around each weed cluster.
Don't worry about painting the whole yard—just focus on the problem areas. The paint will wash off with rain or watering in a few days. If you miss a spot, the weeds will grow back, so take your time here. You'll know you're ready when you've marked all visible weed clusters in your yard.
✂️ Step 2: Cut the Roots at the Right Depth
Now grab a sharp spade or weed cutter—you want to make clean cuts, not tear the roots. Dig 4-6 inches deep along the painted lines, slicing through the roots horizontally. This is where the magic happens: cutting the roots prevents the weed from sending up new shoots. I like to work in small sections, about 2 feet by 2 feet, so I don't miss any spots.
If the roots are thick, like with bindweed or nutgrass, you might need to cut deeper—up to 8 inches. You'll feel resistance as you cut through the tougher roots. After cutting, leave the soil exposed for now. You don't need to remove the roots; just severing them stops the weed from growing back.
☀️ Step 3: Monitor and Repeat for Full Eradication
Over the next 2-4 weeks, watch for any new spikes popping up. If you see fresh growth, that means you missed a root section. Grab your spade again and cut those new shoots at the base—right where they meet the soil. This is the most critical step, so don't skip it. I check my yard every 3-4 days during the first month to catch any regrowth early.
Once you've gone 4-6 weeks without new spikes, you can consider that area weed-free. The key is consistency—keep an eye out for any stubborn weeds that might try to sneak back. If you're dealing with a large yard, tackle one section at a time to avoid missing spots.
💧 Step 4: Strengthen the Soil to Prevent Regrowth
After you've cut the roots, your soil might look a little bare. This is your chance to improve it! Spread a 2-inch layer of mulch (like wood chips or straw) over the treated areas. Mulch helps smother any remaining weed seeds and keeps the soil healthy. Water it lightly so the mulch settles in place.
For extra protection, consider planting ground covers or grass in the areas where weeds were worst. Healthy plants crowd out weeds naturally. I've found that clover or creeping thyme work great in shady spots, while fescue grass holds up well in sunny areas. Just give the soil a few weeks to recover before planting anything new.
Tips & tricks for perfect weed eradication
Here's what nobody tells you about making this method work the first time—and every time after.
Precision Marking: When you paint that 2-inch band around weed clusters in Step 1, use a ruler to keep lines straight. I learned this the hard way after missing spots because my freehand painting was uneven. A small piece of cardboard with a straight edge works great for guiding the spray paint. This ensures you don't accidentally cut healthy grass or miss stubborn roots later.
Tool Selection: Don't settle for just any spade in Step 2. A sharp, flat-bladed spade or a weed cutter with a serrated edge makes all the difference. I've tried regular garden spades and they just don't cut cleanly enough. The goal is to sever roots completely—anything less and you'll get regrowth. Rent one from a hardware store if you don't want to buy; they're worth the investment for tough weeds like nutgrass.
Regrowth Watch: During your 2-4 week monitoring in Step 3, set a phone reminder every 3-4 days. I used to rely on memory and missed new shoots that popped up between checks. Write the date on a stake when you first treat an area—this gives you a clear reference point for measuring progress. Any new growth means you need to cut again immediately at the base.
Mulch Application: In Step 4, don't just dump mulch randomly. Create a 2-inch layer that's slightly thicker (about 3 inches) around the edges where you cut roots. This extra coverage prevents any missed root fragments from sprouting. I use straw mulch because it breaks down slowly and doesn't compact like wood chips, giving your soil time to recover properly.
Pro Tips for Spiky Weeds Yard
- Here's what nobody tells you about making this method work the first time—and every time after.
- Precision Marking: When you paint that 2-inch band around weed clusters in Step 1, use a ruler to keep lines straight.
- Tool Selection: Don't settle for just any spade in Step 2.
Frequently asked questions
What are the most common spiky weeds I’ll find in my yard?
Spiky weeds like crabgrass, nutgrass, bindweed, and stinging nettles are the usual culprits. These invaders thrive in sunny, well-drained areas and can spread quickly if left unchecked. Identifying them early makes removal easier—so grab a magnifying glass (or your phone’s camera) and compare them to local weed databases!
How long does it take to see results after cutting the roots?
With root-cutting, you’ll notice a difference within 1–2 weeks as the weeds weaken and new growth slows. For stubborn patches, repeat the process every 2–3 weeks until the area is clear. Patience pays off—consistency is key to preventing regrowth!
Is a root-cutting tool safer than herbicides for pets/kids?
Root-cutting tools (like dandelion diggers or weed wrenches) are chemical-free and safe for families with pets or children. Herbicides, even organic ones, can linger in soil or harm curious critters. Plus, you’ll avoid the fumes and wait times—just grab your gloves and get to work!
Can I reuse the same tool for all types of spiky weeds?
While many root-cutting tools (like hula hoop weed pullers or shovels) work for most weeds, sterilize between uses. Rinse with soapy water or disinfect with rubbing alcohol to prevent spreading diseases. For thorny weeds (e.g., bindweed), a pruner with long handles is safer—your hands will thank you!
What’s the best time of year to tackle spiky weeds?
Spring and fall are prime times—weeds are actively growing but not yet seeded. Avoid peak summer heat (which stresses plants) and winter dormancy (when roots are harder to cut). Early morning or late afternoon work sessions minimize sun exposure, and you’ll avoid disturbing beneficial insects like bees!
What if weeds keep coming back after I remove them?
Persistent weeds often mean hidden roots or seeds in the soil. After cutting, smother the area with cardboard or mulch for 4–6 weeks to block sunlight. For tough spots, try vinegar-based sprays (mix 1 gallon vinegar + 1 oz dish soap) as a natural follow-up. Prevention is easier than cleanup!
Wrapping up and next steps
Saying goodbye to spiky weeds doesn’t have to be a battle—it’s all about the right technique!
By cutting those stubborn roots at the perfect time and depth, you’re not just removing weeds; you’re reclaiming your yard with confidence. 🌱✨ Pro tip: Consistency is key, so grab your tools and tackle those roots before they take over again!
Ready to transform your yard? Start small—pick a section, follow the steps, and watch your hard work pay off. Next up: Share your weed-free wins with fellow gardeners or explore eco-friendly mulching tips to keep weeds at bay long-term!