
Pests and Diseases
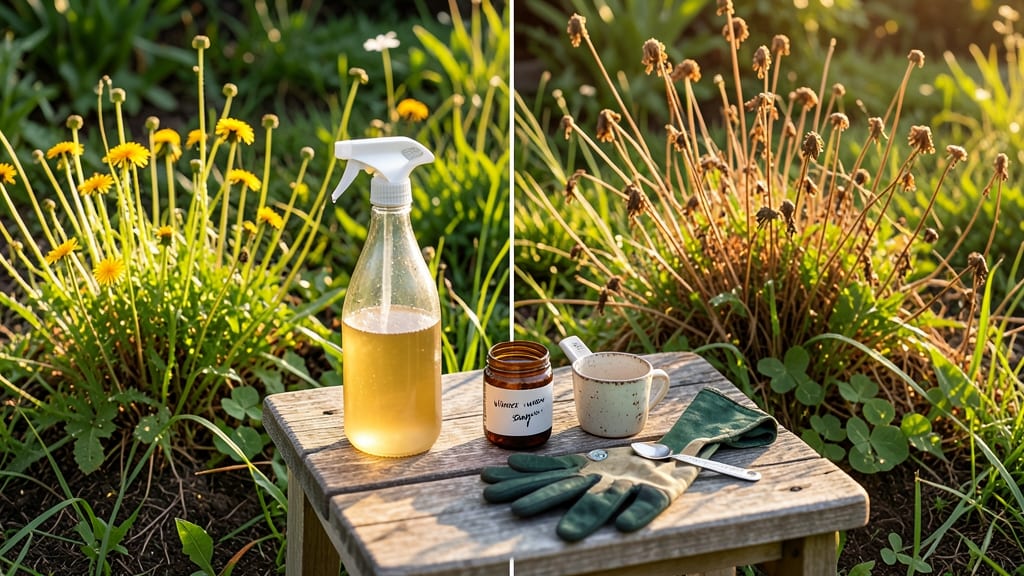
Vinegar kills weeds at the root in 24 hours—no digging, no backbreaking work, just a spray bottle and some kitchen vinegar. 🌱 I’ve used it to clear stubborn patches of crabgrass and chickweed from my driveway cracks, and the results are fast, satisfying, and chemical-free.
The key is getting the concentration right so you don’t accidentally kill your prized flowers or grass. This method works best on young, actively growing weeds, not deep-rooted perennials like dandelions.
You’ll need white vinegar (5% acetic acid), a spray bottle, and a sunny day for best results—vinegar’s acidity works best in direct sunlight. Just mix equal parts vinegar and water, add a few drops of dish soap to help it cling, and spray until the weeds are drenched.
Within 24 hours, you’ll see wilting, and by day three, those weeds will be crispy and gone. The smell fades quickly, and you can walk on the area right away. Just avoid spraying desirable plants—vinegar doesn’t discriminate, and your gardenias or tomatoes won’t thank you for a vinegar bath.
For tougher weeds or larger areas, repeat the process every 3-5 days until the roots give up. Pair this with mulch or landscape fabric to prevent regrowth, and you’ll have a weed-free zone that lasts all season. No more pulling, no more frustration—just a simple spray and watch them vanish.
📚 In This Guide
- What you need
- Instructions
- Tips and common mistakes
- Wrapping up and next steps
What you need
- ● White vinegar (5% to 20% acetic acid): 1 gallon (3.8 liters) – Higher acidity (10%+) works faster but may require dilution for delicate plants.
- ● Spray bottle or garden sprayer: 16–32 oz (0.5–1 liter) capacity – A pump sprayer ensures even coverage for large areas.
- ○ Dish soap (optional but recommended): 1–2 teaspoons – Reduces surface tension so vinegar sticks to weeds.
- ● Water (for dilution, if needed): 1–2 cups (for 10% vinegar) – Adjust ratio based on vinegar strength.
- ● Protective gear: Gloves (nitrile or rubber) – Vinegar can irritate skin.
- ● Eye protection (safety goggles) – Especially if spraying near eyes.
- ● Markers or flags: Small stakes or chalk – To mark treated areas and avoid overspray on desired plants.
- ● Salt (for tough weeds): 1 cup – Adds extra killing power (use sparingly near plants).
- ● Spray nozzle attachment: Adjustable for precision – Great for targeting small weeds.
- ● Plastic sheeting: Lay down to protect nearby plants or soil – Especially useful for driveway cracks or sidewalks.
- ● Reusable spray bottle: For small, targeted applications – Eco-friendly and easy to refill.
Step-by-Step guide to using vinegar for weeds
Here's how I tackle stubborn weeds with vinegar—fast, natural, and effective.
🌱 Step 1: Choose the Right Vinegar and Time of Day
Use undiluted white vinegar (5% acetic acid) for best results—it's stronger than apple cider vinegar and kills weeds faster. Fill a 1-gallon spray bottle (or larger, depending on your weed patch) and fill it halfway with vinegar. The key is applying it on a sunny day when weeds are actively growing. Morning or late afternoon works best—avoid midday heat, which can evaporate the vinegar before it works.
I like to wait until weeds are damp from dew or after a light rain. The moisture helps the vinegar cling to leaves and absorb more effectively. If weeds are bone-dry, spray lightly with water first to prep them. This step ensures the vinegar sticks and penetrates quickly.
🌿 Step 2: Apply Vinegar Directly to Weeds
Hold the spray bottle 6-8 inches above the weeds and apply until the leaves are saturated but not dripping. Focus on the leaves and stems—avoid spraying soil or desirable plants nearby. A light mist won’t cut it; you need full coverage for the acetic acid to work its magic. I like to spray in small sections (about 2 feet by 2 feet) so I don’t miss any spots.
Here’s the thing—don’t overspray. Vinegar is non-selective, meaning it’ll kill anything it touches. If you’re working near flowers or veggies, use a popsicle stick or cardboard as a barrier to shield them. Watch for wilting within hours—that’s your sign it’s working!
⏰ Step 3: Wait and Monitor for Results
Within 24 hours, you’ll see weeds wilting and turning brown. The acetic acid disrupts cellular functions, causing the plant to dry out from the inside. By 48 hours, most weeds will be crispy and ready to pull. I like to wait until they’re completely brown and brittle before removing them—this prevents regrowth from the roots.
If any weeds survive after 48 hours, give them another round of vinegar. Some tough weeds like dandelions or clover might need 2-3 applications, spaced a few days apart. Just remember: patience is key. Rushing the process can leave behind stubborn root fragments that sprout back.
✂️ Step 4: Remove Dead Weeds and Prevent Regrowth
Once weeds are fully dead, pull them by the roots to prevent seeds from spreading. Use a garden fork or trowel to loosen stubborn roots if needed. I like to compost the dead weeds—they’ll break down quickly and won’t reseed. After clearing the area, water the soil lightly to help beneficial microbes recover.
To keep weeds at bay, mulch the area with straw, wood chips, or even cardboard topped with mulch. This blocks sunlight, which weeds need to germinate. Reapply vinegar weekly if new weeds pop up—consistency is the secret to long-term control.
Tips & tricks for vinegar weed control
Here's what nobody tells you about making vinegar weed killer work like a dream—no more missed spots or wasted effort!
Timing is Everything: The 24-hour window is your magic timeframe! Apply vinegar when weeds are actively growing and the sun isn't at its peak—early morning or late afternoon gives you the best results. I've found that waiting for dew-covered weeds in the morning makes the vinegar cling like glue, ensuring maximum absorption. That first 24 hours is when the acetic acid really starts breaking down the plant cells from the inside out.
Precision Application: In Step 2, when you're spraying, think of yourself as a botanical surgeon. The 6-8 inch distance and "saturated but not dripping" rule are non-negotiable—this ensures the vinegar penetrates the leaves without running off. I like to use a spray bottle with a fine mist nozzle for better control. For really stubborn weeds, I'll give them two quick passes: first to wet the undersides of leaves, then again for the tops. This double application makes all the difference with thick-leaved weeds like dandelions.
Weather Watch: Rain is actually your friend before applying vinegar! If you're working on bone-dry weeds, give them a light mist with water first—this helps the vinegar stick and work more effectively. But here's the kicker: don't apply vinegar if rain is forecast within 24 hours. The rain will dilute the acetic acid before it can do its job. I check the weather app before every treatment session—it's saved me from wasted effort more times than I can count.
Targeted Strategy: When you're working near desirable plants, think like a surgeon. Use popsicle sticks or cardboard as barriers—this creates a physical shield that prevents vinegar from drifting. I've even made DIY shields from old plastic lids by cutting them in half. The key is to protect your plants while still getting full coverage on the weeds. This precision work in Step 2 prevents collateral damage and makes the whole process more effective.
Pro Tips for Vinegar For Weeds
- Here's what nobody tells you about making vinegar weed killer work like a dream—no more missed spots or wasted effort!
- Timing is Everything: The 24-hour window is your magic timeframe!
- Precision Application: In Step 2, when you're spraying, think of yourself as a botanical surgeon.
Frequently asked questions
Got questions about using vinegar to kill weeds? You’re not alone!
Here are answers to the most common queries—from safety to speed—so you can tackle those stubborn weeds with confidence.
How long does it take for vinegar to kill weeds?
Most weeds wilt within hours after application, but full death (including roots) can take 24–72 hours for annuals and up to a week for perennials. For best results, reapply if rain is forecasted within 24 hours.
Can I use any type of vinegar for weeds?
Nope! Only white vinegar (5–10% acetic acid) or household vinegar (4–8%) works well. Apple cider vinegar (5%) is milder and may require multiple applications. Avoid industrial-strength vinegar (30%+)—it’s unsafe for plants and skin.
Will vinegar harm my lawn or garden plants?
Yes, vinegar is non-selective—it kills everything it touches, including grass, flowers, and veggies. For targeted weed control, use a spray bottle with a narrow nozzle or apply vinegar only to weeds on sunny days. Wait 24 hours before watering.
How often should I reapply vinegar to weeds?
Reapply every 7–10 days for stubborn weeds or after rain washes away the solution. For new weeds, spot-treat as soon as they sprout. Pro tip: Add dish soap (1 tsp per cup of vinegar) to help it stick!
Is vinegar safe for pets or kids if used outdoors?
While vinegar itself isn’t toxic, its high acidity can irritate skin or eyes if splashed. Keep pets and kids away until the solution dries (usually 30–60 minutes). If weeds are near walkways, opt for boiling water or corn gluten meal as a pet-friendly alternative.
What if vinegar doesn’t kill the weeds?
If weeds survive, they may be too large or deeply rooted. Try these fixes:
- Increase strength: Mix 1 gallon vinegar + 1 cup salt + 1 tbsp dish soap (use sparingly—salt can harm soil).
- Reapply on sunny days (heat enhances effectiveness).
- Smother first: Cover weeds with cardboard for a week to weaken them before spraying.
Wrapping up and next steps
Using vinegar for weeds is a natural, budget-friendly way to reclaim your garden without harsh chemicals! 🌱 Whether you're tackling stubborn crabgrass or pesky clover, this simple solution delivers fast results—often in just 24 hours.
The key is consistency, proper dilution, and timing, so don’t hesitate to give it a try.
Ready to take control? Grab your spray bottle, pick a sunny day, and transform your yard effortlessly. Start small, observe the magic happen, and soon you’ll be enjoying a weed-free paradise—naturally! 🌿