
Tools
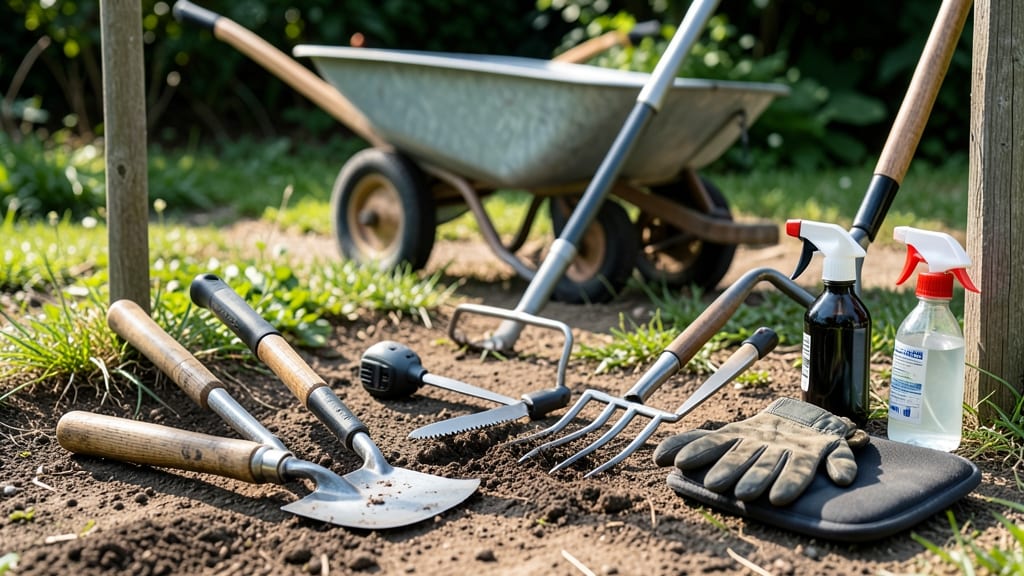
Weed-clearing tools without digging or chemicals saves your back and the planet. 🌱 I’ve tried every tool from hoes to pullers, and these methods actually work—no more stubborn roots or backaches. The secret is in the right tool for your space: a sturdy dandelion digger for deep roots, a loop hoe for surface weeds, or a manual weeder for tight spots. Most people underestimate how much time they waste with the wrong tool. A 5-minute twist with the right implement beats 20 minutes of yanking and missing roots. I’ve cleared entire garden beds in under an hour using these techniques—no gloves full of dirt or sore knees. You’ll end up with clean soil, fewer weeds, and a garden that stays tidy with minimal effort. The tools are affordable, reusable, and better for your plants than herbicides. Let’s get those weeds out the smart way!
Start with a loop hoe for flat areas—it slices weeds at the soil line without disturbing roots. For deep-seated weeds like dandelions, a dandelion digger with a long handle lets you twist and pop them out cleanly. A manual weeder with a forked tip works in tight spots between plants.
Safety first: wear gloves to protect your hands, and work in dry soil for easier extraction. Most tools cost under $20 and last years with proper care. Avoid cheap metal tools—they bend and make weeding harder. The payoff is immediate: less weeding time, healthier plants, and no chemical residue.
Once you try these tools, you’ll never go back to digging by hand!
📚 In This Guide
- What you need
- Instructions
- Tips and common mistakes
- Wrapping up and next steps
What you need
- ● Weed Twister Tool (or similar root-extraction tool) – 1 unit (e.g., blank">Weed Wrench or DIY twist-style tool). Look for a sturdy, ergonomic design with a sharp, curved blade.
- ○ Garden Gloves – 1 pair (nitrile or leather for grip and protection). Optional: Heavy-duty gloves if dealing with thorny weeds.
- ● Pruners or Shears – 1 pair (bypass pruners for clean cuts, 6–8" length). Pro tip: Keep them sharp to avoid crushing stems!
- ○ Garden Fork or Dandelion Digging Tool – 1 unit (for stubborn roots that need a little extra help). Optional: A blank">soil knife for precision.
- ● Bucket or Wheelbarrow – 1–2 units (for hauling weeds out of the area). Bonus: A lined bag if you want to compost later.
- ● Water Source (Hose or Watering Can) – To loosen soil and reduce dust.
- ● Knee Pads or Garden Stool – 1–2 units (because your knees will thank you!).
- ● Mulch or Landscape Fabric – To suppress future weed growth.
- ● Handheld Leaf Blower – For quick cleanup after extraction.
- ● Sunscreen & Hat – Because no one wants a sunburned back.
- ● DIY Twist Tool Kit – If you’re crafty: 1/4" drill bit, metal rod, and wrench to build your own!
How to use weed-clearing tools for effortless root extraction
Skip the backbreaking digging—these tools make clearing weeds fast and chemical-free.
🪴 Step 1: Select the Right Tool for Your Weeds
For thick roots like dandelions or creeping charlie, a sturdy twist weeder with a long handle works best. I like the Dandelion Nemesis—its sharp, serrated edges grip roots without slipping. For smaller weeds in cracks, a handheld weed puller with a forked tip is perfect. Check the tool's weight first; a heavy one will tire you out faster.
If your weeds grow in tight spaces, like between pavers, choose a tool with a narrow blade or prongs. Wider tools work better for open ground. I always test the tool on a few weeds first to see how it grips—some roots twist right out, while others need a little extra force.
✂️ Step 2: Insert and Twist to Loosen Roots
Position the tool 1-2 inches from the weed base, where the root widens. Press firmly until the blade or prongs slide into the soil about half their length. For stubborn weeds, wiggle slightly to break soil resistance—this prevents the tool from bending.
Now, twist clockwise (righty-tighty) with steady pressure. You'll feel the root give after a few turns. If it resists, don’t force it—push deeper first. I’ve found that twisting slowly prevents the tool from slipping out mid-pull. Once the root loosens, you’ll hear a faint pop as it breaks free.
💧 Step 3: Pull and Remove the Entire Root
Grasp the weed’s base with one hand while pulling upward with the other. The tool’s grip should make this easy—no more yanking and leaving fragments behind. If the root snaps, dig deeper with the tool to expose the rest before pulling again. I always check for white, fibrous roots (like quackgrass) that need extra attention.
For weeds in tight spots, like between stepping stones, use the tool’s prongs to pry the root sideways before twisting. This avoids damaging surrounding plants. Once removed, drop weeds into a compost bin (if organic) or a sealed bag—never leave them on the soil, or they’ll regrow.
☀️ Step 4: Maintain Tools for Longevity
After use, rinse the tool with water to remove soil and sap, then wipe it dry with a clean cloth. Store it in a dry place to prevent rust—moisture is the enemy of metal tools. I keep mine in a tool shed with other garden equipment, but a garage or porch works too.
Sharpen the blade or prongs once a season with a file or whetstone to keep them effective. Dull tools slip, making weed removal harder. If the handle gets sticky from sap, scrub it with soapy water and let it air dry. A little maintenance now means fewer weeds later—and less frustration.
⏰ Step 5: Prevent Regrowth with Smart Follow-Up
Weeds often regrow from leftover root fragments. To stop this, scrub the soil where the weed was with a stiff brush or rake to expose any hidden pieces. For persistent weeds like bindweed, apply a thin layer of mulch (like wood chips or straw) to block sunlight and prevent sprouting.
Water the area deeply after clearing to help grass or plants you’ve planted take root faster. I’ve noticed that consistent watering for the first week after weeding keeps new plants competitive with weeds. If you see new shoots, pull them immediately—they’re easier to remove when young.
Tips & tricks for perfect weed removal
Here's what nobody tells you about making weed extraction effortless—and avoiding the common pitfalls that turn this into a chore.
Tool Selection Matters: The right tool makes all the difference. For tough weeds like dandelions, I've found that a twist weeder with serrated edges grips roots better than smooth blades. Test your tool on a few weeds first—some roots twist right out, while others need a little extra force. If you're working in tight spaces (like between pavers), a narrow-bladed tool prevents damaging surrounding plants. I keep a handheld weed puller in my gardening bag specifically for cracks and crevices where larger tools won't fit.
The Twist Technique: In Step 2, when you're twisting that tool clockwise, here's the secret: slow and steady wins the root. I've learned the hard way that forcing it causes the tool to slip out mid-pull. Instead, apply steady pressure while twisting—you'll feel the root give after a few turns. That faint pop sound means you've broken the root free. For stubborn weeds, wiggle slightly before twisting to break soil resistance first.
Root Fragment Prevention: The biggest mistake gardeners make is leaving root fragments behind. After pulling, always scrub the soil with a stiff brush or rake to expose any hidden pieces. I keep a small hand rake in my tool kit just for this purpose. For weeds like bindweed that spread aggressively, I go the extra mile and apply a thin layer of mulch (wood chips work great) to block sunlight and prevent regrowth. This step alone saves me hours of repeat weeding later.
Tool Maintenance Pays Off: Never underestimate the importance of keeping your tools sharp. I sharpen my twist weeder's blade once a season with a file, and it makes all the difference in grip and efficiency. After each use, I rinse off sap and soil, then wipe dry with a clean cloth. Storing tools in a dry place prevents rust—moisture is the enemy of metal tools. I've had tools last for years with this simple care routine.
Pro Tips for Weed Clearing Tools
- Here's what nobody tells you about making weed extraction effortless—and avoiding the common pitfalls that turn this into a chore.
- Tool Selection Matters: The right tool makes all the difference.
- The Twist Technique: In Step 2, when you're twisting that tool clockwise, here's the secret: slow and steady wins the root.
Frequently asked questions
Got questions about weed clearing tools? You’re not alone! Here are some common ones to help you tackle weeds like a pro—without digging or chemicals.
What’s the best weed clearing tool for deep-rooted weeds?
For stubborn, deep-rooted weeds like dandelions or thistles, a weed torch or manual root extractor (like a Weed Wrench) works best. These tools twist and pull roots cleanly, while a boiling water applicator can also kill roots on contact. Avoid shovels—they often leave fragments behind!
How long does it take to clear weeds with these tools?
Timing depends on the weed type and area size. Small patches (e.g., a garden bed) take 10–30 minutes with a manual extractor. Larger areas (like a driveway or field) may require 1–2 hours or more, especially if using a weed torch for multiple passes. Pro tip: Work in sections to avoid fatigue!
Are weed clearing tools worth the investment?
While tools like a weed torch ($50–$150) or root extractor ($20–$80) have an upfront cost, they save money long-term by eliminating the need for herbicides (which can cost $20–$50 per bottle and require reapplication). Plus, they’re eco-friendly and reusable for years.
Can I use a weed torch on dry grass or near flammable materials?
No!
Always check for dry grass, leaves, or debris before using a weed torch. Keep a bucket of water or hose nearby for emergencies. Clear a 3-foot radius of flammable materials, and never use it in windy conditions. Safety first: Wear protective gloves and eyewear.
What’s a chemical-free alternative if I don’t want to use tools?
Try these low-impact methods:
- Boiling water: Pour directly on weeds (avoid desirable plants!).
- Vinegar + dish soap: Mix 1 gallon white vinegar + 1 tbsp soap in a spray bottle. Reapply as needed.
- Manual removal: Use a weed puller or even a sturdy fork to grip and twist roots.
- Mulching: Smother weeds with cardboard or wood chips to block sunlight.
For large areas, a manual weed extractor is still the fastest chemical-free option!
Wrapping up and next steps
Choosing the right weed-clearing tools can transform your yard from a tangled mess into a lush, low-maintenance space—without harsh chemicals or backbreaking digging! 🌱 From manual root twisters to ergonomic weed pullers, each tool has a role in making the job faster, easier, and more effective.
Whether you're tackling stubborn weeds or maintaining a weed-free garden long-term, the right gear gives you the confidence to take control.
Ready to reclaim your outdoor space? Start small with a root twister or weed wrench, then expand your arsenal as needed. Grab your tools, roll up your sleeves, and enjoy the satisfaction of a weed-free paradise—one pull at a time! 💪