
Fertilization
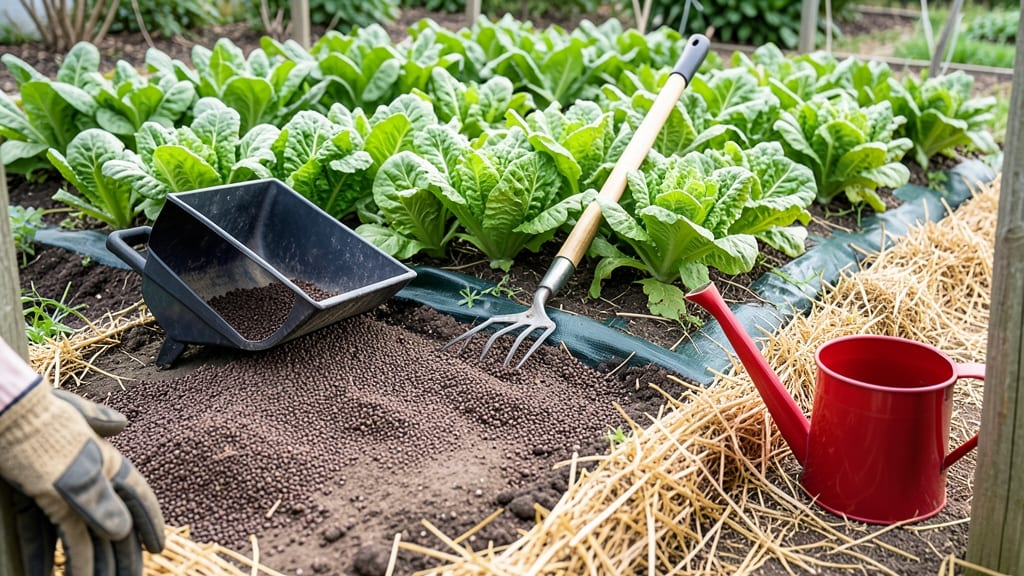
Weed control and fertilization are the two sides of the same coin in a healthy garden. 🌱 I used to think these were separate battles—until I realized the real victory comes from treating them as one system.
The weeds you’re fighting today are just symptoms of soil that’s either starved or overfed, and fixing that changes everything.
Start with a simple soil test (kits cost $20 or less) to check pH and nutrient levels. Most weeds thrive in compacted, nutrient-poor soil, while your plants struggle to compete. Once you know what’s missing—whether it’s nitrogen, phosphorus, or organic matter—you can fertilize with purpose, not guesswork.
A balanced approach (like compost tea or slow-release organic fertilizer) feeds your plants while starving weeds of the space they love.
Here’s the game-changer: mulch isn’t just for looks. A 3-inch layer of straw or wood chips blocks sunlight (killing weed seeds) while retaining moisture and feeding the soil over time. Combine that with targeted fertilization, and you’ll see weeds shrink while your plants grow stronger and faster than ever.
The best part? This method works for veggie gardens, flower beds, and even lawn edges.
Troubleshooting is simple: if weeds return, you’re either over-fertilizing (which feeds them too) or not mulching consistently. Adjust your routine—think of it like a diet for your soil—and you’ll break the cycle. Ready to transform your garden from a weed warzone to a thriving ecosystem? Let’s get started.
📚 In This Guide
- What you need
- Instructions
- Tips and common mistakes
- Wrapping up and next steps
What you need
- ● Organic mulch (straw, wood chips, or shredded leaves) – 2–4 inches per garden bed.
- ● Corn gluten meal (pre-emergent weed control) – 20–30 lbs per 1,000 sq ft (apply in early spring).
- ● Compost or well-rotted manure – 1–2 inches mixed into soil or top-dressed.
- ● Slow-release organic fertilizer (e.g., fish emulsion, bone meal, or 5-5-5 blend) – follow label rates.
- ○ Vinegar or horticultural salt spray (for spot treatment) – 1 gallon vinegar + 1 oz dish soap (optional).
- ● Garden fork or broadfork – for aerating soil without tilling.
- ● Hand weeder or dandelion digger – for precise weed removal.
- ● Garden hose with spray nozzle – for applying vinegar or water.
- ● Gloves and knee pads – because comfort matters!
- ○ Soil pH test kit (optional) – to check soil health before fertilizing.
- ● Identify weed-prone areas (e.g., cracks in pavement, garden edges).
- ● Test soil moisture levels – fertilize only when soil is slightly damp.
- ● Choose the right time of year (spring/fall for best results).
Step-by-Step guide to weed control and fertilization
Here’s how to transform your soil into a weed-resistant powerhouse while feeding your plants—no chemicals needed.
🌱 Step 1: Clear Existing Weeds and Loosen Soil
Start by removing any visible weeds using a hand fork or garden hoe. I like to pull them at the base to avoid leaving roots behind—those fragments will just regrow. Work the soil to a depth of 4-6 inches, breaking up compacted layers so water and nutrients can penetrate deeply. This also disrupts weed seed germination by exposing them to light and air.
If weeds are particularly stubborn, like dandelions or creeping charlie, focus on the edges of your planting area first. You’ll see fewer regrowth spots later if you tackle the worst offenders early. After clearing, let the soil sit uncovered for a day to dry out any remaining weed seeds—sunlight is their enemy.
💧 Step 2: Apply Organic Mulch for Weed Suppression
Spread a 2-3 inch layer of organic mulch—like shredded leaves, straw, or wood chips—over the soil surface. Mulch blocks sunlight, which weeds need to germinate, and gradually breaks down to enrich the soil. I prefer straw for vegetable beds because it decomposes quickly and adds nitrogen as it breaks down.
Leave a 1-inch gap around plant stems to prevent rot. Water the mulch lightly after applying to help it settle and make contact with the soil. Over time, the mulch will also improve soil structure and retain moisture, reducing the need for frequent watering—another win for weed control.
☀️ Step 3: Feed Soil with Natural Fertilizers
Work compost or well-rotted manure into the top 6 inches of soil to replenish nutrients. I like to mix in a handful of worm castings for an extra boost of microbial activity—this helps plants absorb nutrients more efficiently while crowding out weed seeds. Avoid fresh manure, as it can burn plants and attract pests.
For a slower-release option, sprinkle bone meal or kelp meal over the soil and lightly rake it in. These fertilizers provide phosphorus for root growth and potassium for overall plant health, making your crops stronger and more competitive against weeds. Water thoroughly after fertilizing to activate the nutrients.
✂️ Step 4: Maintain Soil Health for Long-Term Weed Control
Every 4-6 weeks, top up the mulch layer to maintain its weed-suppressing thickness. I also rotate my planting beds annually to disrupt weed cycles—many weeds thrive in the same spot year after year, so shifting crops keeps them on the defensive.
Monitor soil moisture and adjust watering to avoid over-saturating the mulch, which can create anaerobic conditions and encourage weed seeds to germinate. A healthy, well-aerated soil will naturally outcompete weeds, so focus on keeping it rich and active with regular compost additions.
Tips & tricks for soil revitalization that outsmarts weeds
Here's what I've learned after years of battling weeds and transforming my garden soil—these tricks make all the difference.
Timing for Weed Removal: In Step 1, focus on removing weeds when the soil is damp but not soggy—this makes pulling easier without breaking roots. I've found that early morning or late afternoon is ideal because the soil holds moisture longer, and weeds are more pliable. After clearing, let the soil dry out for that full day before mulching—this sunlight exposure kills any remaining weed seeds that might have survived.
Mulch Layer Precision: When applying that 2-3 inch mulch layer in Step 2, I recommend using a ruler or straight board to ensure even coverage. Uneven mulch leaves gaps where weeds can sprout. For vegetable beds, I like to use straw because it breaks down quickly, adding nitrogen as it decomposes—this is especially helpful if your soil is nitrogen-deficient. Just remember to keep that 1-inch gap around plant stems to prevent rot.
Fertilizer Application Technique: In Step 3, when working compost or well-rotted manure into the top 6 inches of soil, I've found that a garden fork works best for this job. It aerates the soil without disturbing the weed seeds too deeply. For an extra boost, I sprinkle worm castings directly into the planting holes before adding transplants—they provide immediate microbial activity that helps roots establish faster and outcompetes weeds.
Long-Term Maintenance Strategy: The 4-6 week mulch refresh in Step 4 is crucial, but I've discovered that adding a thin layer of fresh compost every time you refresh the mulch gives an extra nutrient boost. This keeps your soil actively improving while maintaining that weed-suppressing barrier. I also recommend keeping a garden journal to track when you refresh mulch and rotate beds—this helps you spot weed patterns over time.
Pro Tips for Weed Control And Fertilization
- Here's what I've learned after years of battling weeds and transforming my garden soil—these tricks make all the diff...
- Timing for Weed Removal: In Step 1, focus on removing weeds when the soil is damp but not soggy—this makes pulling ea...
- Mulch Layer Precision: When applying that 2-3 inch mulch layer in Step 2, I recommend using a ruler or straight board...
Frequently asked questions
Got questions about tackling weeds while keeping your soil healthy? You’re not alone!
Here are some of the most common queries—and straightforward answers—to help you master weed control and fertilization like a pro.
What’s the best time of year to fertilize and control weeds?
For most plants, early spring (before weeds sprout) or fall (after weeds die back) are ideal. Pre-emergent herbicides work best in spring, while post-emergent treatments target weeds after they appear. Fertilize when soil is warm but weeds are still manageable—usually April–May or September–October.
Can I use organic fertilizers to prevent weeds?
Organic fertilizers like compost, manure, or bone meal improve soil health, which naturally suppresses weeds by outcompeting them. Pair them with mulch (straw, wood chips) to block sunlight and smother weeds. Just avoid synthetic fertilizers that can feed weeds as much as your plants.
How do I fix over-fertilized soil that’s now a weed magnet?
If your soil is too rich, weeds thrive. Dilute nutrients by adding sand or peat moss to amend the soil, then apply mulch to balance things out. For chemical burns, flush the soil with water and test pH—aim for 6.0–7.0. Over time, cover crops (like clover) can restore balance naturally.
What’s a natural weed killer that won’t harm my lawn or garden?
Try a vinegar + dish soap + water spray (1 gallon vinegar + 1 tbsp soap) for spot treatment—it burns weeds on contact but won’t penetrate deep roots. For long-term control, boiling water or corn gluten meal (pre-emergent) work well. Always test small areas first to avoid damaging plants!
Why do weeds keep coming back even after treatment?
Weeds often return due to dormant seeds, poor soil health, or inconsistent treatments. Reapply herbicides as needed, pull weeds by the root, and improve soil with compost. If the problem persists, test your soil for nutrient imbalances—healthy soil = fewer weeds!
Wrapping up and next steps
Mastering weed control and fertilization isn’t just about keeping your lawn or garden tidy—it’s about nurturing a thriving, resilient ecosystem that naturally outcompetes weeds.
By combining smart fertilization with targeted soil care, you’re not just fighting weeds; you’re building a healthier, more vibrant space that requires less effort over time. 🌱✨
Ready to take the next step? Start small—test your soil, tweak your routine, and watch your garden flourish with confidence. Your green thumb is closer than you think!