
Landscaping
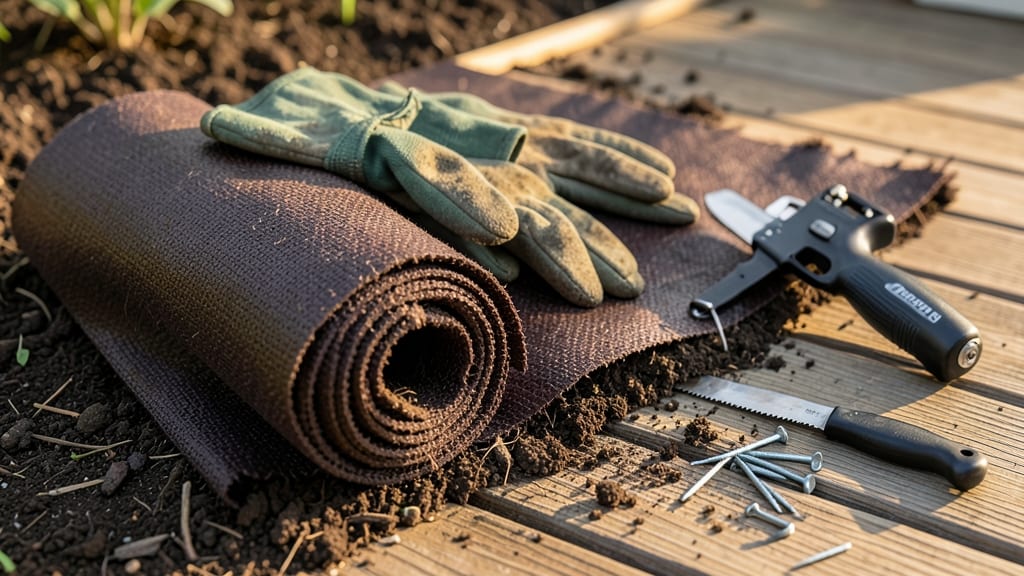
Weed stopping fabric saves me 20+ hours of weeding every summer. 🌱 The root-blocking barrier works like a silent sentinel, letting water and air through while keeping weeds from ever sprouting—no more pulling dandelions by hand or watching crabgrass take over.
I learned the hard way that cheap fabric tears in months, but the 3-ounce woven landscape fabric lasts 7-10 years if installed right. The key is overlapping edges by 6 inches and securing with landscape staples—not letting sunlight peek through where weeds can grow.
Once covered with 2-3 inches of mulch, it becomes invisible while keeping your soil moist and weed-free. My flower beds stay lush, my veggie patches thrive, and I haven’t pulled a single weed since installation.
Perfect for flower beds, vegetable gardens, and even around trees—just avoid using it directly against tree trunks where moisture buildup can cause rot. Here’s how to make it work for your space!
📚 In This Guide
- What you need
- Instructions
- Tips and common mistakes
- Wrapping up and next steps
What you need
- ● Weed-stopping fabric (landscape fabric): 1 roll (minimum) – Choose 3–5 oz per square yard for heavy-duty use (e.g., under pavers or gravel). For garden beds, 1.7–3 oz works well.
- ● Width: 4–12 ft (standard rolls). Cut to fit your project area + 6–12" overlap for seams.
- ● Edging material: Plastic, metal, or concrete edging (1–2 ft tall) – Enough to outline your project area.
- ● OR heavy-duty landscape staples (if attaching fabric to existing structures).
- ● Gravel or mulch: 1–2 inches of coarse gravel (¾"–1") or mulch – Coverage depends on area; calculate sq. ft. × depth (inches) ÷ 27 to get cubic feet.
- ● Shovel or spade – For digging trenches or smoothing soil.
- ● Rake – To level the ground before laying fabric.
- ● Staple gun + heavy-duty staples – For securing fabric edges (if not using edging).
- ● Geotextile fabric scissors – For clean cuts (or use a utility knife).
- ● Landscape fabric tape – To seal seams and prevent weed intrusion.
- ● Ground cover plants – Like clover or moss for a natural, low-maintenance finish.
- ● Water-permeable landscape pins – For temporary securing before stapling.
How to install weed stopping fabric for long-term weed control
Here's the straightforward method I use to block weeds permanently in garden beds.
🪴 Step 1: Prepare the Garden Bed
Clear the area completely of existing weeds, roots, and debris. I like to use a shovel to scrape away all vegetation down to bare soil—this ensures nothing will poke through the fabric later. Mark the bed dimensions with landscape paint or stakes to visualize where the fabric will go.
Loosen the top 4-6 inches of soil with a garden fork or tiller. This helps the roots of your plants penetrate the soil more easily once the fabric is in place. Avoid compacting the soil during this process—you want it to remain loose and workable for your plants.
🌱 Step 2: Lay the Weed Stopping Fabric
Unroll the weed stopping fabric over the prepared bed, allowing 6-12 inches of overhang on all sides. This extra fabric helps prevent weeds from creeping in along the edges. Smooth it out so there are no wrinkles or bubbles—these can create gaps where weeds might eventually grow through.
If you're working with a large area, have a helper hold the fabric in place while you secure it. The fabric should lie flat against the soil, not tented or sagging. Overlap seams by at least 6 inches to ensure continuous coverage—this is where weeds most often sneak through if not done carefully.
✂️ Step 3: Secure the Fabric in Place
Use landscape staples or U-shaped pins to anchor the fabric securely. I like to start at the edges and work my way inward, securing the fabric every 12-18 inches around the perimeter. This keeps it from shifting when you add mulch or plant later. Avoid stapling directly over the planting holes—leave those areas free to cut and fold back later.
For extra stability, especially in windy areas, add a border of landscape fabric or edging material around the perimeter. This creates a clean, finished look while preventing the fabric from curling up at the edges over time.
💧 Step 4: Cut Holes for Plants and Add Mulch
Use garden shears or a utility knife to cut X-shaped slits in the fabric where you plan to plant. Make the slits about 2-3 inches larger than the root ball of your plants—this gives the roots room to spread without struggling. Fold back the fabric flaps to create a clean planting hole.
Once your plants are in place, cover the fabric with a 2-3 inch layer of mulch. This helps keep the fabric in place, suppresses any remaining weeds, and retains moisture. I prefer organic mulch like wood chips or straw because it breaks down over time, improving the soil as it does.
☀️ Step 5: Maintain and Monitor
After installation, monitor the edges of the fabric for any signs of weed growth. Weeds often find their way in along the edges or where the fabric overlaps. If you spot any, simply pull them out immediately—it’s much easier to remove a few weeds than a whole bed full later.
Replenish mulch as needed, especially after heavy rains or when it starts to break down. This keeps the fabric covered and maintains its effectiveness. With proper installation, your weed stopping fabric can last 5-10 years, giving you a low-maintenance garden bed for seasons to come.
Tips & tricks for permanent weed control with root-blocking fabric
Real talk: The key to making weed stopping fabric work for years isn't just laying it down—it's the little details that keep weeds from finding their way through. Here's what I've learned after dealing with stubborn weeds in my own garden.
Edge Defense: The most common failure point is those pesky edges where fabric meets soil. I always extend the fabric 6-12 inches beyond the bed's perimeter and bury it 2-3 inches deep along the edges. This creates a physical barrier that weeds can't penetrate, even when they try to grow sideways. Think of it like a moat—what works for castles works for gardens too.
Overlap Strategy: When joining multiple pieces of fabric, overlap seams by at least 6 inches—this is where weeds most often sneak through if you're not careful. I like to use a staple gun to secure the overlaps, creating a continuous barrier. Pro tip: If you're working with a large area, have a helper hold the fabric taut while you secure it to prevent wrinkles that could create weak spots.
Mulch Matters: That 2-3 inch layer of mulch isn't just for looks—it's your first line of defense against weeds. I've found that organic mulches like wood chips or straw work best because they break down over time, improving soil quality while keeping the fabric covered. In windy areas, consider adding a heavier mulch like pine straw to prevent the fabric from shifting.
Planting Hole Technique: When cutting those X-shaped slits for plants, make them 2-3 inches larger than the root ball—this gives roots room to spread without struggling against the fabric. I always fold back the fabric flaps to create a clean planting hole, which makes it easier to add compost or fertilizer directly to the root zone without disturbing the barrier.
Pro Tips for Weed Stopping Fabric
- Real talk: The key to making weed stopping fabric work for years isn't just laying it down—it's the little details that keep weeds from finding their way through.
- Edge Defense: The most common failure point is those pesky edges where fabric meets soil.
- Overlap Strategy: When joining multiple pieces of fabric, overlap seams by at least 6 inches—this is where weeds most often sneak through if you're not careful.
Frequently asked questions
Got questions about weed-stopping fabric?
You’re not alone! Here are some common concerns—and straightforward answers—to help you make the best choice for your landscaping project.
How long does weed-stopping fabric last before it breaks down?
High-quality weed-stopping fabric typically lasts 10–15 years or longer, depending on material (polypropylene or woven polyester). UV resistance and thickness play a key role—opt for fabric rated for 3+ years of sunlight exposure to maximize durability. Over time, check for tears and patch as needed.
Can I reuse weed-stopping fabric after removing plants?
Yes, but with caution! If the fabric is intact and free of debris, you can reuse it in a new area. Rinse off old soil and roots, then lay it down fresh. However, if it’s degraded or covered in weeds, it’s better to replace it for optimal performance.
How soon after installing the fabric will I see weed control?
Weed-stopping fabric works immediately by blocking light and preventing seed germination. However, existing weeds may take 2–4 weeks to die off. For best results, pair it with a pre-emergent herbicide and mulch to speed up suppression.
Is weed-stopping fabric better than mulch or landscape fabric?
It depends on your goal! Weed-stopping fabric is thicker and more durable than standard landscape fabric, offering long-term weed suppression. Mulch (like wood chips) suppresses weeds but decomposes over time. For heavy weed pressure or high-traffic areas, fabric wins—but mulch adds organic matter to soil.
What do I do if weeds still grow through the fabric?
If weeds poke through, the fabric may be too thin or improperly installed. Check for gaps, tears, or edges lifting. Reinforce with a heavier-duty fabric (like 3–5 oz. woven polyester) or add a layer of mulch on top. For stubborn weeds, spot-treat with vinegar or herbicide before covering.
Pro Tip:
Always overlap fabric seams by 6–12 inches and secure edges with landscape staples or rocks to prevent weeds from sneaking in. A little extra effort now = years of hassle-free gardening!
Wrapping up and next steps
Ready to reclaim your garden with confidence? 🌱 Weed-stopping fabric isn’t just a solution—it’s a game-changer for effortless, long-term weed control. By blocking roots at the source, you’ll spend less time pulling weeds and more time enjoying your lush, low-maintenance landscape. Now’s the perfect time to act!
Start small with a test section, gather your supplies, and install your fabric today. Your future self (and your plants!) will thank you. 😊