
How To
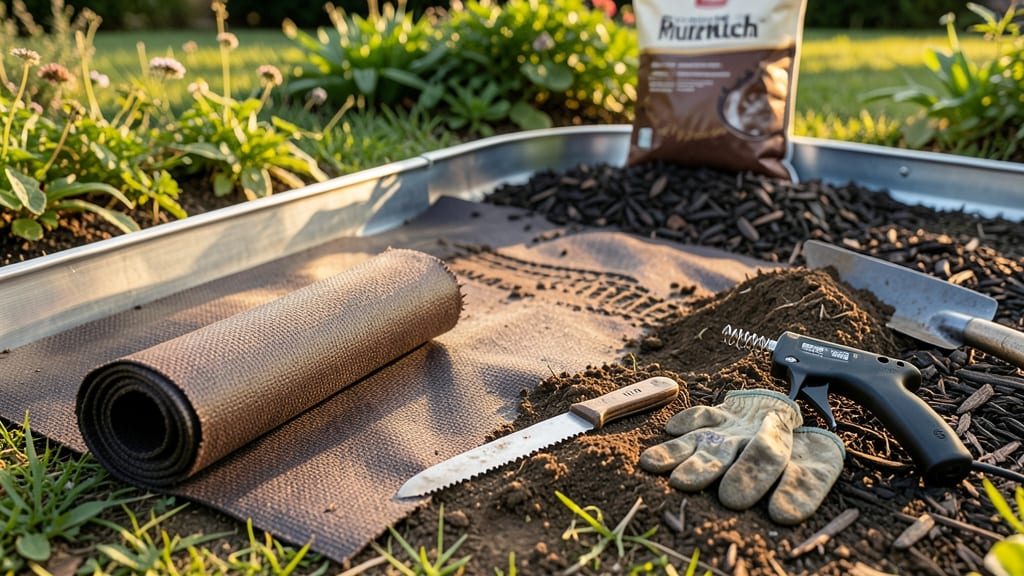
Putting down a weed barrier is the unsung hero of garden maintenance—it saves hours of weeding while keeping your soil healthy. 🌱 I’ve battled weeds for years, and once I installed a proper barrier, my garden transformed from a battleground to a peaceful oasis.
The key isn’t just laying down fabric; it’s about placement, material, and preparation to avoid common pitfalls.
The right weed barrier depends on your needs: heavy-duty landscape fabric for permanent beds, biodegradable cardboard for temporary suppression, or even thick mulch for organic control. You’ll also need scissors, stakes, and a tape measure—simple tools for a foolproof setup.
The goal is to smother weeds without suffocating your plants, so proper hole-cutting and edge-securing are critical.
Once installed, you’ll notice fewer weeds popping up within weeks, and your plants will thrive without competition for nutrients. The barrier breaks down over time (especially with biodegradable options), so you can replant without disturbing the soil.
Just remember to cut holes for new plants and secure edges to prevent shifting.
This method works for flower beds, vegetable gardens, and even around trees—anywhere weeds are a persistent nuisance. With the right approach, you’ll spend less time pulling weeds and more time enjoying your garden’s bounty. Let’s get that barrier down!
📚 In This Guide
- What you need
- Instructions
- Tips and common mistakes
- Wrapping up and next steps
What you need
- ● Weed barrier fabric – Choose a heavy-duty, landscape-grade fabric (3-5 oz per square yard) for best results. Measure your garden area and buy enough to cover it with a 6-12 inch overlap.
- ● Landscape staples or U-shaped pins – Galvanized or plastic-coated staples (1-1.5 inches long) to secure the barrier. Aim for at least 1 staple every 12-18 inches along edges and seams.
- ● Shovel or spade – For digging trenches (if installing around plants) or loosening soil for better fabric placement.
- ● Rake or garden hoe – To smooth out the soil and remove rocks/debris before laying the barrier.
- ● Measuring tape – For precise cuts and ensuring full coverage.
- ● Utility knife or scissors – To trim the weed barrier fabric to size (avoid tearing to prevent fraying).
- ● Gloves – Heavy-duty work gloves to protect your hands from rough edges and soil.
- ● Edging material – Metal or plastic edging to keep the barrier neat and prevent soil from creeping underneath.
- ● Mulch or landscape fabric pins – For extra security in windy areas or around high-traffic zones.
- ● Staple gun – Faster than hand-stapling for large projects (rent or borrow if needed).
- ● Water or spray bottle – Lightly dampen the fabric before stapling to reduce wrinkles.
Step-by-Step instructions for installing weed barrier in your garden
Here's the foolproof method I rely on to create a weed-proof foundation that lasts for years.
🪴 Step 1: Clear and Prepare the Garden Bed
Start by removing all existing vegetation, including weeds, grass, and plants. Use a garden fork or shovel to loosen the soil to a depth of 6-8 inches. This ensures the weed barrier makes direct contact with the soil, preventing any weed roots from pushing through gaps. I like to work when the soil is slightly moist—it's easier to remove stubborn weeds without tearing up the bed.
Rake the area smooth and remove any large rocks or debris. The goal is a clean, level surface where the weed barrier will lay flat. If your bed has slopes, create gentle terraces to prevent the barrier from shifting. This prep work is critical—skipping it means weeds will find their way through any imperfections later.
🌱 Step 2: Lay Down the Weed Barrier Material
Choose a high-quality landscape fabric with a thickness of at least 4-6 mil—thicker materials last longer and block more light. Unroll the fabric over the prepared bed, allowing 6-12 inches of overlap between sections to prevent weeds from sneaking through seams. Secure the edges with landscape staples or heavy rocks to keep it in place.
For garden beds, I tuck the fabric edges under the soil slightly to create a clean border. In vegetable gardens, leave a 2-inch border exposed around the edges to easily add mulch later. Avoid stretching the fabric—it should lay loosely to allow water and air to penetrate while blocking weeds. Real talk: cheap fabric tears easily, so invest in a durable brand.
✂️ Step 3: Secure and Cover the Barrier
Once the fabric is laid, add a 2-3 inch layer of coarse mulch—such as wood chips, gravel, or pine straw—directly on top. This holds the fabric in place and prevents it from blowing away. For pathways, use 3-4 inches of gravel to create a stable, weed-free surface. The mulch also helps regulate soil temperature and retain moisture.
In garden beds, I leave a 2-inch gap between the mulch and plant stems to prevent rot. For trees and shrubs, create a "mulch volcano" shape, keeping mulch away from the trunk. Water the area lightly after installation to settle the mulch and ensure good contact with the fabric. This step is where many people cut corners—don't skip it.
💧 Step 4: Maintain and Monitor the Weed Barrier
Check the barrier periodically for tears or gaps, especially after heavy rain or wind. Repair any damage immediately by overlapping a new piece of fabric and securing it. Over time, organic mulch will break down, so replenish it annually to maintain the weed-blocking effect. In high-traffic areas, consider a more permanent cover like pavers or stepping stones.
Here's the thing—weed barriers don't last forever. After 3-5 years, the fabric may degrade, especially in sunny or wet conditions. Plan to replace it as needed, but with proper installation, you'll see dramatic reduction in weeds within the first season. The key is consistency: a little maintenance now saves hours of weeding later.
Tips & tricks for perfect weed barrier installation
Common pitfalls—and how to sidestep every one—when creating your underground garden shield.
Prep Work is Non-Negotiable: That 6-8 inch soil loosening in Step 1 isn't just recommended—it's essential. I learned this the hard way after weeds sprouted through gaps where roots could still reach. For stubborn weeds with deep roots, consider using a soil knife to cut roots at the 6-inch depth before removing them completely. This prevents regrowth from root fragments.
Material Selection Matters: The 4-6 mil thickness specification isn't arbitrary—thinner fabrics degrade faster and let more light through, allowing weeds to grow. I recommend looking for fabrics labeled "UV-stabilized" for extended longevity. For high-traffic areas, consider a woven geotextile fabric instead of standard landscape fabric for added durability.
Edge Treatment Secrets: The 2-inch exposed border in vegetable gardens serves a dual purpose: it creates a clean planting edge AND makes future mulch additions easier. For pathways, I've found that securing fabric edges with heavy-duty grommets and landscape staples prevents shifting better than rocks alone. This is especially important on sloped areas where erosion can expose the fabric.
Mulch Layering Strategy: The 2-3 inch mulch recommendation is ideal for most plants, but for Mediterranean herbs like rosemary and thyme, I increase this to 4 inches to create better insulation against temperature fluctuations. When using wood chips, choose ones labeled "double-shredded" as they break down more slowly, extending the weed suppression period between replenishments.
Pro Tips for Put Down Weed Barrier
- Common pitfalls—and how to sidestep every one—when creating your underground garden shield.
- Prep Work is Non-Negotiable: That 6-8 inch soil loosening in Step 1 isn't just recommended—it's essential.
- Material Selection Matters: The 4-6 mil thickness specification isn't arbitrary—thinner fabrics degrade faster and let more light through, allowing weeds to grow.
Frequently asked questions
Got questions about laying weed barrier? You’re not alone!
Here are answers to the most common concerns—so you can tackle your project with confidence.
When is the best time to install weed barrier?
The ideal time is early spring or fall when soil is workable but not frozen. Avoid extreme heat or drought—bare soil can dry out too quickly, reducing effectiveness. If you’re in a mild climate, late winter (before weeds sprout) works too!
How wide should I lay the weed barrier?
Extend the barrier at least 12–18 inches beyond your planting area on all sides. For paths or high-traffic zones, use 24+ inches to prevent weeds from creeping in. Pro tip: Overlap sheets by 2–3 inches to block gaps where weeds love to sneak through.
Can I reuse old weed barrier?
Yes, but only if it’s intact and still weed-free. Inspect for tears, mold, or accumulated debris—these weaken its barrier. Clean it with a hose and let it dry completely before reuse. Warning: If it’s brittle or smells musty, toss it and start fresh for best results.
What if weeds grow through the barrier?
This usually means gaps, thin material, or poor installation. Check for:
- Uneven soil (fill low spots before laying barrier).
- Overlapping edges (seal with landscape staples or tape).
- Thin spots (use heavier-duty barrier in problem areas).
For stubborn weeds, spot-treat with vinegar or mulch over the barrier—just avoid harsh chemicals near plants.
Is weed barrier worth the cost vs. mulch?
It depends! Weed barrier is long-term (5–10+ years) and great for permanent beds, slopes, or high-weed areas. Mulch (like wood chips) is cheaper but needs annual refreshers and may decompose faster. Best of both worlds? Use barrier under mulch for double protection!
Wrapping up and next steps
Putting down a weed barrier is your secret weapon for a low-maintenance, lush garden—no more battling stubborn weeds or wasting time on endless pulling! 🌱 Whether you’re using landscape fabric, cardboard, or mulch, the key is preparation, proper placement, and patience.
With the right steps, you’ll create a durable shield that keeps weeds at bay while letting your plants thrive.
Now that you’re armed with the know-how, it’s time to roll up your sleeves and transform your garden. Start small—pick a section of your yard, gather your supplies, and follow the steps above. Before you know it, you’ll be sipping lemonade in your weed-free paradise! 🍋✨