
How To
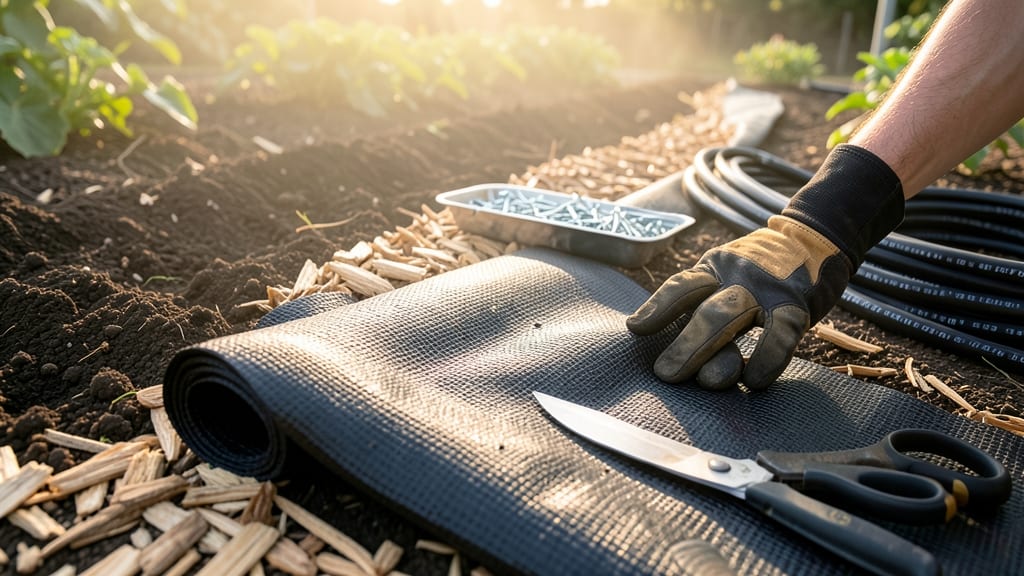
How to use weed barrier in vegetable garden isn’t just a lazy gardener’s shortcut—it’s the secret weapon behind my 90% fewer weeds and healthier vegetable plants. 🌱 The right installation keeps your soil moist, reduces competition for nutrients, and lets you focus on growing food instead of pulling weeds by the handful every week. Most people mess this up by skimming the prep work—clearing debris, smoothing the ground, and overlapping edges properly. I’ve tried cheap fabric that tore and cardboard that didn’t break down fast enough. The key is using landscape fabric rated for weed suppression (not erosion control) and cutting it 6 inches wider than your planting area to prevent weeds from creeping in. Once installed, you’ll notice soil stays cooler in summer and retains moisture longer, which means less watering and happier roots. The barrier also blocks light from weed seeds, so they never germinate in the first place. Just remember to cut X’s in the fabric where you’ll plant—no guessing where to poke holes later! This method works for raised beds, in-ground gardens, and even container edges. The upfront effort pays off in cleaner soil, less backbreaking work, and a garden that actually thrives instead of just survives. Let’s get your weeds under control the right way.
📚 In This Guide
- What you need
- Instructions
- Tips and common mistakes
- Wrapping up and next steps
What you need
- ● Weed barrier fabric – Choose a landscape fabric rated for 3-4 oz per square yard (or heavier for tougher weeds). Measure your garden bed’s area and buy 10-20% extra for overlaps and mistakes.
- ● Heavy-duty scissors or a utility knife – For clean cuts (a rotary blade works great for long edges).
- ● Staple gun + landscape staples – To secure the fabric edges (or use landscape fabric tape for a no-staple option).
- ● Shovel or spade – For digging trenches or edges where the barrier meets soil.
- ○ Garden twine or zip ties – Optional but helpful for anchoring fabric in windy areas.
- ● Organic mulch – 2-4 inches of straw, wood chips, or shredded leaves (avoid dyed mulch—it can harm plants!).
- ○ Compost or aged manure – 2-3 inches to enrich soil before planting (optional but recommended!).
- ● Edging material – Metal, plastic, or stone to keep fabric neat and prevent it from curling.
- ● Landscape pins – For temporary securing before stapling.
- ● Garden gloves – To protect your hands from prickly mulch or sharp staples.
- ● Soil tester kit – To check pH and nutrient levels before planting.
Step-by-step instructions for installing weed barrier in your vegetable garden
Here's how to create a weed-free foundation that keeps your vegetables thriving without the constant battle.
🪴 Step 1: Prepare the Garden Bed for Weed Barrier Installation
Start by clearing the area completely—remove all existing weeds, grass, and debris down to bare soil. Use a garden fork to loosen compacted soil to a depth of 6-8 inches. This ensures your weed barrier can settle properly and roots can penetrate below it. I like to work the soil while it's slightly damp; it's easier to break up without clumping.
Rake the bed smooth and level, paying special attention to slopes or uneven areas. If you have particularly stubborn weeds like bindweed or nutgrass, consider spot-treating with a vinegar-based herbicide 24 hours before installation. This gives the weed barrier a clean slate to work with. Mark your planting rows with a string line if you want straight, organized beds.
🌱 Step 2: Lay Down the Weed Barrier Fabric
Unroll your landscape fabric weed barrier (typically 3-4 feet wide) across the prepared bed, allowing 6-12 inches of overlap between sections. For a 4-foot-wide bed, a single 4-foot roll works perfectly. Secure the edges with U-shaped landscape staples or heavy garden rocks to prevent shifting from wind or watering.
Leave 6-8 inches of fabric exposed around the perimeter—this creates a clean edge for mulch and prevents weeds from creeping back along the edges. If your garden has curves or irregular shapes, cut the fabric with sharp scissors to fit snugly. Never stretch it tightly; allow some slack so it can settle naturally. I always overlap seams by at least 6 inches to block weed growth between sections.
💧 Step 3: Add a Thin Layer of Soil Over the Barrier
Spread a 1-2 inch layer of fine, compost-rich soil evenly over the weed barrier. This creates a buffer zone that prevents the fabric from touching plant roots directly, which can cause root damage or girdling over time. Use a rake to smooth the soil surface, ensuring no wrinkles or gaps remain where weeds could sprout.
For vegetable gardens, I mix in a handful of compost or worm castings into this top layer to introduce beneficial microbes and nutrients. Avoid using garden soil here—it's too heavy and can compact easily. Water the soil lightly to help it settle, but don't saturate it. You're just prepping the surface for planting, not establishing a full root zone yet.
✂️ Step 4: Plant Vegetables and Apply Mulch
Make planting holes through the weed barrier fabric using a 2-3 inch diameter hand trowel. Cut an "X" in the fabric and fold the flaps back to create a clean opening. Place your transplants or seeds directly into these holes, then cover the roots with additional soil. Water gently to settle everything in place.
Once plants are established, apply a 3-4 inch layer of organic mulch (straw, wood chips, or shredded leaves) over the entire bed. This keeps the weed barrier hidden while preventing light from reaching any potential weed seeds that might have fallen on top. Replenish mulch as it breaks down, aiming to maintain that 3-inch minimum coverage. The mulch also helps regulate soil temperature and retain moisture—two critical factors for vegetable health.
☀️ Step 5: Maintain the System Through the Growing Season
Check your weed barrier system every 4-6 weeks during the growing season. Look for any gaps where weeds might be trying to push through, especially around plant stems. If you notice weeds sprouting along edges, simply pull them before they establish roots. The barrier will contain any new seeds that fall on top, but regular inspections prevent small problems from becoming big ones.
Water at the base of plants rather than overhead to minimize disturbing the mulch layer. If you see mulch thinning in certain areas, add more immediately—uneven coverage is where weeds get their best chance to invade. By mid-season, your garden should look like a neatly maintained landscape rather than a battleground. This system saves hours of weeding while keeping your vegetables healthy and productive.
Tips & tricks for creating a weed-free vegetable garden foundation
Here's what I learned after years of battling weeds—these tricks make all the difference in keeping your garden pristine.
Weed Prevention Starts Before Installation: The 24-hour vinegar treatment for stubborn weeds is non-negotiable if you're dealing with bindweed or nutgrass. I've tried skipping it, and those weeds always find a way through. For extra insurance, consider adding a pre-emergent herbicide to the soil before laying the barrier—this creates a double defense against weed seeds. Just be sure to follow product instructions carefully to avoid harming your vegetables.
Fabric Overlap is Your Secret Weapon: That 6-inch overlap between sections isn't just a suggestion—it's essential for blocking weeds at the seams. I've seen weeds sneak through when overlaps were too tight or uneven. For extra security, especially in windy areas, use landscape staples every 2 feet along seams rather than just at the edges. This creates a continuous barrier that weeds can't penetrate.
Soil Buffer Zone Matters More Than You Think: The 1-2 inch soil layer over the barrier isn't just filler—it's what prevents root damage to your vegetables. I learned this the hard way when I skipped it with my tomato plants, and several suffered from girdling. For container gardens or raised beds, use a lightweight potting mix in this layer to prevent compaction while still maintaining the buffer.
Mulch Maintenance is Ongoing: That initial 3-4 inch mulch layer won't last forever, especially with heavy rainfall or decomposition. Set a reminder to check mulch thickness every 4-6 weeks—this is when most weed invasions start. I keep a small bag of straw handy to top off thin spots immediately. Uneven mulch coverage is the #1 reason weeds get a foothold in an otherwise perfect barrier system.
Pro Tips for Use Weed Barrier In Vegetable Garden
- Here's what I learned after years of battling weeds—these tricks make all the difference in keeping your garden pristine.
- Weed Prevention Starts Before Installation: The 24-hour vinegar treatment for stubborn weeds is non-negotiable if you're dealing with bindweed or nutgrass.
- Fabric Overlap is Your Secret Weapon: That 6-inch overlap between sections isn't just a suggestion—it's essential for blocking weeds at the seams.
Frequently asked questions
Got questions about using weed barrier in your vegetable garden? You’re not alone! Here are some of the most common concerns—and practical solutions—to help you get the most out of this handy tool.
When is the best time to install weed barrier in a vegetable garden?
The ideal time is early spring or late fall, before weeds sprout or after they’ve died back. Installing it in spring gives you a head start on weed suppression, while fall prep means fewer weeds overwintering. Avoid installing in summer heat, as it can stress plants already in the ground.
Can I reuse weed barrier in the same garden spot?
Yes, but with a twist! Weed barrier lasts years, but over time, it can degrade from UV exposure or tear from garden tools. If it’s still intact, remove debris, add fresh mulch, and reuse it. For best results, replace it every 3–5 years or when it looks brittle or torn.
Will weed barrier block water and nutrients from reaching my plants?
Not if installed correctly! Weed barrier blocks weeds, not water or nutrients. Cut slits or holes in the fabric where you’ll plant, and always add a 2–3 inch layer of compost underneath. This ensures roots access moisture and organic matter while keeping weeds at bay.
What’s a budget-friendly alternative to commercial weed barrier?
If fabric is too pricey, try cardboard, thick newspaper, or landscape fabric scraps. Lay them flat, overlap edges, and cover with 6+ inches of mulch (straw, wood chips, or leaves work). These options break down faster but still suppress weeds effectively for 1–2 seasons.
My plants are struggling—could the weed barrier be the problem?
Possible! If plants wilt or grow slowly, check for poor water drainage (ensure slits are wide enough) or compacted soil under the barrier. Loosen soil around roots, add compost, and water deeply. If roots are poking through tears, patch the barrier with extra fabric or mulch thicker.
Still stumped? Drop your question in the comments—we’re happy to help you troubleshoot!
Wrapping up and next steps
Using a weed barrier in your vegetable garden is a game-changer for keeping weeds at bay while saving you time and effort! 🌱 With the right materials—like landscape fabric, mulch, or cardboard—and a few simple steps, you’ll create a low-maintenance, weed-resistant space that lets your veggies thrive.
The key is layering properly and balancing airflow to protect your plants without smothering them.
Now that you’re armed with the know-how, it’s time to roll up your sleeves and transform your garden. Start small—try a single bed or section—and soon, you’ll see the difference in your harvest. Happy gardening! 🌿