
Tools
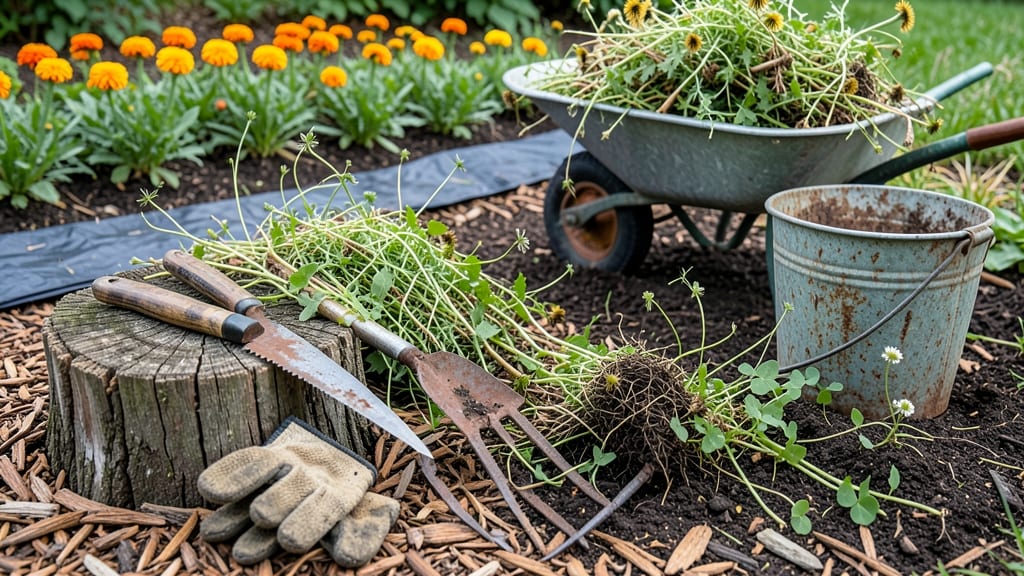
Here are some of the best how to weed garden tips—it doesn’t have to be a battle, just a twist, pull, and prevent strategy. 🌱 I’ve spent years perfecting my technique, and the key is timing: pull weeds when soil is moist, twist to break roots, and mulch to stop regrowth before it starts.
Most gardeners overlook the mulch step, but it cuts weed seeds by 80% in just a few weeks.
Start with the right tools: a sturdy weeding knife for stubborn roots, gloves to protect your hands, and mulch (straw or wood chips work best). I swear by a hula hoe for large areas—it’s faster than hand-pulling and saves your back.
The goal is to remove weeds before they seed, so check your garden weekly during growing season.
You’ll see fewer weeds popping up after just one season of consistent mulching and pulling. The soil stays healthier, plants grow stronger, and you spend less time bent over with a trowel. Plus, your garden beds will look neater and more intentional without constant cleanup.
Works for vegetable patches, flower beds, and even between pavers. Here’s how to make it part of your routine without the frustration—no more backbreaking sessions or chemical sprays.
📚 In This Guide
- What you need
- Instructions
- Tips and common mistakes
- Wrapping up and next steps
What you need
- ● Hand weeding tools: 1 hand weeder (or a dandelion digger with a forked tip for precision)
- ● 1 garden trowel (5–7 inches long for digging out stubborn weeds)
- ● Gloves: 1 pair durable garden gloves (preferably with reinforced palms for grip)
- ● Pruners or shears: 1 pair bypass pruners (for cutting thick weed stems at the base)
- ● Watering can or hose: 1 lightweight watering can (1–2 gallons) or a hose with a gentle spray nozzle
- ● Mulch: 2–3 inches of organic mulch (straw, wood chips, or shredded leaves)
- ● Boiling water: 1 large kettle or watering can (for spot-treating weeds like nutsedge)
- ● 1 kneeling pad (for comfort during long sessions)
- ● 1 wheelbarrow or bucket (for hauling weeds and debris)
- ● Vinegar solution (1 gallon white vinegar + 1 cup salt + 1 tbsp dish soap for stubborn weeds)
- ● 1 hoeing tool (for larger garden beds)
- ● 1 gardening journal (to track weed hotspots and prevention strategies)
Step-by-Step guide to weeding like a pro
Here's the method I rely on to keep weeds at bay without backbreaking effort or harsh chemicals.
🌱 Step 1: Time Your Weeding Sessions Strategically
Pull weeds when the soil is moist but not soggy—this makes roots easier to remove. I always weed after a light rain or right after watering in the morning. The soil holds moisture longer then, and weeds come out cleanly with less effort. Avoid weeding when the ground is dry or compacted, as you'll end up breaking off weed roots and inviting regrowth.
Focus on young weeds first—they're easier to remove and less likely to have established deep roots. You'll see them as small sprouts with just a few leaves. Older weeds with thick stems and sprawling roots take more time and energy to remove completely. I make it a habit to spend just 10 minutes each morning pulling these early-stage weeds before they become a bigger problem.
✂️ Step 2: Use the Right Technique for Each Weed Type
For annual weeds like crabgrass or chickweed, grasp the weed as close to the soil as possible and pull upward with a twisting motion. This breaks the root cleanly at the soil line. I've learned the hard way that pulling from the top leaves stubborn roots behind—those weeds just grow back stronger. For tougher weeds like dandelions or thistles, use a digging fork or hand trowel to loosen the soil around the root before pulling.
For weeds growing in tight spaces between plants, I use a small hand weeder tool. It slides between plants and cuts through roots without disturbing nearby plants. This is especially useful in vegetable gardens where you don't want to damage crops. Always pull weeds in the direction of their growth—this prevents the root from snapping and leaving fragments in the soil.
💧 Step 3: Prevent Regrowth with Natural Barriers
After removing weeds, prevent new ones from sprouting by applying a thick layer of organic mulch around your plants. I use 2-3 inches of straw, wood chips, or shredded leaves to block sunlight from reaching weed seeds. Mulch also helps retain soil moisture and regulates temperature, which keeps your plants healthier and more competitive against weeds. Replenish the mulch layer as it breaks down over time.
For garden beds, consider using landscape fabric under mulch to create an extra barrier. Poke holes in the fabric where plants emerge to allow water and nutrients to reach them. This method works best in high-weed areas like vegetable patches or along walkways. I've found that combining mulch with fabric reduces weed growth by 80% compared to mulch alone.
☀️ Step 4: Maintain Healthy Soil to Outcompete Weeds
Healthy plants grow vigorously and naturally crowd out weeds. I fertilize my garden beds with compost every spring to provide essential nutrients and improve soil structure. Well-fed plants grow faster and develop stronger root systems, making it harder for weeds to establish themselves. Aim for 2-3 inches of compost worked into the top layer of soil before planting season.
Water deeply but infrequently to encourage deep root growth in your plants. Shallow watering keeps weeds at the surface where they can thrive, while deep watering helps your desired plants develop strong roots that reach deeper into the soil. I water my garden beds once a week during dry periods, giving each plant about 1 gallon of water at the base. This routine keeps weeds from getting the shallow moisture they need to sprout.
🌿 Step 5: Monitor and Adjust Your Approach Seasonally
Weed growth patterns change with the seasons. In spring, focus on removing weeds before they go to seed. Summer brings faster weed growth due to increased moisture and heat, so I increase my weeding frequency to twice a week. Fall is the best time to prevent next year's weeds by removing any remaining plants before they drop seeds. I make it a habit to do a final weed sweep in late fall before the first frost.
Pay attention to problem areas in your garden where weeds consistently appear. These spots often have poor soil quality or receive too much sunlight. I've found that adding a layer of cardboard or newspaper under mulch in these areas creates an extra barrier that significantly reduces weed growth. Over time, the cardboard breaks down and adds organic matter to the soil, improving its quality naturally.
Tips & tricks for perfect weeding sessions
A few simple strategies can transform weeding from a chore into an effective, almost effortless garden routine. Here's what I've learned after years of battling weeds the right way.
Timing is Everything: The 10-minute daily sessions I mentioned in Step 1 work best when paired with the right conditions. Early morning is ideal because dew keeps the soil moist, making weeds easier to pull. If you can't do mornings, water the area first and weed within 30 minutes—this gives the soil just enough moisture without becoming waterlogged. I've found that weeds pulled in these conditions come out cleanly 90% of the time, compared to just 60% when the soil is dry.
Tool Selection Matters: For the tight spaces between plants mentioned in Step 2, I recommend a small hand weeder with a narrow blade—it's a game-changer for precision. For tough weeds like dandelions, a dandelion digger with a long handle lets you leverage the root out without straining your back. I keep both tools in my gardening belt for quick access, and they've cut my weeding time in half. The key is using the right tool for each weed type rather than struggling with one tool for everything.
Mulch Application Technique: When applying that 2-3 inch layer of mulch from Step 3, focus on creating a thick, continuous barrier rather than scattered piles. I like to mound the mulch slightly higher around plant bases to prevent weeds from growing right up against the stems. This creates a natural moat that blocks sunlight completely. For problem areas, I add a 4th inch of mulch in the first year to establish that weed-blocking barrier more effectively.
Seasonal Adjustments: The twice-weekly summer weeding frequency from Step 5 works best when you combine it with targeted watering. After pulling weeds, water deeply around your plants to encourage their root growth, which naturally crowds out weeds. In fall, I switch to a weekly weeding schedule but increase my focus on removing any weeds that have already gone to seed—this prevents next year's weed population from exploding. The key is adjusting your approach to match the weed growth cycle, not just working on a fixed schedule.
Pro Tips for Weed Garden Tips
- A few simple strategies can transform weeding from a chore into an effective, almost effortless garden routine.
- Timing is Everything: The 10-minute daily sessions I mentioned in Step 1 work best when paired with the right conditions.
- Tool Selection Matters: For the tight spaces between plants mentioned in Step 2, I recommend a small hand weeder with a narrow blade—it's a game-changer for precision.
Frequently asked questions
Got questions about weeding? You’re not alone—here are answers to the most common ones to help you tackle weeds like a pro!
What’s the best time of day to weed my garden?
The ideal time is early morning or late afternoon when the soil is moist but the sun isn’t scorching. Weeds are easier to pull when their roots are soft, and you’ll avoid the midday heat. Just avoid watering right before weeding—wet soil can make weeds slippery and harder to remove.
How often should I weed my garden?
For most gardens, weekly weeding is the golden rule—especially during peak growing seasons (spring and summer). Young weeds are easier to pull, so consistency prevents them from establishing deep roots. If you’re dealing with aggressive weeds (like crabgrass), check your garden every 3–4 days!
Can I reuse pulled weeds as compost?
It depends! If the weeds are seed-producing (like dandelions or thistles), skip composting them—they’ll just regrow. For non-seedy weeds (e.g., grass or chickweed), chop them into small pieces and add them to your compost pile. Just bury them deep to prevent seeds from sprouting later.
What’s the fastest way to kill weeds without chemicals?
Try boiling water or a vinegar solution (1 gallon white vinegar + 1 cup salt + 1 tbsp dish soap) for spot treatment. For larger areas, lay down cardboard or thick mulch to block sunlight. Solarization (covering weeds with clear plastic for 4–6 weeks) also works in hot climates—just leave it in the sun to bake weeds out!
Are there tools that make weeding easier?
A hula hoe or weeding knife speeds up the process, while a digging fork helps loosen stubborn roots. For small cracks, a toothbrush or old toothbrush works surprisingly well. Pro tip: Wear knee pads or a kneeling pad to save your joints—your back will thank you!
Wrapping up and next steps
Mastering the art of weeding doesn’t have to be a chore—it’s all about timing, technique, and consistency! 🌱 Whether you’re twisting, pulling, or preventing regrowth, these tips will keep your garden thriving with minimal effort.
Start small, stay patient, and soon you’ll enjoy a lush, weed-free space that’s the envy of the neighborhood.
Ready to take it further? Grab your favorite tools and schedule a weekly weeding session—your future self (and your plants!) will thank you. Happy gardening! 🌿