
Transplanting
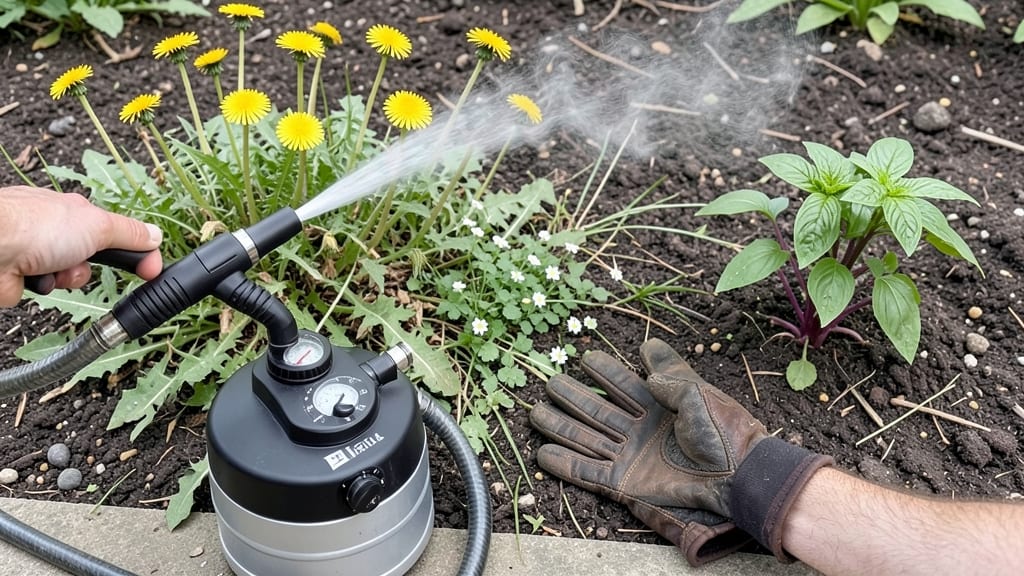
Steam kills weeds down to their roots in seconds—no chemicals, no regrowth. 🌱 I’ve tried every weed-killing method, but steam is the only one that works instantly on stubborn patches like crabgrass and dandelions without harming your plants or soil.
The secret lies in the heat—water boiling at 212°F destroys weed cells on contact, including the roots. You’ll need a steam weeder (rentable or DIY with a pressure washer), protective gloves, and a sunny day for best results.
Unlike vinegar or tilling, steam leaves your soil intact and ready for planting within hours.
Within minutes, you’ll see weeds wilt and collapse completely. The steam method is especially great for driveways, sidewalks, and garden beds where you want a clean slate without toxic residues. I’ve used it to prep flower beds and even kill weeds between patio stones—no more pulling or digging.
Works best on young, actively growing weeds, but even deep-rooted invaders like bindweed weaken after repeated treatments. For tough spots, you might need to steam twice. The best part? Your garden stays chemical-free while looking freshly tilled in no time.
📚 In This Guide
- What you need
- Instructions
- Tips and common mistakes
- Wrapping up and next steps
What you need
- ● Steam Weeder: A handheld or backpack-style steam weeder (e.g., Weed Dragon or Farm Innovators models). Look for one with at least 1500W power and a boiler capacity of 2-4 gallons for efficiency.
- ● Extension Wand: A 12-18 inch stainless steel or brass wand (included with most steam weeders) for precise targeting.
- ● Water: Distilled or dechlorinated water (1-2 gallons, depending on your machine’s capacity). Avoid tap water with high mineral content to prevent scaling.
- ● Protective Gear: Heavy-duty gardening gloves (nitrile-coated for grip and protection).
- ● Closed-toe shoes or boots (steam can be hot!).
- ● Long sleeves and safety goggles (to shield from steam and debris).
- ● Garden Tools: A hand trowel or weeding knife to loosen soil and expose weed roots before steaming.
- ● A small broom or leaf blower to clear debris after treatment.
- ● Soil Thermometer: To check soil temperature (180–212°F) for optimal weed-killing results.
- ● Compost or Mulch: To cover treated areas and prevent regrowth.
- ● Steam-Resistant Mat: A heat-resistant pad (e.g., silicone or fiberglass) to protect surfaces like patios or driveways.
- ● Extension Cord (if needed): A heavy-duty, outdoor-rated cord (14-gauge or thicker) for backpack-style weeders.
How to kill weeds with steam: a chemical-free solution
Here's how I eliminate weeds instantly—no digging, no sprays, just superheated water doing all the work.
💧 Step 1: Choose the Right Steam Equipment
For this method, you'll need a steam weed killer (like a handheld steam generator) or a pressure washer with a steam attachment. I use a 3-gallon capacity steam cleaner because it delivers consistent heat and covers larger areas. Make sure your equipment has a narrow nozzle—this focuses the steam directly on weed roots for maximum destruction.
If you don't have a dedicated steam tool, a large, heavy-duty kettle can work in a pinch. Just boil enough water to fill it completely and pour it directly over weeds. The key is consistent, high-temperature steam—water straight from the tap won't cut it.
✂️ Step 2: Clear the Area and Identify Target Weeds
Remove any large debris or rocks from the area you're treating—steam works best when it can penetrate directly into the soil. Focus on weeds with deep roots or persistent growth, like dandelions, crabgrass, or clover. These are the toughest to kill with other methods, but steam cuts through them effortlessly.
I like to work in small sections—about 2 feet by 2 feet at a time. This keeps the steam concentrated and ensures you don’t miss any spots. If the area is very weedy, you might need to pass over it 2-3 times to fully eradicate the roots.
☀️ Step 3: Apply Steam Directly to Weeds and Soil
Start by aiming the steam nozzle at the base of the weed, where the stem meets the soil. Hold it there for 10-15 seconds until you see the leaves wilt and turn brown. The steam kills the plant by disrupting its cellular structure—almost like cooking it from the inside out.
Next, move to the surrounding soil. Steam penetrates about 1-2 inches deep, so focus on the area where the roots are likely to be. You’ll see the soil steam and bubble—this means the heat is reaching the roots. For stubborn weeds, I add a little vinegar or salt to the steam mixture (if your equipment allows) to enhance the effect.
🌱 Step 4: Monitor and Retreat as Needed
After steaming, the weeds will die back within 24-48 hours. However, some deep-rooted weeds might regrow in 1-2 weeks
I recommend steaming on a dry, sunny day when the soil is warm. Warm soil absorbs heat better, making the steam more effective. Avoid steaming right before rain—moisture can dilute the heat and reduce effectiveness. Once the weeds are gone, keep the area weed-free by regularly steaming it every 4-6 weeks or by applying a layer of mulch or landscape fabric. Steam kills existing weeds but doesn’t prevent new seeds from sprouting. I use straw mulch in garden beds because it blocks sunlight and suppresses weed growth naturally. For pathways or driveways, a quick steam treatment every 2 months keeps weeds at bay without chemicals. The best part? Steam is safe for pets, kids, and the environment—no harmful residues left behind.🪴 Step 5: Maintain the Area to Prevent Regrowth
Tips & tricks for effective steam weeding
Here's what nobody tells you about getting the most out of your steam treatment—these tricks make all the difference between temporary results and lasting weed control.
Equipment Matters: The narrower the nozzle, the better the results. I've found that a 3-gallon capacity steam cleaner with a ¼-inch nozzle delivers the most consistent heat penetration. If you're using a kettle as a backup, make sure it's heavy-duty—lightweight kettles won't maintain enough pressure for deep root destruction. For stubborn patches, I add a 1:1 vinegar-water mix to the steam tank (if your equipment allows) for enhanced effectiveness.
Timing is Everything: Those 10-15 seconds per weed in Step 3 are critical—don't rush! You'll know you've done it right when the leaves first wilt, then turn completely brown. For thick weed clusters, I recommend working in 2-foot sections, passing over each weed twice. The second pass ensures you catch any roots you might have missed. I've seen some gardeners try to speed this up, but that's how weeds survive!
Soil Temperature Secret: Warm soil works like a heat amplifier. On a dry, sunny day, the soil will be at its warmest—this makes the steam penetrate deeper and work faster. If you're treating in cooler weather, I recommend pre-warming the soil with a heat lamp for 10-15 minutes before steaming. This isn't in the instructions because most people don't realize how much difference it makes!
Maintenance Hack: The 4-6 week maintenance schedule, mentioned in Step 5, works perfectly for garden beds. But for pathways and driveways, I've found that every 8 weeks, works better because these areas get more foot traffic that can disturb new weed seeds. The key is consistency—don't let weeds get established again, or you'll be fighting a bigger battle later.
Pro Tips for Killing Weeds With Steam
- Here's what nobody tells you about getting the most out of your steam treatment—these tricks make all the difference between temporary results and lasting weed control.
- Equipment Matters: The narrower the nozzle, the better the results.
- Timing is Everything: Those 10-15 seconds per weed in Step 3 are critical—don't rush!
Frequently asked questions
Got questions about steam weeding?
Here are answers to the most common ones to help you tackle weeds like a pro—without harsh chemicals!
Is steam weeding safe for plants and pets?
Yes! Steam targets weeds by killing their roots with high-temperature water vapor (up to 212°F+), leaving soil and nearby plants unharmed. Just keep pets away during treatment—steam can be hot, but it cools quickly. Perfect for gardens, patios, and even between pavers!
How long does it take for weeds to die after steaming?
Weeds typically wilt within minutes and die within 1–3 days. For stubborn roots (like dandelions), repeat the process after 24 hours. Steam penetrates deep, so you’ll see results faster than with manual pulling or herbicides. Pro tip: Aim for consistent steam pressure for best results!
Can I use a regular pressure washer for steaming?
Nope! Pressure washers spray water—steam requires a dedicated steam weeder (or a DIY setup with a boiler and hose). These machines generate superheated steam, which is essential for killing roots. If you’re handy, look for DIY steam generator kits for a budget-friendly option!
What’s the best time of day to steam weeds?
Early morning or late afternoon works best! Steaming in direct sunlight can cause steam to dissipate too quickly, reducing effectiveness. Also, avoid windy days—steam needs to linger on weeds. Bonus: Cool soil makes steam penetrate deeper, so water the area lightly beforehand if it’s dry.
What if steam doesn’t kill all the weeds?
If weeds persist, they might have deep or thick roots. Try steaming again after 24 hours or use a metal probe to loosen stubborn roots before pulling. For large infestations, spot-treat with vinegar (50% water, 50% white vinegar) as a follow-up—just avoid desirable plants!
Wrapping up and next steps
Steam is a powerful, eco-friendly way to banish weeds without chemicals, saving you time and effort while protecting your garden’s health. 🌱 Whether you’re tackling stubborn roots or preventing regrowth, this method delivers instant results with minimal tools.
Ready to transform your yard? Grab your steamer and start reclaiming your space—one weed-free patch at a time!
Next step: Test steam on a small area first to adjust heat settings, then expand your weed-free zone. Happy gardening! 🌿