
How To
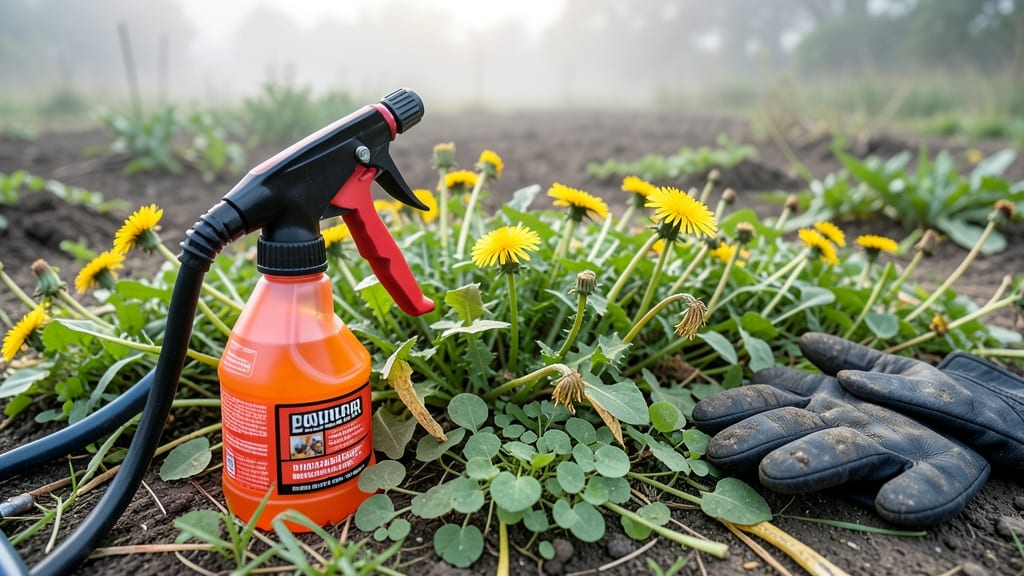
A pump sprayer for weed killer transforms stubborn weeds from a weekend chore into a 30-minute elimination. I’ve used this method for years to clear dandelions, creeping Charlie, and crabgrass without resorting to harsh chemicals—just targeted pressure and the right solution.
The key isn’t brute force; it’s precision timing and technique that keeps your lawn looking sharp while protecting surrounding plants.
Start with a 3- to 5-gallon pump sprayer (plastic won’t corrode like metal over time) and a pre-mixed weed killer labeled for your specific weeds. Safety first: wear gloves, eye protection, and avoid spraying on windy days—drifting spray can damage nearby flowers or vegetables.
For eco-conscious gardeners, vinegar-based solutions work for non-woody weeds, though they require reapplication.
When you’re ready, apply the solution on a dry, sunny morning when weeds are actively growing. A slow, steady stream at the base of the weed ensures full coverage without overspray.
Watch for wilting within hours—that’s your sign it’s working. For tough patches, repeat in 7–10 days. The right sprayer and method mean fewer weeds and more time enjoying your yard.
Pro tip: Clean your sprayer immediately after use to prevent clogs, and store it upside down to keep the pump primed. A little maintenance now means reliable performance next season.
Whether you’re tackling a small garden bed or a large lawn, this approach cuts down on labor and keeps your space weed-free efficiently.
📚 In This Guide
- What you need
- Instructions
- Tips and common mistakes
- Wrapping up and next steps
What you need
- ● Pump sprayer (1) – Choose a 1- to 2-gallon capacity with a fine-mist nozzle (e.g., blank">Chapin 63500 or similar). Pro tip: Look for BPA-free plastic for safety! 💡
- ● Weed killer concentrate (1 bottle) – Opt for a glyphosate-based or vinegar/salt solution (e.g., blank">Roundup or 20% vinegar + 1 tbsp dish soap). ⚠️ Warning: Avoid mixing chemicals unless labeled safe!
- ● Water (1-2 gallons) – Use clean, tap water (avoid hard water if possible).
- ● Measuring cup (1) – For precise mixing (e.g., 1/4 cup increments).
- ● Stirring stick or spoon (1) – A wooden or plastic utensil to avoid reactions with chemicals.
- ● Gloves (1 pair) – Nitrile or rubber gloves to protect your skin.
- ● Safety goggles (1 pair) – Essential for eye protection when handling concentrated weed killer.
- ● Spray shield or drop cloth (1) – Protects nearby plants and surfaces (e.g., plastic sheeting or cardboard).
- ● Spray tip extender (1) – Helps reach tall weeds without bending over.
- ● Backpack sprayer (alternative) – For larger areas (e.g., 5-gallon capacity).
- ● Spray pattern adjuster – For wide-angle or stream control.
- ● Label maker or tape – To mark your sprayer with contents and date.
- ● Clear, calm weather (avoid windy days to prevent drift).
- ● Targeted area free of pets/kids during application.
- ● Check local regulations—some areas restrict certain weed killers! 🌱
How to use a pump sprayer for effective weed control
This method delivers precise, targeted weed killer without harming surrounding plants when done correctly.
Prepare Your Pump Sprayer and Weed Killer Solution
First, ensure your pump sprayer is clean and free of residue from previous chemicals. Fill the tank with 1 gallon of water—this is the base for your solution. I always use distilled or rainwater because tap water minerals can reduce effectiveness over time. Add 2 tablespoons of dish soap (this acts as a surfactant to help the solution stick to weed foliage).
Next, measure 1 cup of vinegar (white vinegar works best) into the tank. Vinegar is a natural herbicide that works by breaking down cell walls in weeds. If you're dealing with particularly tough weeds like dandelions or crabgrass, you can add ½ cup of salt to boost effectiveness. Stir thoroughly to combine all ingredients completely.
Calibrate the Sprayer for Precise Application
Attach the nozzle to your pump sprayer and test the spray pattern on a piece of cardboard or scrap paper. You want a fine, even mist—not a heavy stream that will run off leaves or overspray nearby plants. Adjust the nozzle pressure by squeezing the pump handle until you achieve a consistent, fine spray. This ensures the solution adheres to weed surfaces rather than bouncing off.
Fill the sprayer tank completely and pump until the pressure stabilizes. You'll know it's ready when the spray pattern remains uniform without drips or uneven coverage. I like to test on a small weed first to confirm the solution is strong enough to kill but not so harsh it damages desirable plants.
Apply the Solution Directly to Weeds
Hold the sprayer 6-8 inches away from the weeds and apply the solution only to the foliage. Avoid spraying soil or nearby plants—vinegar and salt can harm other vegetation. Focus on the leaves and stems of the weeds, ensuring full coverage. You'll see the solution soak in within seconds, which is when it starts working its magic on the plant cells.
For stubborn weeds, you may need to apply the solution twice, allowing the first application to dry completely (about 1-2 hours) before reapplying. Watch for wilting within 24 hours—this is your signal that the weed killer is taking effect. If weeds remain green after 48 hours, they may require a stronger solution or repeated treatment.
Monitor and Retreat as Needed
Check treated areas after 3-5 days. Effective weed control will show as brown, crispy foliage and eventual collapse of the weed. If some weeds persist, they may have thick roots or be in a dormant state. In this case, repeat the application, this time focusing on the base of the weed where the stem meets the soil. This targets the root system more effectively.
After treatment, water the area lightly if your climate is dry. This helps rinse away any stray solution that may have landed on soil or nearby plants. Avoid watering for 24 hours after application to allow the vinegar-salt mixture to fully penetrate the weeds. Overwatering too soon can dilute the solution and reduce its effectiveness.
Maintain Your Sprayer for Future Use
Rinse the pump sprayer thoroughly with clean water after each use to prevent clogging and corrosion. Pay special attention to the nozzle and pump mechanism, as residue can build up and affect performance. Store the sprayer in a dry, shaded area to prolong its lifespan. I keep mine in a plastic bin with silica gel packets to absorb any moisture that might cause rust.
Refill the sprayer with 1 gallon of water and 1 tablespoon of vinegar every few weeks, even if unused, to keep the pump mechanism lubricated. This simple maintenance step ensures your sprayer is ready for next time without any hassle. With proper care, a pump sprayer can last years, making it a cost-effective tool for long-term weed control.
Tips & tricks for effective pump sprayer weed control
These targeted strategies will help you maximize your sprayer's efficiency and ensure stubborn weeds don't stand a chance.
Solution Strength: For particularly aggressive weeds like crabgrass or creeping Charlie, increase the salt to ¾ cup while keeping the other ingredients the same. The extra salt disrupts cellular function more aggressively, but test on a small area first—some plants may show stress symptoms. I've found this works best when combined with the second application technique mentioned in Step 3.
Application Technique: When targeting weeds growing near desirable plants, use the 6-8 inch distance but apply the spray in short bursts rather than continuous coverage. This minimizes overspray while still delivering enough solution to kill the weeds. For weeds with broad leaves like dandelions, focus on the undersides—the solution will penetrate more effectively through the porous leaf surface.
Timing is Everything: The 24-hour wilting indicator is your best friend for determining effectiveness. If you don't see wilting within 24 hours, the weeds either need a second application or have particularly thick cuticles. I've noticed that morning applications work best because dew on the weeds helps the solution adhere more effectively. Avoid spraying when rain is forecasted within 24 hours—it can wash away the solution before it works.
Maintenance Secret: After rinsing your sprayer, run a solution of 1 part white vinegar to 3 parts water through the tank and nozzle to remove any residual soap or salt buildup. This prevents clogging and keeps your sprayer performing optimally for years. I do this maintenance every third use regardless of how clean the sprayer appears to be.
Pro Tips for Pump Sprayer For Weed Killer
- These targeted strategies will help you maximize your sprayer's efficiency and ensure stubborn weeds don't stand a chance.
- Solution Strength: For particularly aggressive weeds like crabgrass or creeping Charlie, increase the salt to ¾ cup while keeping the other ingredients the same.
- Application Technique: When targeting weeds growing near desirable plants, use the 6-8 inch distance but apply the spray in short bursts rather than continuous coverage.
Frequently asked questions
Got questions about using a pump sprayer for weed killer? You’re not alone! Here are some of the most common concerns—plus straightforward answers to help you tackle weeds like a pro.
What’s the best time of day to spray weed killer with a pump sprayer?
The ideal time is early morning or late afternoon when temperatures are cooler (between 60°F–85°F). This reduces evaporation, improves absorption, and minimizes harm to desirable plants. Avoid spraying on windy days or when weeds are wilted—aim for active, healthy growth for best results.
Can I use a pump sprayer for weed killer on edible plants or vegetables?
Only if the herbicide is labeled safe for edible gardens. Most glyphosate-free or vinegar-based weed killers are non-toxic when used correctly, but always check the label. For edibles, spot-treat weeds carefully and avoid overspray. Organic options like boiling water or corn gluten meal are safer alternatives.
Why is my pump sprayer clogging or not spraying evenly?
Clogging usually happens due to dried herbicide residue or debris in the nozzle. Disassemble the sprayer, soak parts in warm soapy water, and rinse thoroughly. Use a fine-mesh screen in your mix to prevent future clogs. If the spray is uneven, adjust the nozzle or check for air leaks in the pump.
Is a pump sprayer better than a backpack or hose-end sprayer for weed killer?
It depends on your needs! Pump sprayers are great for precision control and larger areas (like lawns or gardens), offering consistent pressure. Backpack sprayers are portable for tight spaces, while hose-end sprayers are convenient but less accurate. For targeted weed killer, a pump sprayer wins for versatility and ease of refilling.
How long does it take for weed killer to work in a pump sprayer?
Most synthetic weed killers (like glyphosate) take 3–7 days to show results, while natural options (vinegar, salt) work faster but may require reapplication. Factors like weed type, weather, and concentration affect speed. Always follow the product’s instructions for best timing—patience pays off!
Wrapping up and next steps
Ready to reclaim your garden from those pesky weeds?
With the right pump sprayer for weed killer and a homemade solution, you’ve got everything you need for effective, eco-friendly results—no heavy machinery required! 🌱 Whether you’re tackling dandelions or crabgrass, consistency is key, so grab your sprayer and get to work with confidence.
Your next step? Test your recipe on a small patch first, then expand as needed. Happy spraying—and enjoy that weed-free paradise! 🌿✨