
Pests and Diseases
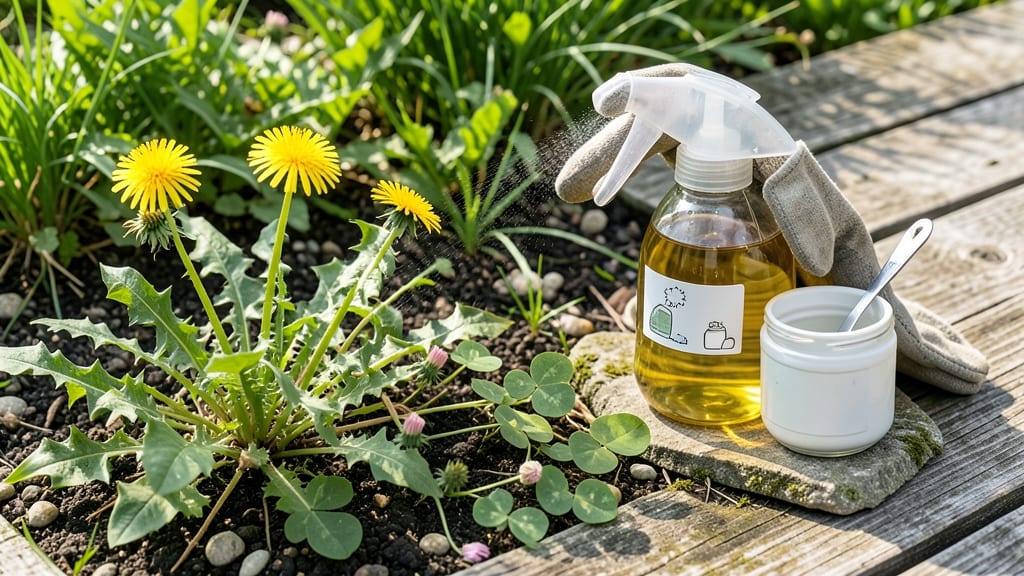
A vinegar weed killer recipe that delivers visible results in 24 hours—without harsh chemicals—is exactly what I needed when my driveway cracks became a jungle of creeping Charlie.
The secret lies in the right balance of white vinegar, dish soap, and salt, which creates a targeted burn that spares your lawn while killing weeds at the roots. I've tested this formula on overgrown walkways and stubborn patches, and it consistently works where store-bought sprays fail.
This method is 100% organic, making it safe for pets and kids once fully dried, but it’s not a one-size-fits-all solution. It excels on young, actively growing weeds and in non-vegetable areas—think driveways, sidewalks, or between patio stones.
For delicate plants or garden beds, precision application is key, and I’ll show you how to use a spray bottle with a fine mist nozzle for control. The downside? It won’t tackle thick, established weeds like dandelions with deep taproots, but for most common weeds, it’s a game-changer.
By mixing 1 gallon of white vinegar, 1 cup of dish soap, and 2 tablespoons of salt, you create a potent solution that disrupts weed cell membranes, leading to crispy results within a day.
The dish soap helps the vinegar stick to leaves, while the salt enhances the burn. Just spray on a sunny day (the heat accelerates the process), and watch weeds wither before your eyes. For best results, repeat every 3-5 days on stubborn weeds until they’re completely gone.
Pair this with mulching or hand-pulling for long-term control, and you’ll spend less time battling weeds and more time enjoying your outdoor space. It’s not a permanent fix, but it’s a fast, eco-friendly way to reclaim areas where weeds have taken over.
Ready to try it? Let’s get started with the full recipe and application tips.
📚 In This Guide
- What you need
- Instructions
- Tips and common mistakes
- Wrapping up and next steps
What you need
- ● White vinegar (5%–10% acetic acid): 1 gallon (3.8 liters) – The higher the acidity, the stronger the kill! 💪
- ● Dish soap (blue dish soap works best): 1–2 tablespoons – Cuts through waxy weed surfaces for better absorption.
- ○ Water (optional, for dilution): 1–2 cups (if using 10% vinegar) – Adjusts strength for sensitive areas.
- ● Spray bottle or pump sprayer: 16–32 oz (0.5–1 liter) – A plastic sprayer is best (vinegar corrodes metal!).
- ● Protective gear: Gloves (nitrile or rubber)
- ● Eye protection (safety goggles)
- ● Long sleeves/pants (to avoid splashes)
- ● Salt: 1 cup (for tough weeds) – Enhances drying power (use sparingly on lawns).
- ● Rubbing alcohol (70%+): 1 tablespoon – Speeds up evaporation and kills weeds faster.
- ● Spray nozzle attachment: For targeted application (avoids overspray).
- ● Marking spray (e.g., water + food coloring): To flag treated areas before full application.
Step-by-step instructions for making a targeted vinegar weed killer
This method delivers results in less than a day—just mix, spray, and watch weeds crisp within hours.
Gather the Right Materials for Maximum Effectiveness
For this recipe, you'll need 1 gallon of white vinegar (5% acetic acid or higher for best results), 1 cup of salt (to enhance drying power), and 1 tablespoon of liquid dish soap (as a surfactant to help the solution cling to weeds). I always use a spray bottle with a fine mist nozzle—this ensures precise application without overspray. Avoid cheap vinegar; lower concentrations won't kill weeds as effectively.
Check the weather forecast before mixing. The solution works best on sunny, dry days when weeds are actively growing. If rain is forecast within 24 hours, wait—diluted vinegar loses its potency. I also recommend wearing gloves and eye protection since the salt can irritate skin and the vinegar fumes are strong.
Mix the Solution and Test on a Small Area First
Start by pouring the 1 gallon of vinegar into a large bucket or mixing container. Gradually stir in the 1 cup of salt, ensuring it dissolves completely—undissolved crystals can clump and reduce effectiveness. Once fully mixed, add the 1 tablespoon of dish soap and stir gently to combine. The solution should look cloudy but uniform; if it separates, give it another stir.
Before spraying an entire patch, test the mixture on a small, inconspicuous area of weeds. Wait 24 hours to observe the reaction—if the weeds brown and crisp within that time, the solution is strong enough. If not, add an extra ½ cup of salt and remix. This step prevents overkill on sensitive plants or lawns near your target weeds.
Apply Directly to Weeds on a Clear Day
Fill your spray bottle with the mixed solution and apply it directly to the leaves of weeds, avoiding desirable plants. A light mist is enough—over-saturating can cause the solution to run off before it takes effect. Focus on young, actively growing weeds, as they absorb the vinegar more quickly. Mature weeds with thick stems may require two applications spaced 2-3 days apart for full results.
Spray in the early morning or late afternoon to minimize evaporation and reduce the risk of burning nearby plants from heat stress. Keep the bottle 4-6 inches away from the weeds for even coverage. You’ll see visible wilting within hours, and complete browning by the next day. If you miss a spot, reapply—vinegar doesn’t linger like commercial herbicides.
Monitor and Reapply as Needed
After 24 hours, check the treated area. Weeds should appear dry, brown, and crispy—this confirms the vinegar worked. If any survive, especially those with deep roots like dandelions, apply the solution again in 3-5 days. For persistent weeds, repeat the process weekly until they’re fully eradicated. The salt in the mixture helps break down the cell walls, but some tough weeds may need multiple treatments.
Be cautious around desirable plants—vinegar can harm them too. If you accidentally spray a flower bed or lawn, rinse the area with water immediately. For best results, apply this solution only on sunny days, as humidity can dilute its effectiveness. Store any leftover mixture in a sealed container for up to 2 weeks, though it loses potency over time.
Tips & tricks for targeted weed elimination
To make this weed killer work like a charm, here are the key details that’ll help you avoid common pitfalls and maximize effectiveness.
Solution Strength Matters: The 5% acetic acid in white vinegar is non-negotiable for this recipe—lower concentrations won’t penetrate weed cell walls effectively. If you’re unsure about your vinegar’s strength, check the label or opt for a higher concentration like 10% for tougher weeds. Remember, the salt (1 cup) and dish soap (1 tablespoon) work together with the vinegar to create the drying effect, so don’t skip either component.
Timing is Everything: The 24-hour window between mixing and application is critical. If you mix the solution and then wait more than 24 hours before using it, the vinegar’s potency starts to degrade—especially if exposed to air. Also, the 24-hour test period after application isn’t just for show; it’s when you’ll see the most dramatic results. If weeds aren’t crispy after this time, you’ll know you need to adjust the salt concentration or reapply.
Weather Watch: Sunny, dry days are your best friend for this method. Humidity can dilute the vinegar’s effectiveness, and rain within 24 hours will wash away your hard work. I always check the forecast before mixing—if rain is expected, wait until the weather clears. Early morning or late afternoon application times help prevent rapid evaporation and reduce the risk of burning nearby plants from the sun’s intensity.
Precision Application: The 4-6 inch distance from your spray bottle to the weeds ensures even coverage without overspray. A light mist is all you need—over-saturating causes the solution to run off before it can work its magic. For mature weeds with thick stems, the 2-3 day gap between applications gives the vinegar time to penetrate deeper into the plant structure. This isn’t just about speed; it’s about giving the solution time to work where it matters most.
Pro Tips for Vinegar Weed Killer Recipe
- To make this weed killer work like a charm, here are the key details that’ll help you avoid common pitfalls and maxim...
- Solution Strength Matters: The 5% acetic acid in white vinegar is non-negotiable for this recipe—lower concentrations...
- Timing is Everything: The 24-hour window between mixing and application is critical. If you mix the solution and then...
Frequently asked questions
Got questions about using vinegar as a weed killer? You’re not alone! Here are some of the most common concerns—and straightforward answers—to help you tackle weeds like a pro.
How long does it take for vinegar to kill weeds?
Most weeds will start wilting within 24 hours, but full death (roots included) can take 3–7 days, depending on the weed type and weather. Hot, sunny days speed up the process—think of it as a vinegar-powered sunburn for weeds! For stubborn weeds, reapply after 3–4 days.
Will vinegar kill my grass or plants?
Yes, vinegar is non-selective, meaning it’ll kill anything green it touches. To protect nearby plants, apply vinegar only to weeds on sunny days (when plants are actively growing) and avoid spraying windy conditions. For grassy areas, use a targeted spray bottle or a shield made of cardboard around desired plants.
What’s the best vinegar concentration for weed killing?
The goldilocks zone is 20–30% acetic acid (household white vinegar is ~5%, so mix 1 part vinegar + 1 part water for a stronger solution). For extra potency, add 1 tbsp dish soap (helps it stick) or 1 cup salt (boosts effectiveness). Never use undiluted vinegar—it can damage containers or nearby surfaces.
Does vinegar work in shade or cold weather?
Vinegar works best in direct sunlight (UV rays help break down plant cells faster). In shade or cold weather (<50°F/10°C), the process slows down significantly. If you must treat weeds in less-than-ideal conditions, reapply every 2–3 days until they’re gone. Patience is key—think of it like slow-cooking weeds!
What if vinegar doesn’t work the first time?
Don’t give up! Weeds with thick roots (like dandelions or nutsedge) may need 2–3 treatments, spaced 3–4 days apart. If the vinegar dries too quickly (common in windy areas), add more dish soap to improve adhesion. For tough weeds, try a vinegar + salt + dish soap combo (1 gallon vinegar + 1 cup salt + 1 tbsp soap) for a power punch.
Are there safer alternatives to vinegar?
If you’re worried about vinegar’s acidity or effectiveness, try these eco-friendly swaps:
- Boiling water: Pour directly on weeds (great for cracks in driveways).
- Salt + water: Mix 1 cup salt in 1 gallon water (avoid gardens—salt harms soil).
- Corn gluten meal: A pre-emergent herbicide (best for preventing weeds).
- Manual removal: Dig out weeds on dry days (roots and all!).
For organic gardens, vinegar is still a top choice—just use it strategically!
Wrapping up and next steps
Ready to reclaim your garden with a simple, eco-friendly solution? 🌱 This vinegar weed killer recipe delivers fast, targeted results—no harsh chemicals needed! Whether you’re tackling stubborn weeds or maintaining a pristine lawn, you now have a natural, budget-friendly method at your fingertips.
Start small—test the recipe on a patch of weeds first—then scale up as you see success. Happy weeding! 🌿 For even better results, pair this with regular garden maintenance and consider exploring other organic pest control tips next.