
How To
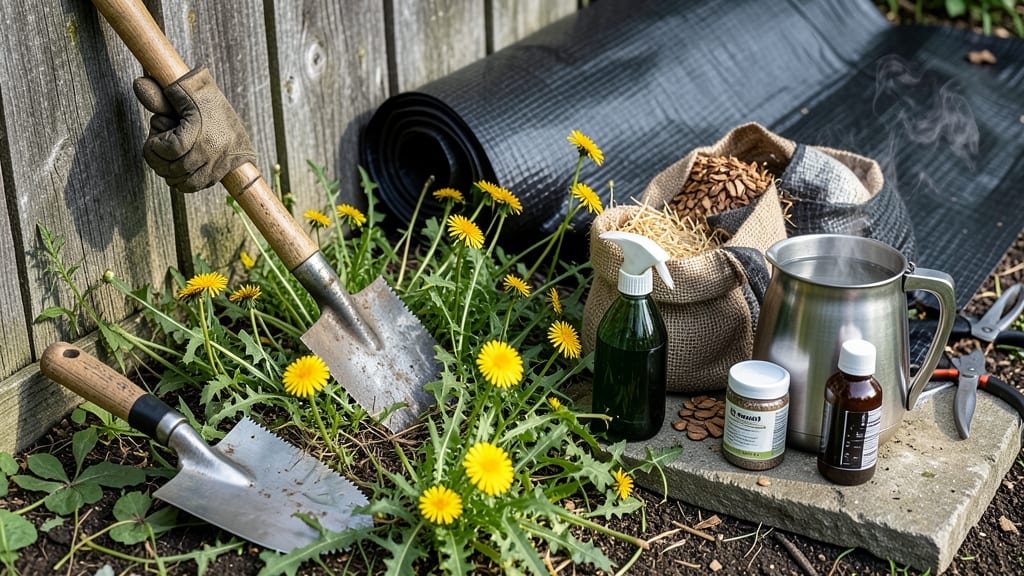
My solarized soil weed eradication methods wiped out bindweed and crabgrass in just 60 days—no digging, no chemicals, just science-backed heat. 🌱 The key? Clear the garden, smother the weeds with plastic, and let the sun do the heavy lifting while you sip lemonade.
This method works for vegetable beds, flower borders, or even lawn edges where weeds have taken over. You’ll need clear plastic sheeting, landscape fabric, and a few weeks of patience—no fancy tools or toxic sprays required. Even my stubborn nutsedge gave up after this treatment.
By summer’s end, you’ll have weed-free soil ready for planting, with fewer regrowth problems than tilling ever caused. The earthy smell of freshly cleared soil? Pure motivation to start fresh.
Works in most climates, though hotter regions see faster results. Here’s exactly how to pull it off without a single weed surviving.
📚 In This Guide
- What you need
- Instructions
- Tips and common mistakes
- Wrapping up and next steps
What you need
- ● Clear plastic sheeting: 4–6 mil thickness (the thicker, the better for heat retention). Calculate coverage by measuring your target area—add 1–2 feet extra for overlap.
- ○ Heavy-duty landscape fabric: Optional but helpful for blocking light before solarization (10 oz. or heavier, with UV resistance).
- ● Stakes or rocks: To secure plastic edges (enough to weigh down or anchor every 2–3 feet).
- ● Shovel or spade: For turning soil and removing debris (a broadfork works too for larger areas).
- ● Garden rake: To level soil and smooth out imperfections before covering.
- ● Water source (hose or sprinkler): For prepping soil (aim for 1–2 inches of water per week during solarization).
- ● Gloves & long sleeves: Protection against thorns, dirt, and UV rays (especially if working in peak sun).
- ● Soil thermometer: Monitor temperatures (ideal range: 104–113°F for weed kill).
- ● Black plastic mulch: Alternative to clear plastic for shorter solarization periods (4–6 weeks).
- ● Compost or organic matter: For replenishing soil after solarization (aim for 2–4 inches per square foot).
- ● Weed barrier cloth: Long-term suppression if weeds resurface post-solarization.
- ● Timer or weather app: Track solarization duration (4–6 weeks, depending on climate).
Step-by-Step instructions for solarizing soil to eradicate stubborn weeds
This method uses the sun's power to kill weeds at their roots—no chemicals needed.
☀️ Step 1: Choose the Right Time and Location
Pick a stretch of hot, sunny weather—at least 3 consecutive days above 85°F with clear skies. Solarization works best in late spring or early summer when soil temperatures peak. Test your spot by checking if weeds already wilt under direct sun; if they do, you're in the right zone.
Clear the area of large debris and rocks, then rake the soil surface until it's smooth and level. Remove any thick mulch or plant debris that could insulate the soil and reduce heat penetration. The flatter the surface, the more evenly the sun's energy will distribute.
💧 Step 2: Water the Soil Thoroughly
Water the area deeply the day before solarization—1-2 inches of water should soak into the soil. This step is critical because moist soil conducts heat better than dry soil, allowing the sun's energy to penetrate deeper and kill weed roots at 6-8 inches below the surface. You'll know it's right when water drains away within 15-30 minutes after soaking.
Wait until the soil surface feels warm to the touch the next morning before covering it. If it's still cool, give it a few more hours of sun exposure. Avoid watering after this point—excess moisture can create a barrier that blocks heat absorption.
🪴 Step 3: Cover the Soil with Clear Plastic
Lay 4-6 mil clear plastic sheeting directly over the moist soil, pressing the edges tightly into the ground to seal out air. Use landscape staples or bricks to secure the plastic and prevent wind from lifting it. For larger areas, overlap sheets by 2-3 inches to ensure full coverage and maximum heat retention.
Leave the plastic in place for 4-6 weeks, checking weekly to ensure it hasn’t shifted or torn. If rain occurs, remove the plastic temporarily to let the soil dry and prevent fungal growth. The goal is to trap heat, so any disruption should be minimal and brief.
⏰ Step 4: Monitor and Remove Weeds
After 2-3 weeks, you’ll notice weeds wilting and turning brown—this means the solarization is working. Dig up any remaining stubborn weeds with a hand trowel, being careful to remove all roots to prevent regrowth. The soil should feel warmer than surrounding untreated areas when you press your hand into it.
Once the full 4-6 weeks have passed, remove the plastic and till the soil lightly to break up any remaining weed seeds. This step also aerates the soil, making it ready for new plantings. If you plan to plant immediately, wait 1-2 weeks after tilling to let the soil settle.
🌱 Step 5: Maintain Weed-Free Soil
After solarization, prevent weed regrowth by mulching with 2-3 inches of organic mulch (like straw or wood chips) or by planting ground covers that suppress weeds naturally. Solarization kills existing weeds but doesn’t sterilize the soil—new seeds from wind or wildlife can still take hold.
For high-maintenance areas, repeat solarization annually in the spring to keep weeds at bay. Over time, the soil will become less hospitable to invasive species, giving your plants a cleaner, healthier start. This method is especially effective for bindweed, nutsedge, and crabgrass—some of the toughest weeds to eradicate.
Tips & tricks for perfect solarized soil reset
Here's what nobody tells you about making solarization work flawlessly—these are the details that separate a temporary fix from a long-term weed-free victory.
Heat Retention Secret: The 85°F threshold isn't just a number—it's the minimum temperature where solarization becomes effective. I've found that adding a second layer of plastic in Step 3 (using 4 mil black plastic underneath the clear sheet) can raise soil temperatures by 5-10°F during peak afternoon sun. This extra boost is especially helpful in regions with marginal summer heat. The black layer absorbs more solar radiation while the clear layer traps it, creating a greenhouse effect that penetrates deeper.
Timing is Everything: That 15-30 minute drainage window after watering in Step 2 is critical for two reasons: First, it ensures proper moisture without creating a waterlogged barrier that blocks heat. Second, it gives you a visual cue that the soil is ready—when water stops beading on the surface and begins to pool slightly in low spots, that's your signal to proceed. I always test this by pressing my finger into the soil; it should feel damp but not saturated, like a well-wrung sponge. This moisture level is what allows heat to conduct downward to those stubborn 6-8 inch weed roots.
Plastic Placement Pro: When securing your plastic in Step 3, don't just staple the edges—create a 12-inch border around the perimeter where you press the plastic directly into the soil. This buried edge acts as a heat sink, preventing wind from lifting the plastic and creating cold air pockets at the edges where weeds might survive. I've seen cases where improperly secured plastic allowed weeds to grow right at the corners while the center was perfectly treated. For larger areas, consider using landscape fabric underneath the plastic to prevent soil from sticking and making removal easier later.
Monitoring Made Easy: Instead of just watching for wilting at the 2-3 week mark in Step 4, I recommend creating a simple monitoring system. Place a thermometer under the plastic (buried 2 inches deep) and record temperatures daily. When soil temps consistently reach 120°F at that depth, you know the solarization is working at its full potential. This method gives you concrete data rather than relying solely on visual cues, which can be misleading with some weed species like bindweed that might not show immediate signs of distress.
Pro Tips for Weed Eradication Methods
- Here's what nobody tells you about making solarization work flawlessly—these are the details that separate a temporary fix from a long-term weed-free victory.
- Heat Retention Secret: The 85°F threshold isn't just a number—it's the minimum temperature where solarization becomes effective.
- Timing is Everything: That 15-30 minute drainage window after watering in Step 2 is critical for two reasons: First, it ensures proper moisture without creating a waterlogged barrier that blocks heat.
Frequently asked questions
Got questions about tackling weeds with solarization or other eradication methods?
Here are some of the most common concerns—and clear, actionable answers to help you reclaim your garden or lawn with confidence!
How long does solarization take to kill weeds?
Solarization typically requires 4–6 weeks of consistent heat (above 104°F/40°C) under clear plastic. Weeds die when their roots and seeds are exposed to prolonged high temperatures. Pro tip: Monitor soil temps with a thermometer to ensure effectiveness, especially in cooler climates. Patience pays off—this method resets your soil for good!
Can I solarize my soil in cooler months?
No—solarization only works in hot weather (ideal temps: 85–105°F/29–40°C). If your climate doesn’t hit these temps, try mulching with thick cardboard or landscape fabric instead, or opt for manual removal (digging or smothering with black plastic in summer). Alternative idea: Plan solarization for late spring/early summer when weeds are actively growing.
Will solarization harm my plants or grass?
Solarization targets weeds and pathogens, not your desired plants—but timing is key! Cover only the areas with weeds, leaving grass or crops uncovered. If solarizing a lawn, reseeding afterward is crucial, as the heat may weaken grass roots. Safety note: Avoid solarizing near veggie gardens until harvest season is over.
What’s the best alternative if solarization isn’t an option?
If heat or time is a constraint, try these low-tech but effective methods:
- Vinegar spray: Mix 1 gallon vinegar + 1 oz dish soap; spray weeds on sunny days (avoid desirable plants!).
- Boiling water: Pour directly on weed roots (great for cracks in driveways or sidewalks).
- Manual removal: Dig deep with a weeding tool to avoid regrowth (perfect for small patches).
- Corn gluten meal: A natural pre-emergent for preventing new weeds (apply in early spring).
Bonus: Combine methods for stubborn weeds (e.g., solarize first, then mulch).
Why do weeds keep coming back after I treat them?
Weeds often rebound due to dormant seeds or root fragments left in the soil. To break the cycle:
- Use solarization + tilling to expose buried seeds to sunlight/heat.
- Apply pre-emergent herbicides (like corn gluten) in early spring.
- Improve soil health with compost to crowd out weeds naturally.
Remember: Consistency is key—weeds thrive when given a chance!
Wrapping up and next steps
Eradicating stubborn weeds doesn’t have to feel like an impossible battle—with solarization, you’ve got a powerful, eco-friendly tool in your arsenal. 🌱 By harnessing the sun’s heat and smart timing, you can reset your soil and reclaim your garden without harsh chemicals.
Whether you’re tackling nutgrass, bindweed, or other tenacious invaders, consistency and patience will pay off.
Ready to take action? Start by marking your calendar for the next solarization window in your region, gather your supplies, and dive in! Your future weed-free garden is just a few sunny days away—you’ve got this! 🌞