
Pests and Diseases
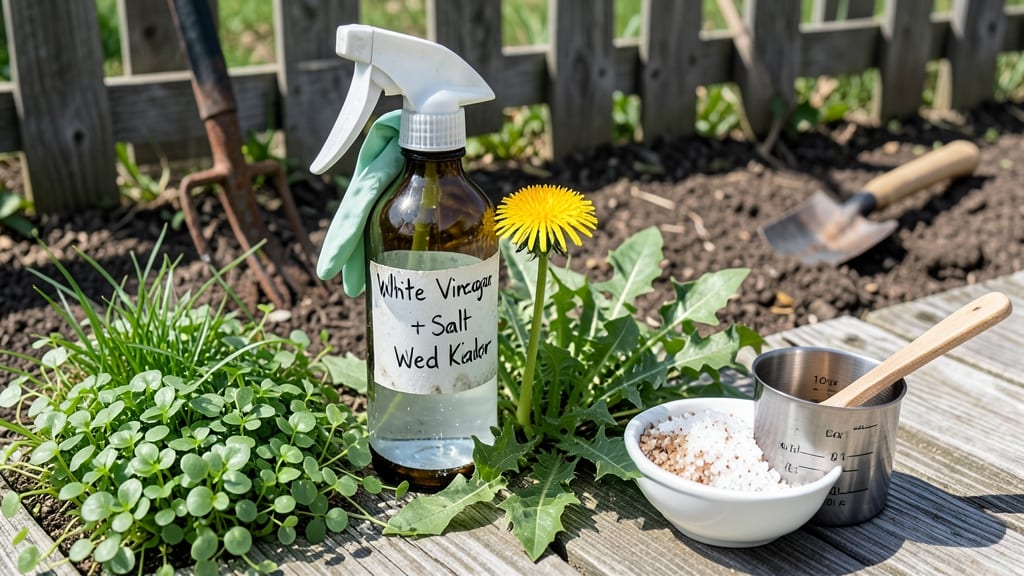
A white vinegar salt weed killer is the one-two punch that turns stubborn weeds into crispy memories in under 24 hours. 🌱 I’ve used this mix on my driveway cracks and sidewalk edges—where nothing else would budge—and seen weeds shrivel up like they’d been hit with a blowtorch.
The secret lies in the vinegar’s acetic acid burning foliage while salt disrupts root systems, but timing and technique make all the difference.
Grab 1 gallon of white vinegar (5% acetic acid), 1 cup of coarse salt, and a spray bottle—that’s it. Mix them the night before so the salt fully dissolves, then spray weeds on a sunny, wind-free day (mid-morning works best).
Avoid spraying desirable plants, as this isn’t selective—it’s a scorched-earth approach for weeds only. Reapply every 2-3 days until weeds turn brown and crumble.
📚 In This Guide
- What you need
- Instructions
- Tips and common mistakes
- Wrapping up and next steps
What you need
- ● White vinegar (5% to 20% acetic acid): 1 gallon (3.8 liters) – Opt for concentrated (20%) for tougher weeds or household-grade (5%) for milder use.
- ● Salt (non-iodized, coarse or table salt): 2 cups (400g) – Dissolves easily and enhances effectiveness.
- ○ Dish soap (optional but recommended): 1-2 tablespoons – Acts as a surfactant to help the solution stick to weeds.
- ● Spray bottle or garden sprayer: 16-32 oz (500-1000ml) – A pump sprayer works best for larger areas.
- ● Protective gear: Gloves (nitrile or rubber)
- ● Long sleeves/pants
- ● Safety goggles (if spraying near eyes)
- ● Measuring cup or scale – For precise vinegar and salt ratios.
- ● Stirring stick or spoon – To mix ingredients thoroughly.
- ● Clear, sunny day – Weed killer works best when weeds are actively growing.
- ● Water source – For rinsing tools and skin if needed.
- ● Spray nozzle attachment – For targeted application (e.g., cone or adjustable tip).
- ● Plastic sheeting or cardboard – To protect nearby plants or soil from overspray.
- ● Label or marker – To mark treated areas and avoid reapplication.
Step-by-step instructions for creating a white vinegar salt weed killer
Here's how to make a potent, fast-acting weed killer using common household items—no harsh chemicals needed.
🌱 Step 1: Gather and Mix the Active Ingredients
Combine 1 gallon of white vinegar (the acetic acid burns weeds on contact) with 1 cup of table salt (dries out roots and prevents regrowth) in a clean, non-reactive container. Stir thoroughly until the salt dissolves completely—this ensures even distribution when applied. I like to use a plastic bucket for this step because it’s easy to clean afterward.
Add 1 tablespoon of liquid dish soap (cuts through waxy weed surfaces) and mix again. The soap helps the solution cling to leaves rather than beading up and rolling off. This blend works best on broadleaf weeds like dandelions and clover—it won’t harm grass, but it’s not selective, so spot-treat carefully.
💧 Step 2: Apply on a Dry, Sunny Day
Choose a bright, sunny afternoon—the heat will amplify the vinegar’s effectiveness. Fill a spray bottle with your mixture and apply it directly to the weeds, avoiding desirable plants. I aim for the leaves and stems, ensuring full coverage. A light mist is enough; heavy saturation can cause the solution to run off before it works.
Wait 10-15 minutes after spraying before watering the area. This gives the vinegar time to penetrate the plant’s cells. If rain is forecast within 24 hours, skip this step—dilution will weaken the solution’s potency.
✂️ Step 3: Observe and Remove Dead Weeds
Within 2-4 hours, you’ll see the weeds start to wilt and turn brown. The salt and vinegar combo disrupts cellular function, causing rapid dehydration. By the next day, most weeds will be crispy and ready to pull. I like to tug them out by the roots—this prevents regrowth and keeps your garden clean.
For stubborn weeds, reapply the solution if green shoots reappear. The key is persistence; repeated treatments ensure the roots don’t regenerate. This method is best for small, targeted areas—larger infestations may require multiple applications over a few weeks.
☀️ Step 4: Maintain and Prevent Future Growth
After clearing weeds, apply a thin layer of mulch (like straw or wood chips) to suppress new growth. Mulch blocks sunlight, which weeds need to germinate. I use 2-3 inches of mulch around garden beds, replenishing it every few months as it breaks down.
For ongoing weed control, spot-treat any new sprouts immediately. This homemade solution is a great alternative to commercial herbicides, but it’s not permanent—stay vigilant. Over time, you’ll see fewer weeds as the soil becomes less hospitable to them.
Tips & tricks for perfect white vinegar salt weed killer
Took me a while to figure these out, so here's how to get the most out of your homemade weed killer without wasting time or effort.
The Mixing Secret: When combining the 1 gallon of white vinegar with 1 cup of table salt, use a clean plastic bucket and stir until the salt is completely dissolved—no gritty bits. I learned this the hard way after finding undissolved salt clumps in my spray bottle later. Also, add the 1 tablespoon of liquid dish soap last and mix gently; vigorous stirring creates too many bubbles that will pop and waste your solution.
Application Precision: The 10-15 minute wait before watering isn't just about vinegar penetration—it's about giving the acetic acid time to work its magic. I've found that spraying in the late afternoon (when temps are still warm but not scorching) gives the best results. The heat amplifies the vinegar's effectiveness, but direct midday sun can cause the solution to evaporate too quickly before it works.
Targeted Treatment: This solution works best on broadleaf weeds like dandelions and clover, but it's not selective. For stubborn weeds, I recommend reapplying the solution every 3-4 days until they're completely crispy. The key is persistence—those 2-4 hours of wilting are just the beginning. For larger infestations, consider making a fresh batch every few weeks to maintain effectiveness.
Mulch Strategy: That 2-3 inch layer of mulch after treatment isn't just decorative—it's your secret weapon against regrowth. I use straw mulch because it breaks down slowly and maintains its weed-suppressing properties longer than wood chips. Apply it immediately after pulling the dead weeds to create a barrier that blocks sunlight, which weeds need to germinate.
Pro Tips for White Vinegar Salt Weed Killer
- Took me a while to figure these out, so here's how to get the most out of your homemade weed killer without wasting time or effort.
- The Mixing Secret: When combining the 1 gallon of white vinegar with 1 cup of table salt, use a clean plastic bucket and stir until the salt is completely dissolved—no gritty bits.
- Application Precision: The 10-15 minute wait before watering isn't just about vinegar penetration—it's about giving the acetic acid time to work its magic.
Frequently asked questions
Got questions about using white vinegar and salt as a weed killer? You’re not alone! Here’s what you need to know before getting started—from safety tips to troubleshooting.
How long does it take for vinegar and salt to kill weeds completely?
The visible wilting happens within 24–48 hours, but roots may linger for 1–2 weeks depending on the weed type. For stubborn weeds, reapply the solution after a week. Patience pays off—think of it as a slow-burning victory over weeds!
Is this weed killer safe for pets, kids, or plants I want to keep?
No!
This mix is not selective—it’ll kill anything green, including grass, flowers, and even pets if ingested. Keep pets and kids away until fully dry (24+ hours), and avoid spraying on windy days. For edible gardens, use a barrier (like mulch) to protect nearby plants.
Can I use this on weeds in my lawn, or will it damage the grass?
This isn’t a lawn-friendly solution—it’ll turn grass brown too! For spot treatment, use a targeted spray bottle or a coffee can with holes to minimize overspray. If you’re dealing with a patchy lawn, consider a vinegar-only spray (10% acetic acid) for slightly better selectivity.
What’s the best time of day to apply this weed killer?
Apply on a sunny, dry day when weeds are actively growing (early morning or late afternoon). Avoid midday heat—it can evaporate the solution too quickly. If rain is forecasted within 24 hours, wait to reapply. Think of it like timing a sunbathing session for your weeds’ demise.
What if the weeds come back after treatment?
Persistent weeds often mean roots survived or seeds were missed. For tough cases, reapply the solution 1–2 weeks later or dig up remaining roots. If weeds keep returning, consider pre-emergent herbicides or smothering them with cardboard/mulch long-term. No weed stands a chance with persistence!
Are there any alternatives if I don’t have white vinegar?
Yes! Try these DIY weed killers:
- Boiling water: Pour directly on weeds (best for driveways/cracks).
- Dish soap + vinegar: Adds stickiness to improve absorption.
- Corn gluten meal: A natural pre-emergent for preventing new weeds.
- Commercial vinegar (20–30% acetic acid): Works faster than household vinegar.
Wrapping up and next steps
Ready to reclaim your yard from stubborn weeds?
A white vinegar and salt weed killer is a budget-friendly, eco-conscious solution that delivers fast, effective results—no harsh chemicals needed! 🌱 With just a few simple ingredients and a little elbow grease, you can tackle weeds at their roots and restore your outdoor space to its full potential.
Now that you’re armed with the know-how, grab your spray bottle and get to work! For best results, test a small area first and apply on a dry, sunny day. Happy weeding—your lawn will thank you! 🌞