
Advice
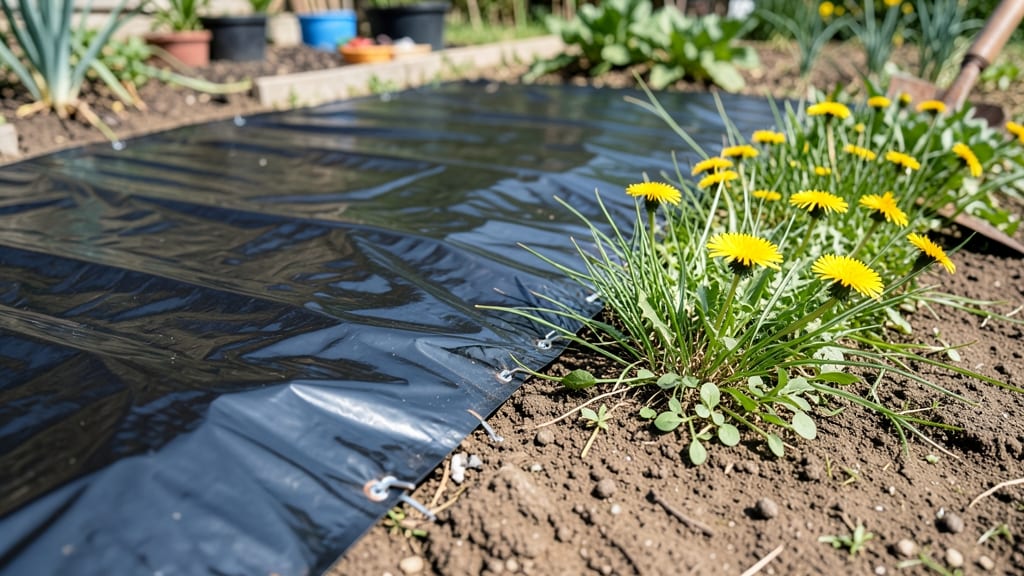
Killing weeds with black plastic turns your weed problem into a sun-blocking smother that works in weeks. 🌱 I’ve used it to clear stubborn patches of crabgrass and clover—no digging, no chemicals, just heat and darkness doing the work for me. The secret lies in trapping sunlight and raising soil temperatures, which kills weeds while preserving your garden’s structure.
You’ll need a roll of black landscape fabric (not plastic—it lasts longer), heavy rocks or landscape staples to secure the edges, and a sunny workday. Lay it down in late spring when weeds are actively growing, and within 4-6 weeks, you’ll see dramatic results.
The best part? It also warms the soil for planting and retains moisture—ideal for organic gardeners who want to avoid herbicides.
📚 In This Guide
- What you need
- Instructions
- Tips and common mistakes
- Wrapping up and next steps
What you need
- ● Black plastic mulch: 4–6 mil (0.01–0.015 inch) thick, UV-stabilized (e.g., agricultural-grade black plastic). Calculate coverage by measuring your garden bed area in square feet.
- ● Heavy-duty staples or landscape staples: 1-inch galvanized staples (1 lb box covers ~1,000 sq ft).
- ● Utility knife or box cutter: For clean cuts and trimming edges.
- ○ Garden twine or burlap strips (optional but helpful): To secure edges and prevent wind lift.
- ● Shovel or spade: For clearing existing weeds and smoothing soil.
- ● Gloves: Heavy-duty work gloves to protect your hands from sharp soil and plastic edges.
- ● Edging material: Metal or plastic garden edging to keep plastic in place and create a neat border.
- ● Rocks or pavers: For anchoring edges and adding weight to prevent shifting.
- ● Soil thermometer: To monitor temperature under plastic (ideal for warm-season plants).
- ● Hose with spray nozzle: For dampening soil before laying plastic to reduce air pockets.
How to use black plastic mulch for weed elimination
This method doesn’t just hide weeds—it starves them out in weeks with solar power.
🌱 Step 1: Clear the Area Thoroughly
Start by removing all visible weeds and their roots. Use a hand fork or weeding knife to dig out stubborn roots—even small fragments will regrow. I like to work when the soil is moist (after rain or watering) because weeds pull easier. Rake up debris and discard it in yard waste or compost (if it’s weed-free).
This is the most critical step. Skipping it means you’re just covering weeds, not killing them. If you see any green shoots poking through the plastic later, you’ll know you missed some. Take your time—this ensures the black plastic actually works.
🪴 Step 2: Prepare the Soil Surface
Smooth the soil with a rake or board to eliminate high and low spots. You want the surface to be level so the black plastic lies flat—bumps create gaps where weeds can peek through. Press down any loose soil to prevent wind from shifting the plastic once it’s down.
For extra effectiveness, I like to add a thin layer of horticultural sand or compost over the soil first. This helps block out even more light and adds a barrier that makes it harder for weed seeds to sprout later. Just keep it under ¼ inch—thicker layers can suffocate soil microbes.
☀️ Step 3: Lay the Black Plastic Correctly
Unroll the black plastic mulch over the area, overlapping edges by 4-6 inches to prevent sunlight from sneaking in. Smooth out any wrinkles—creases trap moisture and can create hot spots that damage plants nearby. Secure the edges with landscape staples or brick borders, pressing firmly so wind can’t lift it.
Leave 6-12 inches of plastic exposed around the edges if you plan to plant later. This prevents the plastic from touching stems or trunks, which can cause damage. For permanent weed control, you can bury the edges slightly with soil to seal them completely.
⏰ Step 4: Monitor and Extend Coverage
Check the area weekly for the first 4-6 weeks. If you see any green shoots breaking through, pull them immediately and smooth the plastic back down. Most weeds will die within 2-4 weeks of total darkness, but deep-rooted perennials may take longer—sometimes up to 6-8 weeks.
For best results, leave the plastic in place for at least one full growing season. This ensures even dormant weed seeds in the soil won’t germinate. If you’re prepping for planting, remove the plastic just before you sow seeds or transplant seedlings.
✂️ Step 5: Remove and Reuse (Or Dispose Properly)
When you’re ready to plant, cut the plastic into strips and fold it for reuse in another area. Never burn it—black plastic releases toxic fumes. If it’s torn or degraded, dispose of it in your local yard waste bin. After removal, till the soil lightly to aerate it before planting.
Here’s the thing—black plastic breaks down over time, especially in sunny climates. If you’re using it long-term, plan to replace it every 2-3 years for maximum effectiveness. For organic gardens, consider cardboard or thick mulch as a biodegradable alternative after the first season.
Tips & tricks for perfect weed elimination with black plastic
Here's what nobody tells you about making this method work flawlessly—no more half-hearted attempts that leave weeds sneaking back.
The Soil Prep Secret: In Step 2, when you're smoothing the soil, take an extra moment to press down any stubborn roots with the back of your rake. I learned this the hard way after seeing weeds poke through gaps I didn't notice. Think of it like creating a smooth canvas—any imperfection becomes a weak spot where weeds can breach your barrier.
Edge Security Strategy: For Step 3, if you're dealing with windy conditions, don't just rely on landscape staples. I've found that adding a second layer of plastic over the edges—just 2-3 inches wide—creates an extra barrier that wind can't lift. This is especially helpful for larger areas where the plastic might flap like a sail. The overlapping edges should be sealed with soil or more staples to prevent light intrusion.
Monitoring Timeline: During Step 4's weekly checks, pay special attention to the first 2-4 weeks—the critical period when most weeds will either surrender or fight back. I keep a small notebook by my garden tools to mark which areas show signs of resistance. This helps me identify if I missed any stubborn roots during the clearing phase. Remember, deep-rooted perennials like dandelions might take the full 6-8 weeks to completely surrender.
Reuse Wisdom: When you're ready to remove the plastic in Step 5, don't just toss it—fold it neatly and store it in a dry place. I've reused the same plastic for up to 5 years in different garden sections, but always inspect it first for tears or degradation. The key is to keep it clean between uses, as dirt buildup can create micro-environments where weeds might still find a way through.
Pro Tips for Killing Weeds With Black Plastic
- Here's what nobody tells you about making this method work flawlessly—no more half-hearted attempts that leave weeds sneaking back.
- The Soil Prep Secret: In Step 2, when you're smoothing the soil, take an extra moment to press down any stubborn roots with the back of your rake.
- Edge Security Strategy: For Step 3, if you're dealing with windy conditions, don't just rely on landscape staples.
Frequently asked questions
Got questions about using black plastic to kill weeds? You’re not alone—this method is powerful but can feel tricky at first. Below, we’ve rounded up the most common questions (and answers!) to help you smother weeds like a pro.
How long does it take for black plastic to kill weeds?
With consistent sun exposure, black plastic typically kills weeds in 4–8 weeks. The plastic blocks sunlight, starving roots of energy. For stubborn weeds or thick patches, extend the timeline to 2–3 months for full eradication. Patience pays off!
Do I need to remove weeds before laying black plastic?
Not always! While chopping weeds down first speeds up the process, black plastic can still work if weeds are mostly buried under the sheet. For best results, mow or till weeds into the soil before covering—this prevents regrowth and ensures the plastic stays flat.
Can I reuse black plastic for weed control?
Black plastic is durable and reusable for 2–3 seasons if stored properly (clean, dry, and rolled tightly). Just watch for tears or fading—if it’s brittle or lets light through, it’s time to replace it. A quick vinegar rinse removes stubborn dirt before storage.
What’s the best time of year to use black plastic for weeds?
Spring or early summer is ideal because weeds are actively growing and sunlight is strongest. Avoid winter—frozen ground or weak sunlight slows the process. For perennial weeds (like dandelions), apply in late spring to catch them at their peak.
What if weeds grow back under the black plastic?
If weeds poke through, it’s usually due to gaps in coverage or plastic shifting. Secure edges with rocks or soil and check for tears. For persistent sprouts, reapply plastic or use a weed barrier fabric underneath next time. A little maintenance goes a long way!
Are there eco-friendly alternatives to black plastic?
Yes! Try cardboard + mulch, biodegradable weed barriers, or dense layers of newspaper (soaked in water first). While these break down faster, black plastic is the most long-lasting and cost-effective for large areas. For small patches, a vinegar spray works too!
Wrapping up and next steps
Killing weeds with black plastic is a game-changer for gardeners tired of endless pulling and chemical battles. This simple, sun-blocking method smothers weeds in weeks while saving time, effort, and your back! 🌱✨
Ready to take control of your garden? Start small—try a section of your yard or a troublesome flower bed—and watch the difference in just a few weeks. Your future self (and your plants) will thank you!
- 📌 Next step: Gather your materials and mark your first weed-free zone!
- 💡 Pro tip: Pair this method with mulch for extra weed defense.